A tale of two christening gowns: The heirloom and the Oliver & S Fairy Tale Dress
Situation: The first was my baptism dress from when I was baptised and my mother passed it on to me to use with my daughter. I was baptized at 6 months so I thought it would fit my 9 month old daughter. Unfortunately, it did not fit. That left my mother and I to start making a dress Thursday morning for church on Sunday morning at 9:00 am with the added detail that 6 additional family members were arriving Saturday afternoon, so it had to be finished before then.
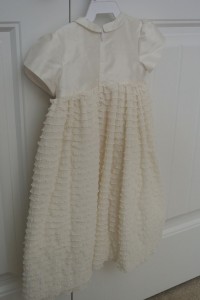
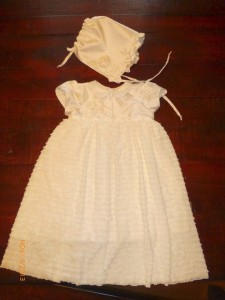
Solution: We chose to flip the Oliver & S Fairy Tale Dress. I wanted a peter pan collar and sleeves with an empire waist to echo my original dress that my mother had made. The fairy tale dress gave me that bodice top and the adjustments gave the long traditional bottom.
To accomplish this I had to make a couple minor adjustments to the pattern. I cut off the fitted dress at an empire waist height, and adjusted the skirt length to go down to the floor. I also took a lot of the gathering out of the skirt because of the silk dupioni fabric I chose to use, and I also felt like it would be overwhelming for such a little girl.
My daughter measured 19.5 inches at the chest which put her as a perfect size 6-12 months, but due to the compressed time frame I didn’t have time for a muslin and couldn’t risk it not fitting. Therefore, I made the 6-12 month size with the 12-18 month width as you can see in the bodice pattern photo. After it was finished, she had enough room that I’m sure the 6-12 month width would have fit perfectly fine but I just couldn’t risk it turning out too small.
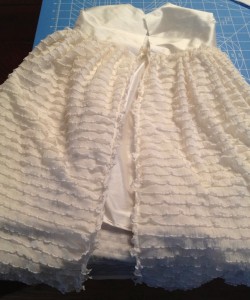
I also added ruffle fabric for the skirt. I made the ruffle fabric about 4-5 inches longer than the silk just to cut down on bulk and make it easier for my daughter to move and easier for me to hold her.
I added some silk flowers to both the bodice and the bonnet. I used this tutorial from Just Another Hang Up for the flowers.
The bonnet is a combination of several tutorials that I found online because I didn’t find a single one that was what I wanted. I got the shape from this one and the ruffle from this one.
I love how the combination turned out! The tulip sleeves, peter pan collar, and ruffle fabric made such a sweet dress. This may have taken more time to make than the time she wore it for, but I really love it and maybe someday this can be worn again. The wrinkles show she wore it most of the day.
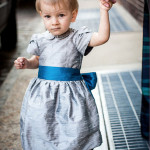
Lastly, a vintage view of a beautiful girl in a dress made by her mom and grandma on a quilt made by me.

Linking up to Show and Tell, Made By Hand, Fabric Tuesday and You Flew Tuesdays.




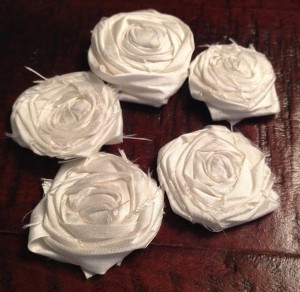



The gown is absolutely beautiful. You and your mom did a fantastic job, even with the “lack of time” pressure. The rolled roses are the perfect addition and the bonnet turned out nicely too.
Thank you so much!
visiting from show and tell. This is absolutely gorgeous. Well done – can’t believe the time frame you had.
It was tight for time… my mom was far more stressed than I was. Sometimes being naive in sewing works 🙂
It’s so gorgeous! I can’t believe you did it with all that pressure! I love how it turned out!
Thank You!
wow it’s stunning! gosh what a wonderful treasured piece it will be for hopefully generations! Thanks also for linking in – great to have you play along!
Wow, that is simply beautiful! I wanted to make my daughters Christening gown, but we ended up buying at the last minute. Very sweet gown, great job!!