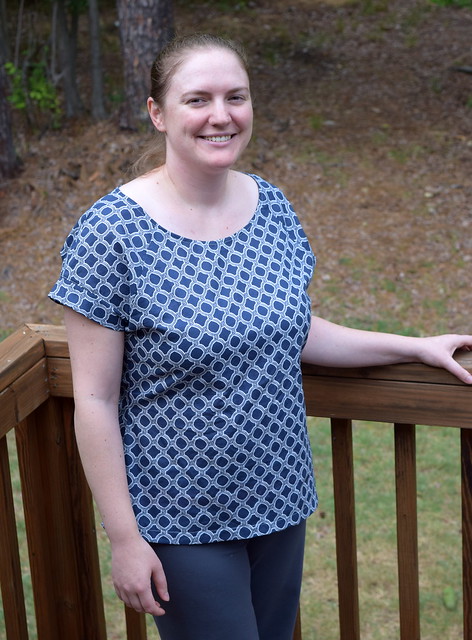
Afternoon Blouse Pattern

Pattern: The Afternoon Blouse by Jennifer Lauren Vintage

Afternoon Blouse

Pattern Description (from designer): An easy summer blouse perfect for afternoons sipping tea (or cocktails), the Afternoon Blouse has been designed with beginners and advanced sewers in mind.  For the beginner, the flowing design will help to build sewing confidence with its choice of two decorative necklines and 1940s-inspired kimono sleeves. For the advanced sewer, this gorgeous blouse can be made in one afternoon using silk or rayon – a luxurious, quick and satisfying make.  While the Afternoon Blouse has been designed to be tucked into high-waisted skirts and pants for a vintage look, it also works perfectly worn loose with jeans and sandals for the modern gal, making it a truly versatile blouse.

Purchase Price: Full price is $12.50 US, but she had a sale after Thanksgiving.

Fabric Required: Oddly specific… 1.58 yards of 60″ or 1.66 yards of 45″.  I would say the conversion from metric to US is why it is so specific, but the metric also goes out to 2 weird decimal places.

Amount of fabric used: I squeezed it out of 1.5 yards of 44″ wide material.  One of my facings had some imaginative cutting done to do so.

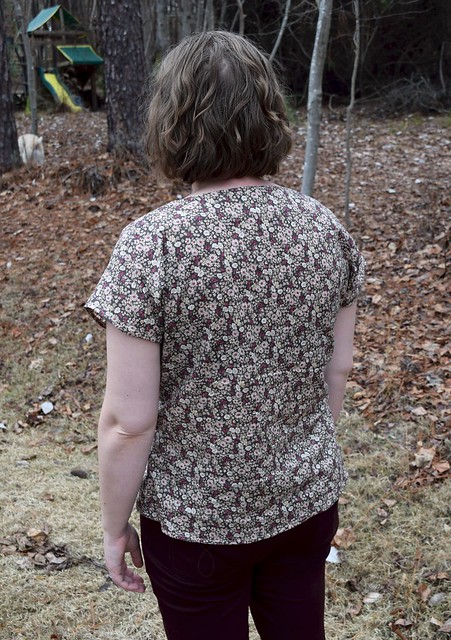
Sizing: I used a 16 for the shoulders (closer to my high bust measurement), then went out to an 18 at the bottom of the sleeves for my bust size, then came back in to a 16 for the hips.  It was really big in the waist/hip area, so I had to take it in some more.  It’s also a little bit shorter than I prefer my blouses.

  • There are no finished measurements, so I had to go off the size chart.  I guess I need to start measuring pattern pieces, but it annoys me to pay good money for a pattern then have to measure pieces of paper to decide what size to wear.  Anyway, the size chart recommended with my measurements to do an 18 bust, 20 waist, and 14 hips.  If I had done that, the shoulders would have been way too big and the waist way too big.

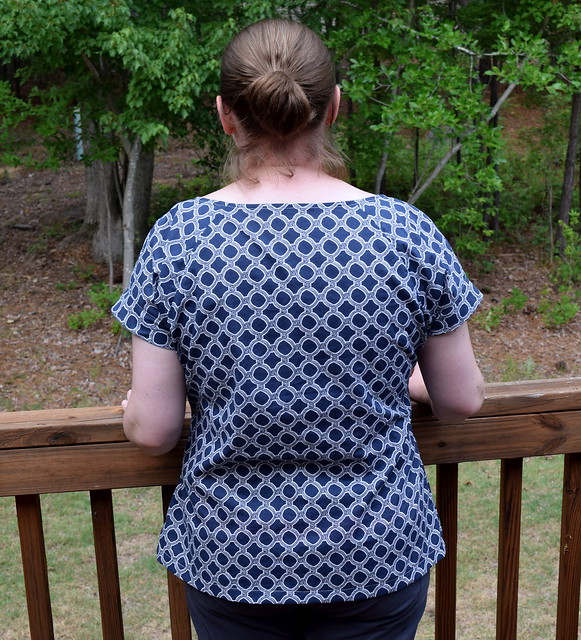
Alterations: Once I tried it on after sewing up the side seams, it was way too loose in the waist/hip area.  I took off the blouse and decided to trace the side seams off my favorite Belcarra Blouse.  That reduced the sizing from an 18 in the bust, to a 16 at the waist and 14 at the hip.  This helped immensely, but I still need to fix the tenting effect in the front of the shirt.

Afternoon Blouse

Instructions: The instructions are good.  This was the designer’s first pattern.  Most of my issues with the instructions are my personal preferences from sewing different patterns by different designers.

  • I personally prefer to hem the sleeve after I sew up the sides to avoid any interior seams showing, but doing it first does make it easier to iron.  I think the best solution is to iron the seamline early, then sew after the sides are done.
  • I also under stitched the neckline.  It was a little tough at the corners, but it really helped my blouse lay flat and keep the insides where they belong.  I think every pattern on earth, especially ones aimed at beginners should mention that step.  I think at the end, there may be a step (step 3 in the “To Make Up” section) that hints at under stitching, but it would be hard that late into the blouse.  It also mentions top stitching as an option, which I don’t think would look very good on this blouse.
  • Printing: I did like that the pieces were tiled so that I only had to print off the pattern for the front that I was using.  On a larger pattern, I would probably prefer some more overlapping to save paper, but on a blouse like this I really appreciated not having to print every single option.

Pattern Issues: Why does it not include finished measurements?!?!  I keep getting tempted by cute patterns without finished measurements.  I know it’s harder to do the bust measurement with kimono sleeves, but at least give me the waist and hip finished measurements so I don’t have to take the shirt in after I’ve already made it…

Afternoon Blouse

Fabric Choice: I used a wonderful 100% cotton lawn by Yuwa.  This stuff feels amazing.  It washes up beautifully, and I admit to googling the brand in an attempt to find more.  It’s that perfect lightweight cotton that isn’t completely see-through like voile, yet substantial enough that you can actually wear it outside of the house without worrying if your bra is showing through the fabric.  The one I purchased from Imagine Gnats appears to be out of stock, but Fancy Tiger and Miss Matabi seem to stock Yuwa regularly.

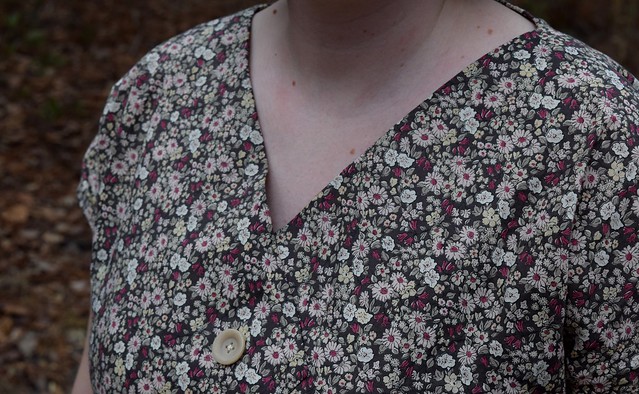
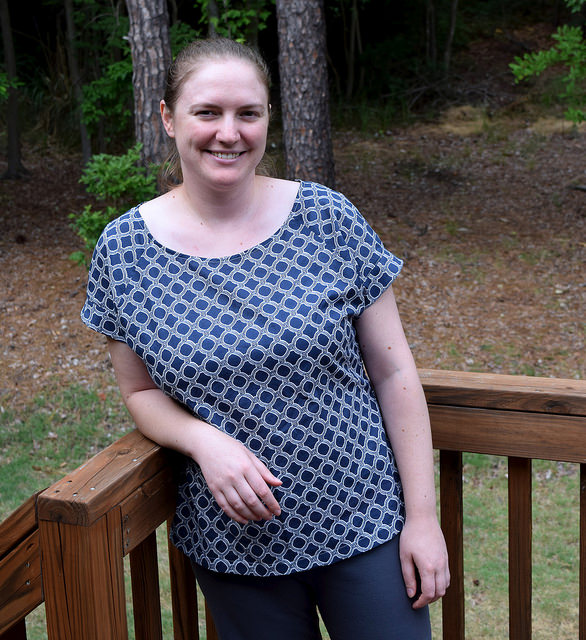
The other consideration is whether or not you want the neckline detail to show.  I love this fabric, but it is so busy you can’t see that aspect of the shirt.  A solid or plainer design would show that much more.

Finished Product: I like the neckline and kimono sleeves.  I am probably going to end up with way too many blouses with kimono sleeves, but I like them.  I can see making this shirt again, and maybe trying the other neckline option.

Afternoon Blouse

Notes for future makes:

  • Make a swayback adjustment.  Just make one in every single pattern you will ever consider sewing in your entire life.  You know you need it, so don’t be lazy and just do it!
  • Also, add a couple inches to the length.  I’m a shorty, but I have a long torso and a short human to chase around, and I like my middle to be covered.
  • It has a weird tent like effect in the front.  None of the pictures of other people’s versions seem to do this, so I’m not sure why mine is.  I think I will add a dart next time to take in some of that excess.

Final Thoughts: Overall, I like this blouse and plan to make it again with a couple fit adjustments.

Looking Back at 2014

2014 was a good year.  It was my second year at home with my daughter.  My husband was in the middle of grad school to get his Master’s Degree.  My brother-in-law got married.  And I kept sewing!

I didn’t realize how much I sewed until I started making mosaics and realized how many pictures I have!  I did not make as many quilts, because there are only so many quilts a person can use and because I choose to do more challenging work for the ones I did make.  This also reminded me that I need to start making blocks for my Real World Red and White quilt if I ever want to get it done.
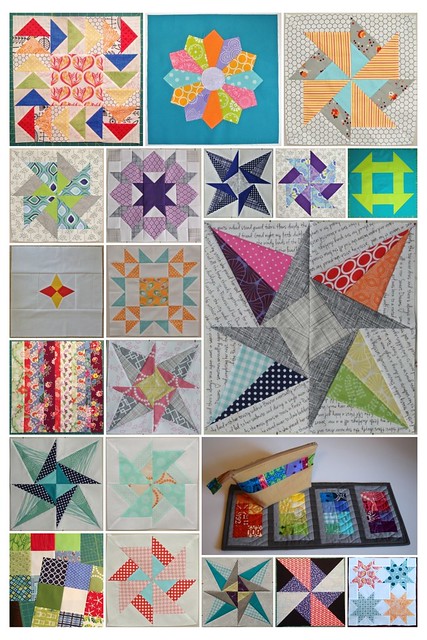
2014 Quilting for me I also joined bees and a swap for the first time, so some of my quilting time was dedicated for other people.  I really enjoyed pushing my boundaries and learning new techniques as part of these bees, so I am continuing in Stash Bee this year – and already signed up for two mini quilt swaps!
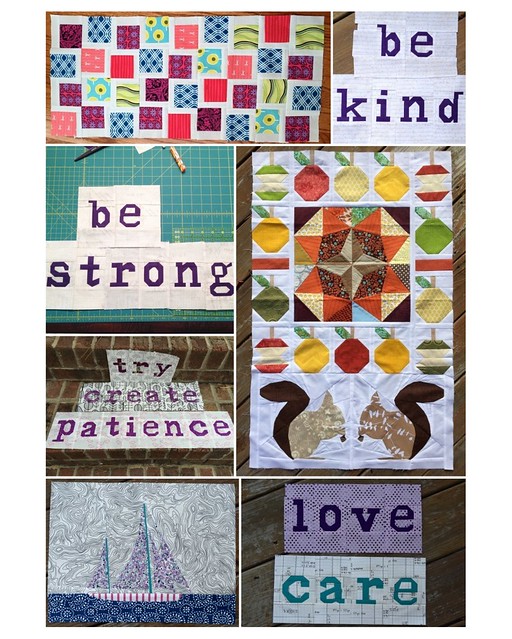
2014 Bees and SwapsI joined the Plum and June New Blogger Group.  As a part of that group, I joined a round robin bee – the Round Trip Quilts group.  It’s seriously one of the hardest and most awesome quilty things I’ve done.   I love the challenge and creativity that our group is demonstrating each round.  I can’t wait to see how everyone’s quilts turn out!
2014 Round Trip Quilts Sewing
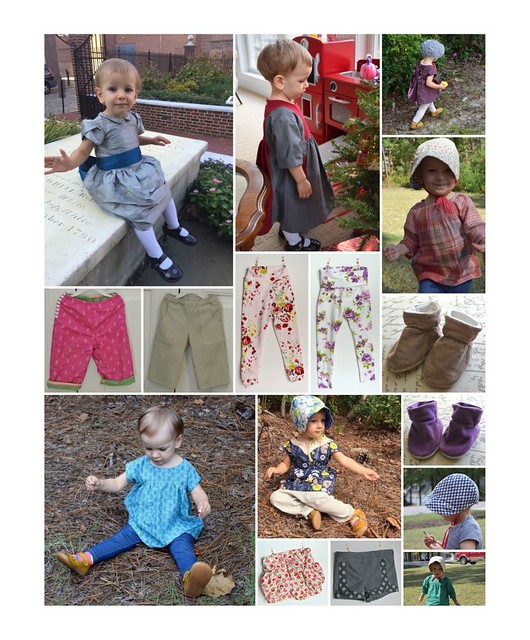
I also started sewing more and more clothes this year.  This isn’t near all of them.  Much of what I sew are basics like leggings and shirts that I apparently did not feel were photo worthy.  I should think about whether or not I feel that way for the future.  Also, fancy dresses are fun to sew, but don’t get worn.  Those leggings get worn to death.
2014 Sewing for my daughterAnd I embraced “selfish” sewing, and made a few things for myself!  Taking pictures of myself in clothes I’ve made is much harder than taking the pictures of a quilt block or of my daughter.  Not only does the light have to be good enough to take pictures, the weather has to be appropriate to wear the garment, it can’t be wrinkly from wearing all day, and my hair has to look acceptable.  Sewing bloggers, I salute you and your herculean efforts to document your makes.  In the coming year I want to become better about blogging what I’ve made for myself.
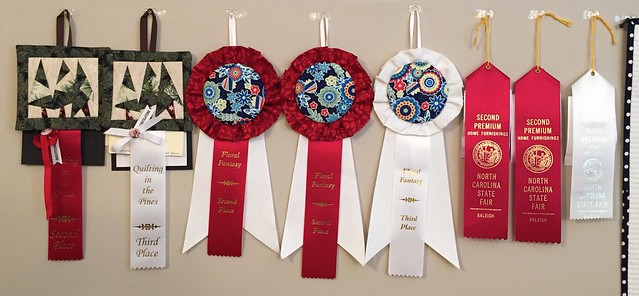
2014 Sewing for meI also entered a quilt show for the first time.  I didn’t really enter thinking I would win anything, but it does make the experience more fun 😉  I really entered because my local shows are full of quilts that all look the same.  I wanted to show that there are quilts that aren’t made from drab colors.  I wanted to enter a wearable category and show that you can quilt a sophisticated bag.  I hope my work demonstrated that you can be young and make technically sound work that is modern and beautiful.

I also have to brag on myself for a minute – I took 2nd in the Group category in the NC State Fair.  I was pretty proud of that because I had heard that the group and dual category are the most competitive categories.  Luckily I found that out after I entered – otherwise I may not have had the nerve to enter the group category.  Then I found out that a quilter who has been quilting longer than me and does amazing custom work had quilted the 3rd and 4th place quilts in the group category.  That made me feel pretty good!

2014 Quilt Show Season

Last year I tried to participate more in the bigger quilting world – through bees and swaps, and also through guest blogging.  I wrote a tutorial for a paper pieced block for Sew Mama Sew.  I guest blogged for Angela Walter’s Business of Machine Quilting Blog.  I took a couple longarm classes and learned some great techniques.

That’s my year in summary.  This coming year I want to piece a little bit more.  I have a to-do list that hopefully I can follow.  I want to quilt more.  I want to continue developing my skills – in piecing and sewing and quilting.  And accomplish all this while moving over the summer and potentially going back to school in the fall… eek.  Here’s to 2015!

Sewaholic Belcarra Blouse Review

Belcarra Blouse Review

I am going to give a quick spoiler and say I love the Belcarra Blouse by Sewaholic!  Continue reading my Belcarra Blouse Review to see why…

Sewaholic Belcarra Blouse

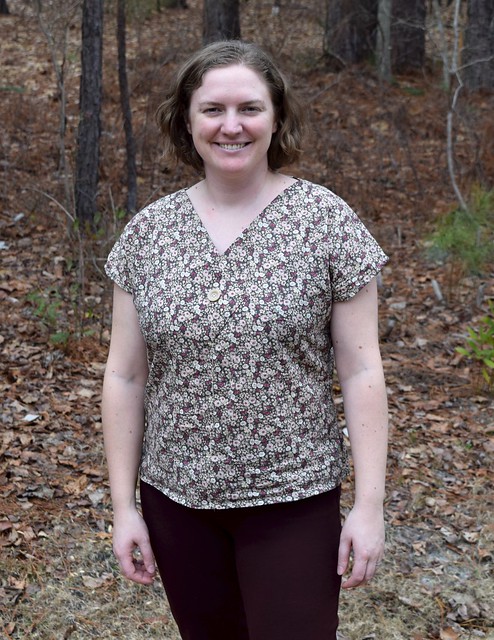
This blouse has a similar look to a blouse I purchased and really like (but it is slightly too big, and made from a kind of weird polyester that is not comfy when it’s super hot out – which North Carolina is HOT in the summer).  Originally, I was going to try to trace the pattern and make it smaller, but honestly – that was not going to happen anytime soon and I wanted a shirt to wear this summer.  So, when I saw this blouse came in a PDF, and was on sale for just under $10, I had to go for it!

Pattern: Belcarra Blouse by Sewaholic.  I used the PDF version of the pattern and I made view A.

Fabric: lightweight 100% cotton

Sewaholic Belcarra Blouse

Sizing: I discovered from this pattern that I am not a pear shape, which is what Sewaholic designs for.

I was a 16 in the bust, 12 in the waist, and 10 in the hip.  I had seen an awesome Madras version on Meg’s blog where she mentioned she went down a size and used the finished measurements to find the size that gave her 2 inches of ease.  I made the same choice, and cut a straight size 14.  The fit looks pretty good in the chest and waist, but I did take it in around the hips – probably to about a 12.

I must admit that about halfway through making this shirt, I had one of those making moments when you question every decision you’ve made associated with a project.  As in, maybe I should have made a muslin?  Did I cut out the right size?  Why did I make this with good fabric that cost $15 a yard?  In my case, I had a major doubt about what size I cut out.  I actually took the shirt with only the shoulder seams sewn into the bathroom, where I was pinching the seams to try and tell if it would fit around my chest or not.  Thankfully, the finished sizes on the pattern were correct, and my chest did fit into the shirt!

Fabric Used: According to the pattern, a size 14 View A shirt should take between 2-2 1/4 yards of fabric (depending on width).  I was able to cut it out of less than 1.5 yards.  I did piece together the neck binding, but that doesn’t show so I didn’t care that it had an extra seam.  Maybe it’s my quilting background that makes me a ninja at maximizing fabric usage?

Instructions:  This blouse is fairly simply to construct, but any questions I would have had were answered in the sew-along.  The instructions and photos in the sew-along made this easy.  The finishes on this project are awesome.  I felt like an amazing seamstress while I was making this.  The pattern pieces have the seam allowance printed on them, which is a nice touch.

Belcarra Blouse

Pattern Issues: I had a little bit of odd fabric that had to be eased in when sewing the sleeves to the front piece.  It was not excessive, and that edge is on the bias, so it is possible it stretched (but I was super careful not to move that fabric, so who knows?)  The neck is also wide.  Bra choice will have to be considered when I wear this.

Fabric Choice: This pattern recommends lightweight cotton, which is what I used, and it is great.  It is going to be so comfortable to wear this summer.

Finished Product: I love how this shirt turned out!  It is going to be in heavy rotation this summer.

Using as scrap – wearable inside the house – wearable outside the housewearing outside the house and will proudly say I made it

Husband’s opinion: The first thing my husband said when he saw it (about halfway through construction) was that it didn’t look handmade, which I take as a compliment 🙂

Belcarra Blouse

Final Thoughts: I may try narrowing the neck on my next version because it does occasionally show my braw strap.  I will definitely grade down to a 12 in the hips.  I’m still debating whether or not to try doing a 12 with a FBA.  I think it could potentially fit slightly better, but this one fits fine.  We’ll see how motivated I get before I make my next one… and there will be a next one!

Linking up to Fabric Frenzy Friday @ Ft. Worth Fabric, Show Off Saturday at Sew Can She, and Sewing Saturdays at Simple Simon & Co.

I also entered this in the New to Me Indie Pattern Contest at The Monthly Stitch.