Apple Loungewear Leggings

For this spring version of Kid’s Clothes week, I made the Apple Loungewear Leggings.  It was 80 this weekend in my part of North Carolina, and Monday it was rainy and 45 degrees.  Then again today, was mid-60’s so the weather is just crazy.  Either way, summer is not yet 100% here, so the little girl needs leggings.

Apple Loungewear Leggings by Shwin Designs

Pattern: Apple Loungewear Leggings by Shwin Designs, purchased end of November and finally made.

Size: 12-18 months

Sizing: The sizing was chart was pretty good.  Technically, she would have been in the 6-9 month waist size, but I’m glad I sized up to her RTW size.  These fit more comfortably, and will be worn longer.  My daughter is a tall, thin 14 month old and these leggings fit her incredibly well.  The length is good.  Most purchased pants are too short on here, and they would not have needed the extra length I added.

The leggings even work well under a dress, especially for a new walker that still trips occasionally.

Apple Loungewear Pants in action

Fabric: Purple floral purchased from Girl Charlee forever ago, so it looks like they no longer have it.  It’s a fairly substantial knit, I didn’t write it down but I’m guessing it is at least 8 oz, maybe 9 oz knit.  It is a great weight for leggings.Instructions: These leggings have three pieces, and are incredibly easy to construct.  They are a super fast sew.

Overall Impression: I like these leggings, and plan to make more pairs.  I wasn’t sure about the fold over waistband at first, but it fits right under her toddler tummy and helps keep the pants up without requiring elastic in the waist.  This pattern is a winner!

Linking up to Anything Goes Monday.

Go Army! Beat Navy! Baby shirt :)

The greatest rivalry in college football – Army vs. Navy was the second weekend in December.  That was awhile ago, and I had this post half written forever so I finally decided to finish it and hit publish anyway.  Since we didn’t have any plans to do anything to celebrate, originally I was not going to make anything for the little girl.  Then my husband asked if we had anything for her to wear.  I then sorted through some drawers to get rid of too small clothes and I found a shirt that would make the most adorable Army baby shirt.  Fast forward a couple hours, and I cut up two (scratch that – three) adult women’s t-shirts to make 1 baby shirt.  Not sure how that happens…

I’m doing another version of the Bimaa from LouBee Clothing, this time with the shawl collar.  My last version is here.

The front of the shirt didn’t go up high enough for the pattern, so I used the arm of the shirt to cut out the extra fabric I needed.

Bimaa Sweater in progress

Bimaa Sweater in progress

The sleeves and cuffs came from the back of another black t-shirt I had set aside to make a t-shirt quilt out of.  The shawl collar was supposed to be the only new fabric in this shirt (Thank you, Girl Charlee Black Friday Sale).  Look ahead to see what really happened.

This is what is left of my former t-shirt!  Just imagine another black shirt without a back – the black doesn’t photograph well.  Turns out this is how it takes two three women’s shirts to make one baby shirt.

Bimaa Sweater in progress

Once I cut out all the pieces, I rethreaded the serger with black thread.  Does anyone else have trouble deciding what thread color to go with on a multi-color project?  I considered using black and white as needed, but that seemed like a lot of thread changing.  In the end, when I had to piece together the front pattern piece there was black fabric in almost every single seam so I went with black.

When it came time to put the shawl collar on, I didn’t like the striped fabric.  It would have worked, but it wasn’t quite as athletic as I was going for with the color blocking and logo on this shirt.

Bimaa Sweater in progress

That led to the 3rd t-shirt being cut up.  I need a black collar.  Luckily, I am never going to wear my old unit’s t-shirt again so it doesn’t matter that I cut the bottom six or so inched off to make this collar.  I love it with the black collar!

Bimaa Sweater

Here is a closeup of the shawl collar.  I tried to lighten up the photo to see it better, but it is still kind of hard to see.  Black is hard to photograph!

Bimaa Sweater

The back – slightly wrinkled from the fit test.

Bimaa Sweater

Game Day outfit is below!  She was almost adorable enough to make up for the terrible football game.

Bimaa Sweater

Then, because it seemed logical, I didn’t want the fabric I used for the collar to go to waste, and I had an extra black color block piece for the front… I cut out another bimaa.  The next one is below.

Bimaa Sweater

Linking up to Whoop Whoop Fridays at Confessions of a Fabric AddictAnything Goes Monday at Stitch by Stitch, and You Flew Sewing Linkup at Feather’s Flights.

How to sew a baby Santa Hat tutorial

I was searching for a tutorial on how to make a baby Santa hat, and found crochet and knitting tutorials and patterns galore but nothing for sewing with knits or fleece.  I played around and made a couple cute versions for my daughter, so hopefully this very loose tutorial can help someone else.

If you choose to do the traditional santa hat, it is a bit easier.  I used a serger for this project, but it was really just because I have a new serger that I was excited and wanted to use.  A regular sewing machine would work just as well.

1. Measure your child’s head.  My daughter’s head was a little over 18.25 inches in circumference.

2. Make hat width about half of the child’s head size.  I made it 9 inches wide.  Cut bottom 9 inches wide, and then go up about 2 inches on the left and right sides of the hat.  For the band, cut white fleece rectangle 18 inches (double the red part’s width) by 6.5 inches.  Make sure the direction of stretch is widthwise when cutting all pieces.

3. Cut the angle for the Santa Hat.  I made mine 60 degree angles using the marking on my quilting ruler.  I just cut up and let them intersect.

4. I cut the top part off because of how I was attaching the fleece pom pom.  If you are hand sewing, I would just leave the angle and sew it on once completed.  Don’t try to serge the fleece with the pom pom in it.  Don’t ask me why I know that.  Just trust me… it’s not worth trying to do no matter how clever it seems.

Example pom pom tutorials: 

5. Sew together the red top angled part of the hat.  If you are using a regular sewing machine, a straight stitch would work for this part.

6. Sew the white rectangle band piece with right sides together on the short end.  Fold the band in half with right sides together.  Sew the white band and red hat together.  If you are using a regular machine, I would use a zig zag stitch for this part so that it will have some stretch to fit on your child’s head.

7. Fold the band down and it is ready for wear!

The skull cap version is a little bit more complicated, but not if you have a hat pattern.

Step one: Get hat pattern.  If you have a knit hat on hand that fits, you can trace it and then add seam allowances to get the proper size.  If you want to make a size 0-3 months, you can use the pattern provided at Zaaberry.  Her instructions on how to assemble the hat are very good and very well photographed, so I recommend using her tutorial for assembly.  
Step two: Cut out two hat pieces and one band piece.  The main hat pieces will be red and the band will be white.  Take care to make sure the direction of the fabric stretch is horizontal so that it can stretch and stay on your little one’s head.  
Step three: Make white pom pom or get pom pom for top of the hat.  Or buy some pom poms from the store, whatever is easiest.  Whatever method you use, make sure there is some thread or fleece or other method of attachment to sew into the hat.  If not, you can hand sew it on at the end.  
Step three: Prepare and Sew together the hat pieces.  Fold the hat piece in half and sew the cut out portion first.  Repeat for second piece.  Then put the right sides together and sew the half moon shape leaving the opening for the head.  Sew the rectangle band piece with right sides together on the short end.  Fold the band in half with right sides together.  
Step four:  Sew the band and hat together.

fleece baby santa hat

I originally had planned to sew a pom pom on the top, but it really fits better under a hood without one. The colors still read Santa hat without the pom pom.  Enjoy!

Linking up to: Make it, Wear it from The Train to CrazyFabric Tuesday at Quilt StoryYou Flew Tuesdays at Feather’s Flights, “We did it Wednesday” at Sew Much Ado and Friday Favs Party at Nap Time Crafters.

I love my new serger!

No seriously, I can’t believe I didn’t get one sooner.  I love my serger.  I have the super-basic Brother 1034D.  It was supposed to be my birthday present back in May, but I wasted months trying to figure out why there is such a price jump in sergers and if the more expensive ones are worth it.  I chose to get a basic serger and then I will get a cover stitcher at a later date.  The combined cost will be less than many of the fancy sergers I was considering.  Despite all my debating, I finally got my serger and I love it!

Why do I love it?  It is amazingly fast, and the finish looks great.  It is also easy to use.

I was a little intimidated at first, mostly because people talk about how hard sergers are to thread and to get the tension correct.  I watched the video tutorial, and then set out to serge.  I was a little upset at first because out of the box, the thread kept breaking and it was not working like the video.  Then I discovered one of the spools had the edge with the cut in it up, so the thread kept getting caught and breaking.  One of the bonuses of this almost tragic frustration is that I got really good at threading it almost immediately.  In fact, I prefer rethreading it when I change thread color to doing the tie and pull thread through method that even the video recommended.

How did I get to love my serger so fast?  I used it on real projects to learn.  I know people advise you to practice on scraps first, but I get bored.  So, after about 12 inches of sewing on scraps I jumped to real projects.

I had two knit projects cut out ready to go: the Bimaa Sweater (LouBee Clothing) and the Lily Blazer (Peek-a-boo Pattern Shop).  It turns out I did not choose the easiest projects – not that the patterns are difficult in any way – I chose difficult fabrics.

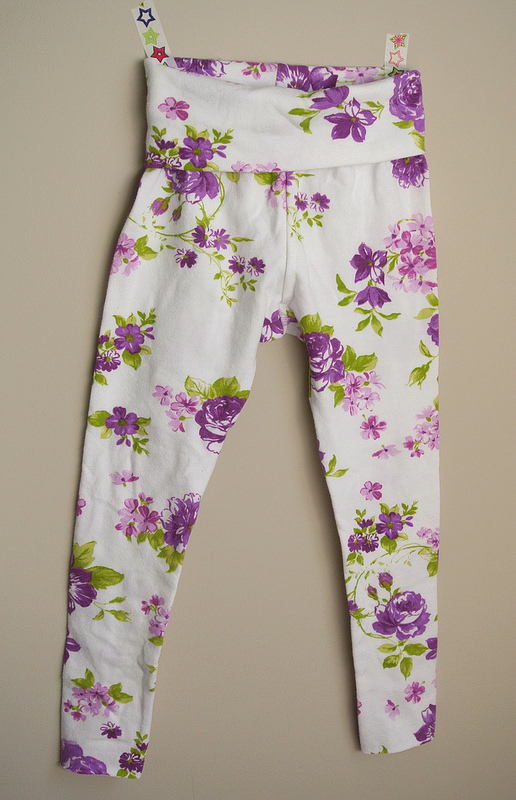
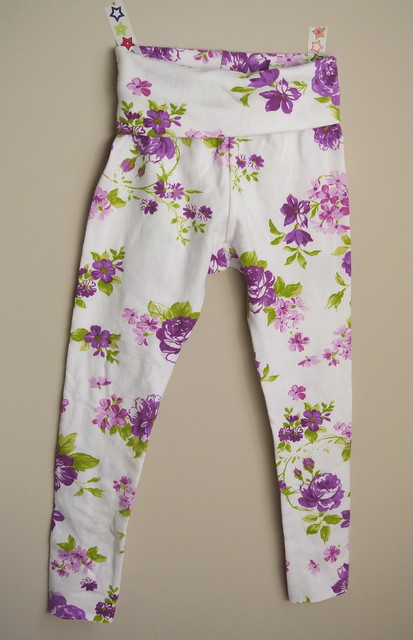
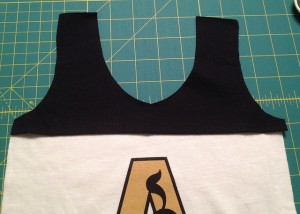
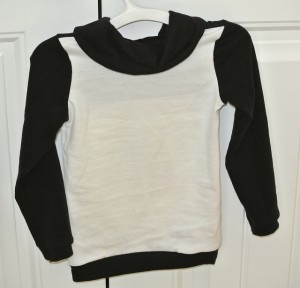
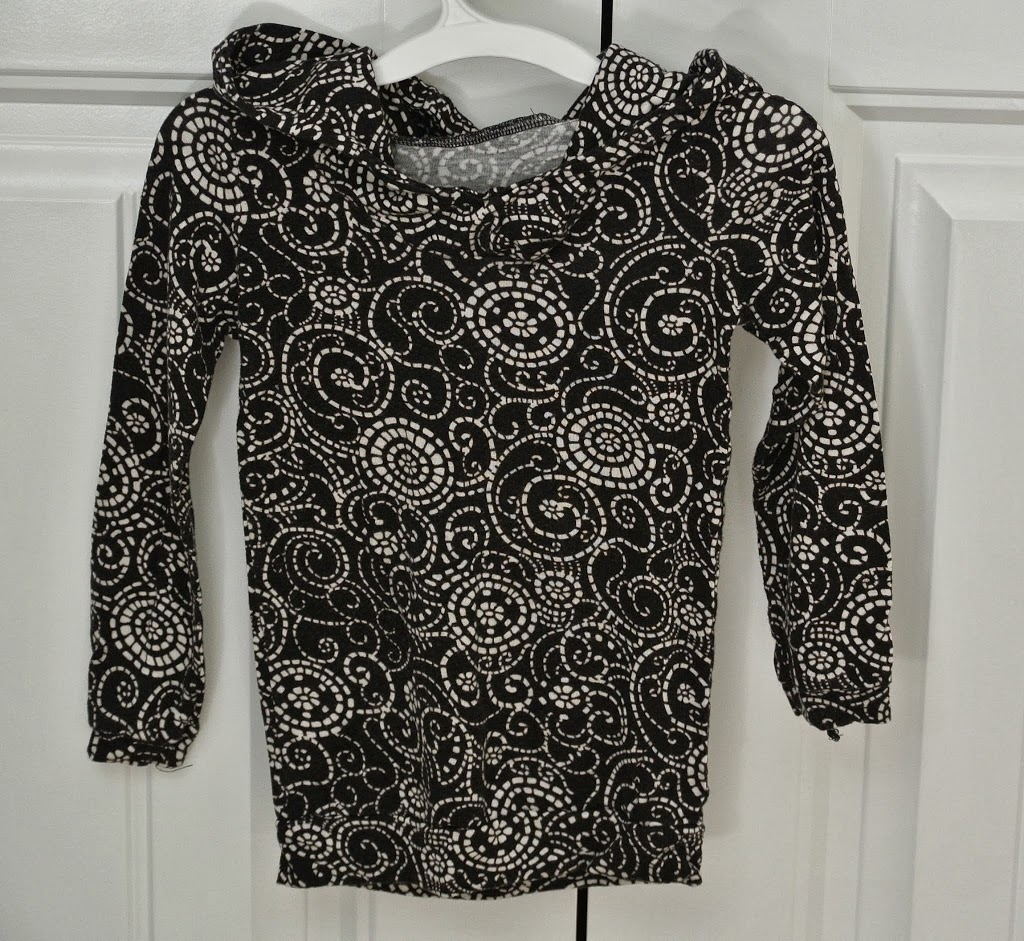
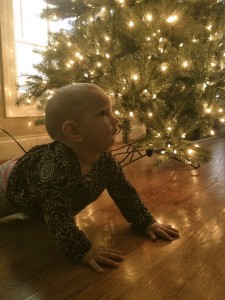
For the Bimaa, I chose the lightest knit ever from JoAnn Fabrics.  I made a 2T, because my daughter’s measurements put her in the 12 month size but I’ve read that it fits tight and I wanted it to fit over onesies.  I should have done the 12 month length with the 2T width because the body and sleeves are about 2 inches too long.  Oh well, room to grow right?

I followed the advice from the video tutorial to change the feed differential to 0.7 for light knits and had no issues putting the Bimaa together.  The serger goes so fast I had to get over my quilter’s need to pin every two inches (and more often on curves).  I felt very proud of my first knit garment when I finished it.  There are a few seams that are not as attractive as they could be on the starts and stops, but it’s a learning process.

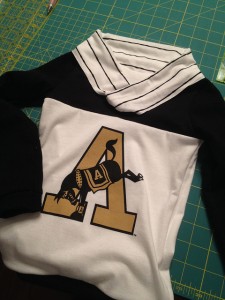
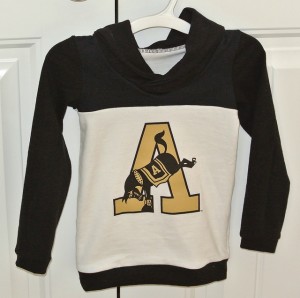
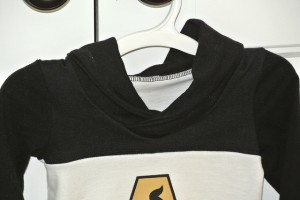
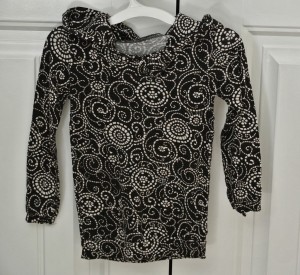
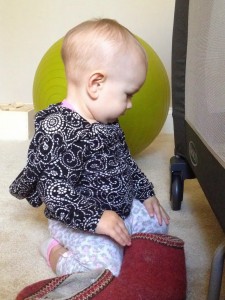
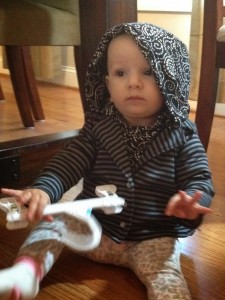
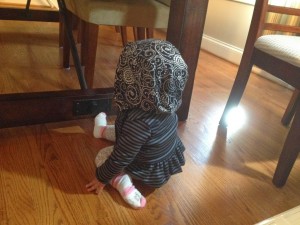
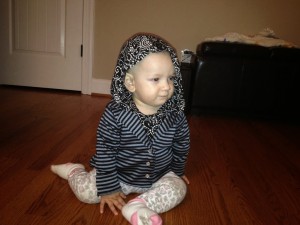
The only odd thing about this pattern is that the hood is huge!  My daughter has a large head – like 96th percentile huge head – and she swims in it.  It is also so big that it pulls the shirt too far back because of too much fabric weight, so it pulls at the neck.  If I were to ever make this hoodie in the smaller sizes I would probably try to draft down the hood a little.  Most likely, I just won’t make the hood option again until she is older.  I will probably do the shawl option next.

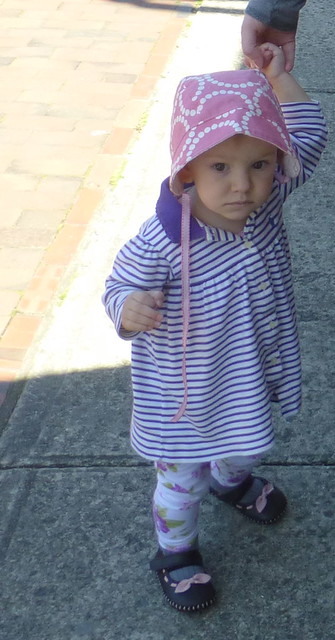
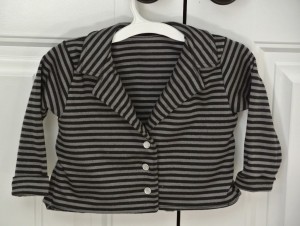
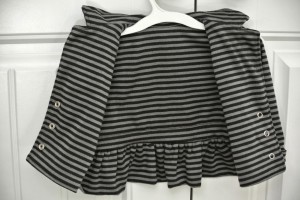
For the Lily Blazer I chose a beautiful stripe that I am pretty sure I also got at JoAnn Fabrics.  Knit stripes are probably not a good choice for a second garment ever made on the serger, but I went for it!

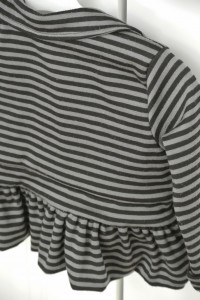
Most of the stripes ended up matching, so I’m pretty happy with it.  I made the 12 month size.  I love the ruffle on her butt when she is crawling around.

The only other change I made was to use snaps instead of buttons because they are easier to dress her with.

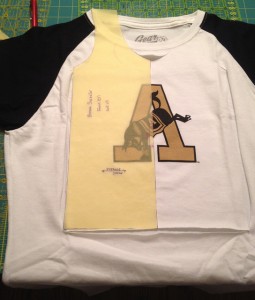
The way this is constructed it becomes fully lined when you are done which is very nice.

My only complaint is that the sleeves are too long with the cuff.  I should have followed the baby example the pattern came with where the designer didn’t add the cuff and just hemmed the sleeves.  Then, the length would have been perfect.  As is, I fold the cuff up completely and the serged edge shows.  The black thread against the dark fabric isn’t really noticeable so in reality, I’m probably the only person that will notice.

I can’t wait to keep using my new toy!

Linked to: Make it, Wear it from The Train to Crazy, Fabric Tuesday at Quilt StoryYou Flew Tuesdays at Feather’s Flights and Friday Favs Party at Nap Time Crafters.