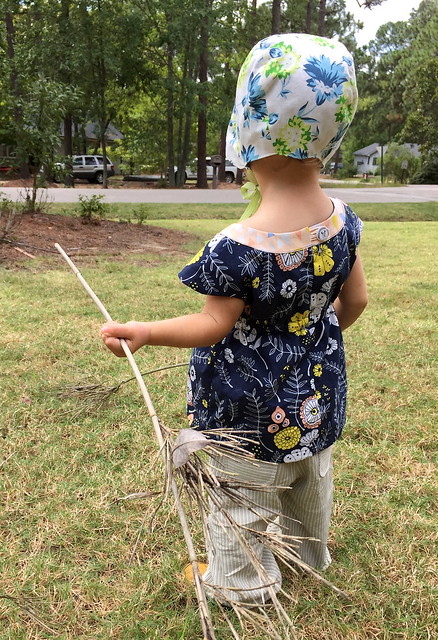
School Bus T-shirt Review

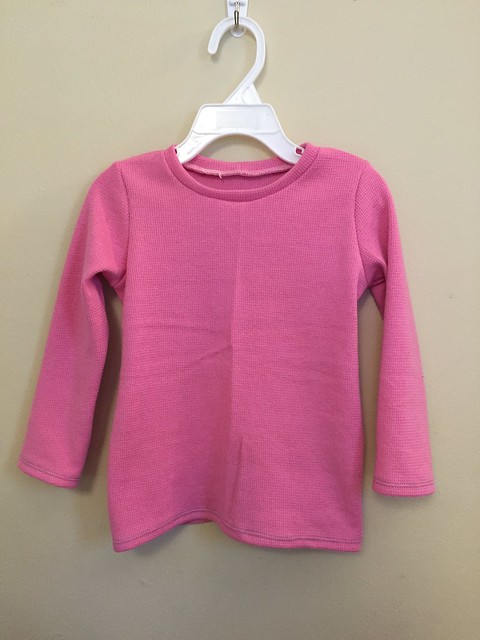
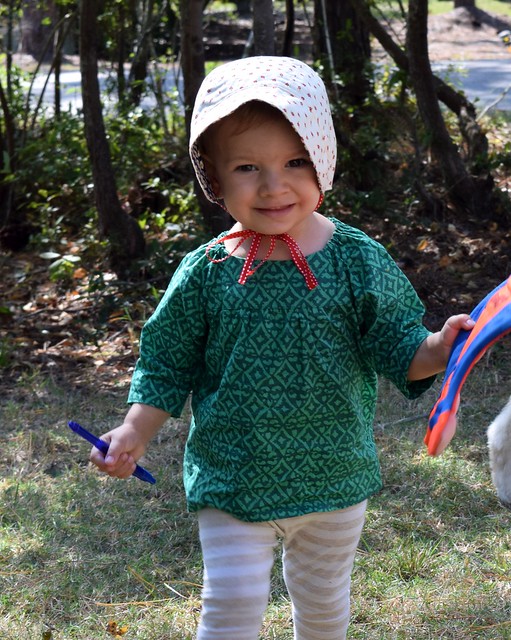
This is continuing the theme of t-shirts that are long enough to cover my daughter’s upper body.  Given that it has been 90 degrees for the last few days, these were made last fall when it was still cold.  If she needed short sleeve shirts for summer, I would make this pattern again.  The School bus t-shirt is a simple pattern that will be in use for a long time.

Pattern: School Bus T-Shirt from Oliver and S

School Bus T-shirt

Pattern Description (from designer): This basic kid’s T-shirt sewing pattern can be made several different ways. With a long-sleeve and two short-sleeve options, you’ll get endless use from this easy and quick-to-sew style.

Pattern Retail Price: $8.95

Fabric Required: 3/4 yard for up to size 8

Amount of fabric used: I got away with about 1/2 yard, would be less for short sleeves.

School Bus Tee

Sizing: Comes in 6 month to 4 years, then the next size range is 5 years to 12 years.  I made a 2T based on chest measurements with 4T length.

Alterations: I added another inch to the second one because the length on the first one was perfect for now.

Instructions: This is a simple shirt, but the instructions are detailed and have enough information for someone who has never made a t-shirt before.

Pattern Issues: None.  I had to add a lot of length, but I have to do that to all patterns and store bought shirts are too short.

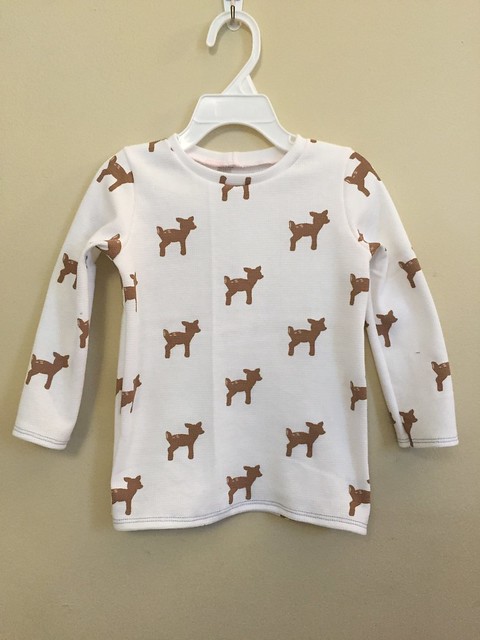
Fabric Choice: I used pink thermal and deer thermal that I bought from Nature’s Fabric last year.  I had a yard of each, and made a long sleeve shirt last winter and this winter from them.  Unfortunately, I don’t think I have enough useable scraps to keep using these fabrics.  I should buy more of the deer while it’s in stock, because she loved it.

School Bus Tee

Finished Product: The school bus t-shirt is a cute, simple tee that is long enough to wear in public (because I can make it longer!).

Notes for future makes: Add more length –  4T + 1″

Final Thoughts: I’m happy to have a simple t-shirt pattern to use until she hits size 12.


2+2 Blouse Pattern Review

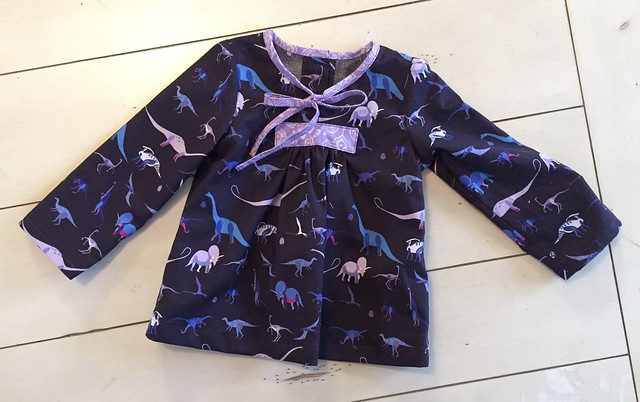
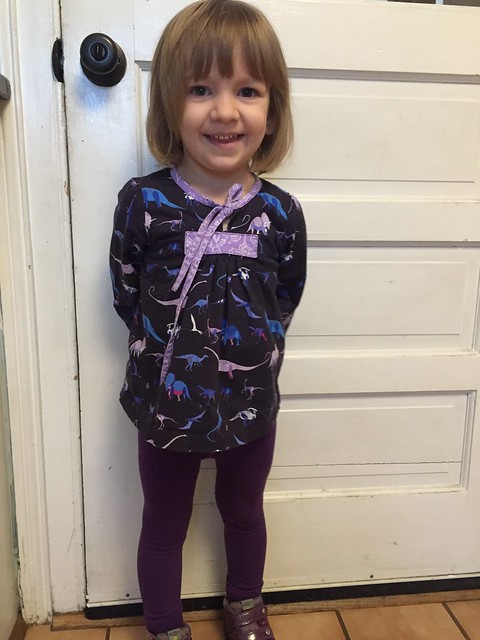
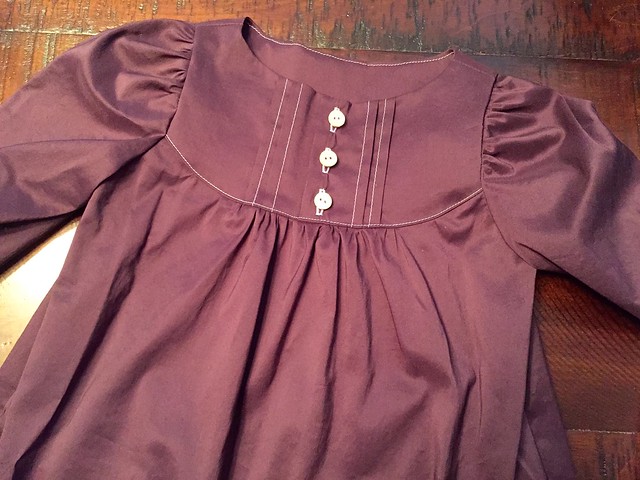
My daughter thinks that dinosaurs are awesome, and loves purple.  Luckily, Lizzy House made this amazing purple dinosaur fabric while she is in this phase!

2+2 Blouse

Pattern: Oliver & S 2+2 Blouse

Pattern Description (from designer): Here comes the school bus! Girl’s tunic-length, A-line blouse features neckband ties, gathered front with applied patch, and button back, options for long and short sleeves.

Pattern Retail Price: $13.95

Fabric Required: 1 yard for 2T, view A

2+2 Blouse

Amount of fabric used: I was happy I had the full yard because I wanted to make sure the dinosaurs lined up.

Sizing: 6 months – 8 years

Alterations: I added extra length so she can wear it longer.

Instructions: Mostly easy to follow.  The gathering in the front was a little confusing the first time I did it because I was having trouble picturing what fabric was ending up covered versus needing to be finished.  It’s not quite as neat as I would like, but next time I make this I’ll be fine.

2+2 Blouse

Pattern Issues: None

Fabric Choice: This is a quilting cotton, which works well for this pattern.  Does it get better than purple dinosaurs?  Not for my purple-loving, dinosaur obsessed daughter!

2+2 Blouse

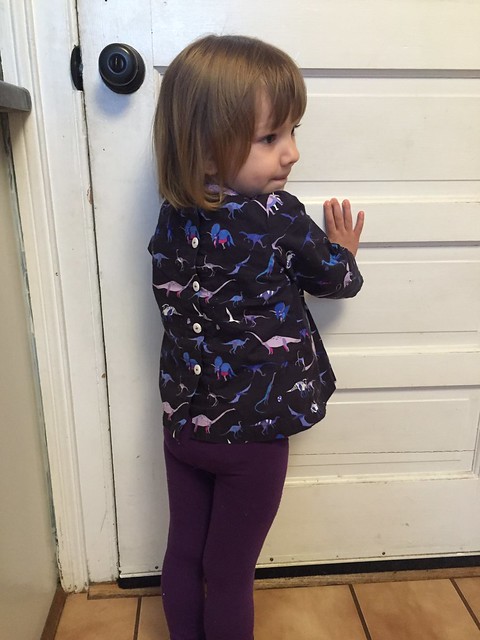
Finished Product: This shirt is adorable.  My daughter is not quite sure what she should do with the ties though.  Sometimes she ignores them, some days she pulls on them continuously.

Notes for future makes: Add more length.  I think I made it 2T with 4T length, and I wish I had added a little more length so she can wear it longer.

Final Thoughts: I wasn’t sure how my daughter was going to feel about the buttons all the way down the back, but she doesn’t seem to even notice them.  This is a cute shirt, and even though it’s a bit of work, it’s adorable and I want to make it again.

Eleanor Dress

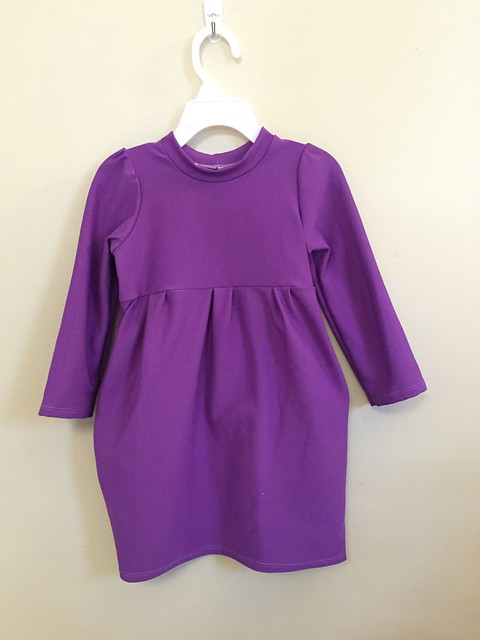
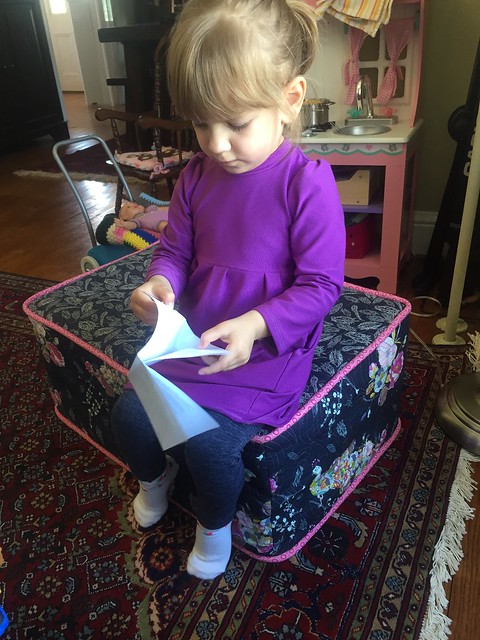
This winter I was really tired of buying shirts for my daughter that were too short, so I made several shirts and dresses for her that are long enough for her to not immediately grow out of.  I had made a previous version of the Eleanor Dress pattern as a shirt, but can’t find a picture of it – despite the fact that she wore it all last winter!  I really like the dress version of this pattern.

Pattern: Eleanor Dress from Shwin Designs

Eleanor Dress

Pattern Description (from designer): Everyone loves a knit dress, comfy and easy to wear. The pattern also has the option for a top. This knit dress pattern comes with many options to create simple by stylish knit dresses. From an oversized collar to ribbing at the neck, long or short sleeves and every combination of them all. This one pattern will take you through many seasons and with the sizes 12m-8years included it will take you through many years of wear.

Pattern Retail Price: $9 for PDF

Fabric Required: 3/4 yard for 2T

Amount of fabric used: I was using leftover fabric from another project so I don’t know exactly what I had, but the amount seems accurate.

Sizing: Includes 12 months to 8 years.  My daughter’s chest was in the 2T range, and that’s what I made and I am pleased with the fit.  Due to the stretch of the fabric, she is still wearing this dress even though she is now wearing 3T and slim-fit 4Ts in RTW.

Alterations: I made this exactly as designed.

Instructions: They are step by step instructions with a photo for each step.  The samples are in a solid color so it is easy to see what is happening, and I like that the short sleeve and long sleeve samples were in different colors so I skip the instructions that didn’t apply to the version I was making.

Pattern Issues: None.

Fabric Choice: I used an athletic fabric that I bought from Fabric Mart last year on a super sale.  I think it’s meant for leggings, but it makes a really cozy shirt/dress.

Eleanor Dress
Finished Product: This dress is cute.  My daughter loves the pockets.

Notes for future makes: Baste the pleats down prior to sewing the skirt to the bodice.

Final Thoughts: I will probably make the short sleeved version again as it warms up.  It’s a cute dress that my daughter didn’t want to take off after trying it on to make sure it fit.  Now that she is getting into the “dresses are the best” phase, she likes it even more!  I like it because it is a dress that she can still run around with her friends in.


Oliver and S Class Picnic Blouse Pattern Review

I was going back through the draft section in my blog and discovered some old posts that never got published.  This is one of them, originally from fall 2014, but the information is still valid although old.

Pattern: Oliver and S Class Picnic Blouse 

Class Picnic Blouse

Pattern Description (from designer): The raglan-sleeve pull-on blouse includes gathers at the yokes, elastic at the shoulders, three-quarter-length sleeves, and wide hems.

Fabric Required: For the 12-18 month size, 1 yard.

Amount of fabric used: I am not 100% sure because my mom cut these out for me.  I think you could probably do it with 3/4 yards for the smallest sizes.

Sizing: My daughter’s chest is the 12-18 month width, and 2T in height, and it fits well.

Class Picnic Blouse

Alterations: None, other than to add the extra length to the shirt

Instructions: Through my own fault, I did not realize there was elastic at the shoulders to make the neck line.  This part of the pattern therefore confused me very much because it seemed like such a crazy way to make the sleeve and collar.  Once I figured out the reason there was a casing, it made much more sense.  Liesl never makes her patterns crazy, so I don’t know why I thought this one was.  When I make more of these shirts next fall, it will be much easier.

  • Tip: In the instructions, it recommends pulling on the elastic when cutting it to get the cut as close to the fabric as possible.  When I did this, I had the elastic actually pull out of the seam twice.  I found it was better to have a little over 1/8″ of the elastic sticking out and live with it not being perfect that to have the frustration of the elastic pulling out of the seam.

Class Picnic Blouse

Pattern Issues: No issues with the pattern that weren’t a result of me not reading through them completely before starting the project.

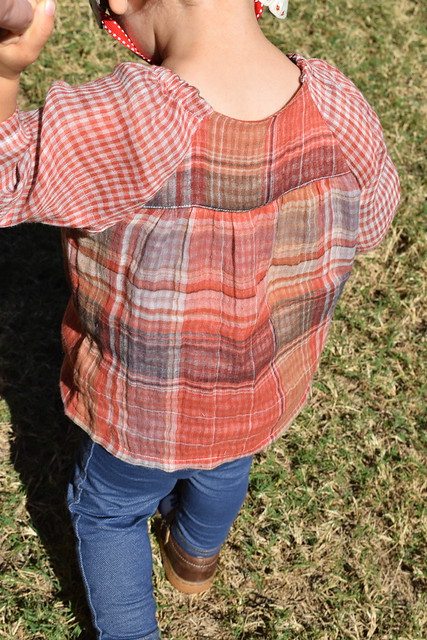
Fabric Choice: The green one is a 100% cotton shirting, and it was a dream to sew up.  The orange plaid one is a very loosely woven double gauze that was a nightmare to cut and sew, but the end result is so cute, it almost makes the hassle worth it.  The orange one is also semi-sheer so it probably should have been lined, or I should have used a double layer for the bodice portion.

Class Picnic Blouse

Finished Product: These shirts were the perfect shirts for a fall day.  They are comfortable for my daughter, easy to wear and play in, not fussy at all, and look great.

Husband’s opinion: Also a fan, wants me to make more of them.

Notes for future makes: No notes, great as is.

Final Thoughts: I am definitely making more of these.

1/2 yard skirt

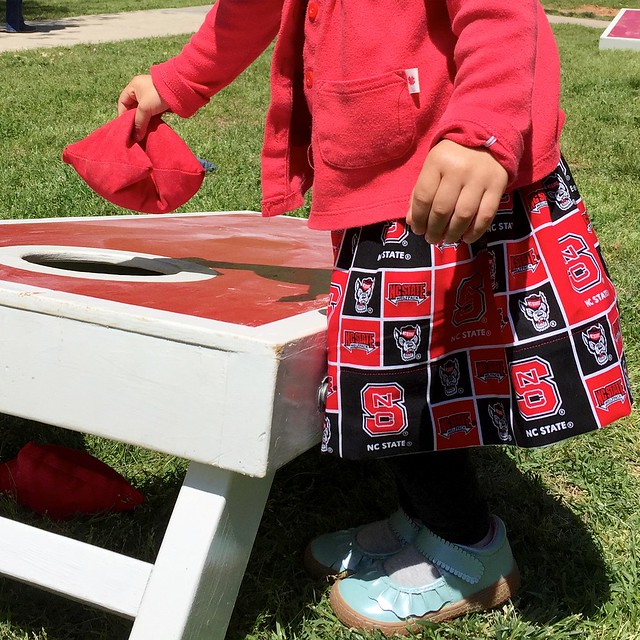
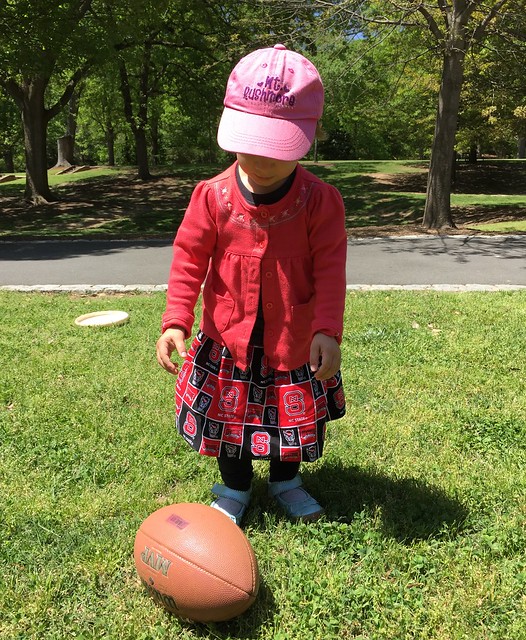
I managed to make a 2nd item for Kids Clothes Week!  This was just a quick rectangle skirt made from 1/2 yard of fabric with a gathered waist and a deep hem, but it was the perfect spirit item to wear to my husband’s picnic for his department at NC State.

NC State Skirt


This fabric was printed ridiculously off grain, so I cut based on the print rather than the grain, and then ironed it into submission.

NC State Skirt


It was a little long – like Little House on the Prairie long, so I hemmed it up 3 inches, and it’s still slightly long.

NC State Skirt


It was a quick and easy skirt – or would have been if I didn’t have the owner of said skirt on my lap “helping” unthread the serger and sewing machine.  She loved the attention she got wearing the skirt, and many of the students loved her support of their school.  Plus, it’s long enough that it will still fit if my husband goes back to NC State to get his PhD someday 😉

Go Wolfpack!


Little Zippy Top

I originally had not planned to participate in Kid’s Clothes Week this week because I have quite a few other obligations that need to be finished.  Then, I was working on a particularly frustrating quilt top, so I needed to just take a break from quilting/piecing for a morning.  I decided that following an easy pattern was just what I needed before tackling that other project.  Therefore, I present to you the Little Zippy Top.
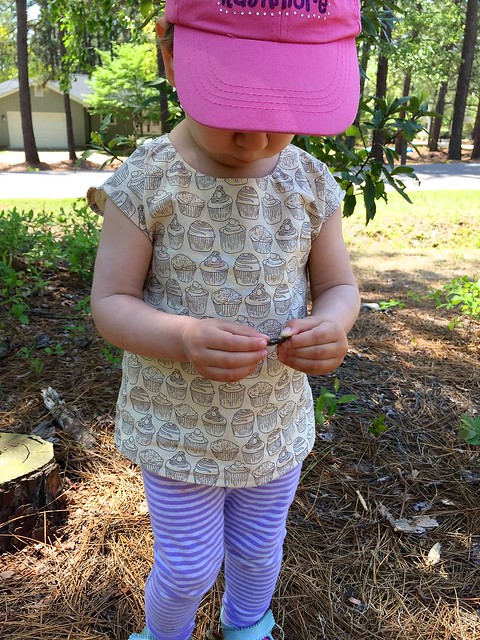
Little Zippy Top

Pattern: Little Zippy Top from See Kate Sew

Pattern Description (from designer): This top is a versatile woven top with an exposed zipper on the back! Make it with all your favorite fabrics! This top is perfect for beginners and quick and fun to sew! Requires very little fabric and a little zipper!

Pattern Price: $9 full price, but watch for sales.

Fabric Required: 1/2 yard for size 4T and smaller

Amount of fabric used: 1/2 yard!

Sizing: Comes in size 18M to 10.

Alterations:  This shirt is a little short, in my opinion.  I used the 4T length hoping to get a little more wear out of the shirt, and it needed that length just to be wearable now on my daughter.
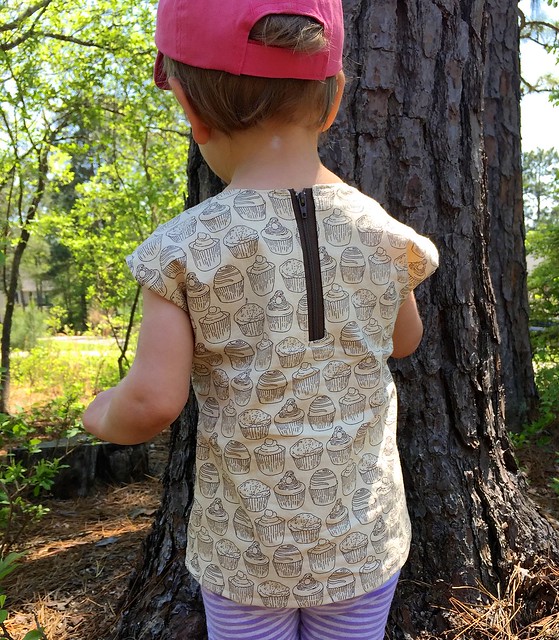
Little Zippy Top

Instructions: Some of the steps were in a little bit of a weird order.  For example, you don’t stay stitch the neckline until step 6 by which point you’ve already handled it quite a bit so if it was going to stretch out, I think it would have by then.  I also prefer to do prep-type work at the beginning, but that’s my personal preference versus a pattern issue.  For example, step 7 is to fuse the interfacing to the facing pieces.  That’s something I prefer to do first before I get into sewing the piece of clothing.

Pattern Issues: Instructions are adequate, but not my preferred style of construction.  For example, you don’t under stitch the facing to the seam allowance.  Instead, you just topstitch the whole neckline.  Which is fine, but that step has you also topstitch around the zipper opening prior to the zipper being installed, which leads you to have to install the zipper while insanely carefully trying to topstitch over the line of stitching already there.  I probably made more work for myself by under stitching the neckline, then installing the zipper and just continuing on to topstitch around the neckline in one go.

Fabric Choice: Cute cupcake fabric that was on sale from Fort Worth Fabric Studio.  The actual name of the fabric is Love At First Bite by Color Bakery for Windham Fabrics.  Quilting cotton works fine for the shirt.

Finished Product: It’s a cute shirt.  I wish the neck was a little bit higher in front.  Sometimes the shirt has a tendency to sit forward a little more than it should, so that may be why the neckline looks lower than it should.
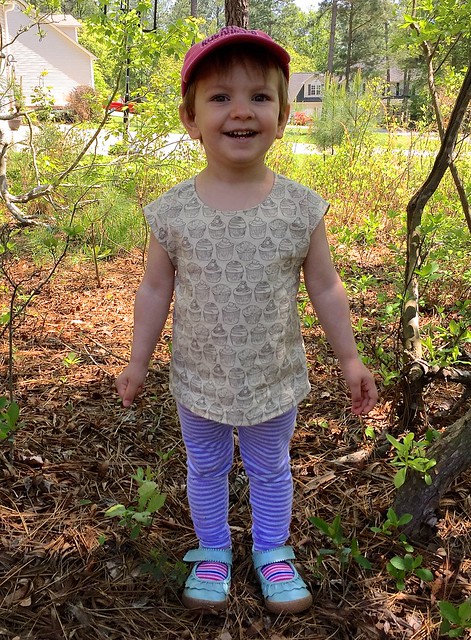
Little Zippy Top

Husband’s opinion: I like the exposed zipper, and the fabric.

Notes for future makes: I think I will go up a size in width, and at least one more size in length (to 5T for a little girl that wears 2T in ready to wear).  My daughter is pretty skinny, but likes to “help” put her clothes on by sticking her arms out straight in whatever direction that makes it impossible to get a woven shirt on, so I’m hoping a little extra width will help make dressing her a little bit easier.
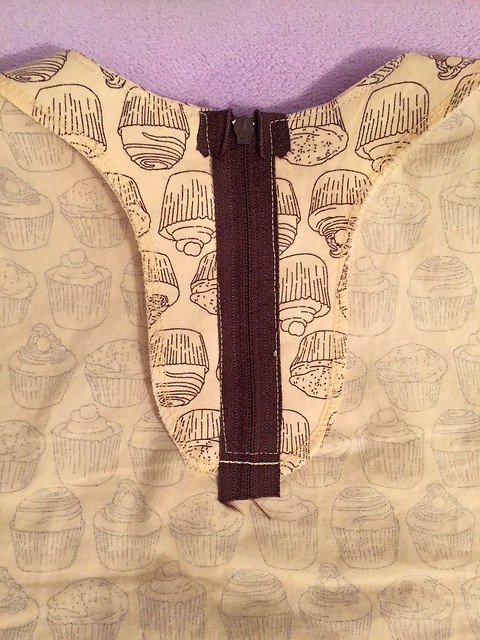
Little Zippy Top

Final Thoughts: I had high hopes for this shirt being one that I go to again and again, but I’m not sure that I will.  It’s like when someone tells you a restaurant has the best hamburger they’ve ever had in their entire life… your hopes get high and no hamburger is going to live up to what you have built up in your head.  I had higher hopes for this pattern, so I think that’s why I’m a little disappointed.

I didn’t keep track of time, but it wasn’t quite as fast of a make as I was hoping.  Then again, if I made multiples, it would go faster.  Making sure the zipper is evenly installed takes longer than buttonholes and sleeves do for me.  I also don’t really like how the zipper is installed.  The zipper seemed to be annoying my daughter last night when we were sitting on the couch together.  I still like how little fabric it uses, so I may try it again just for that reason.

I guess for now, I’ll see how often I dress her in it before deciding if it’s a total win or bust.

Franklin Dress

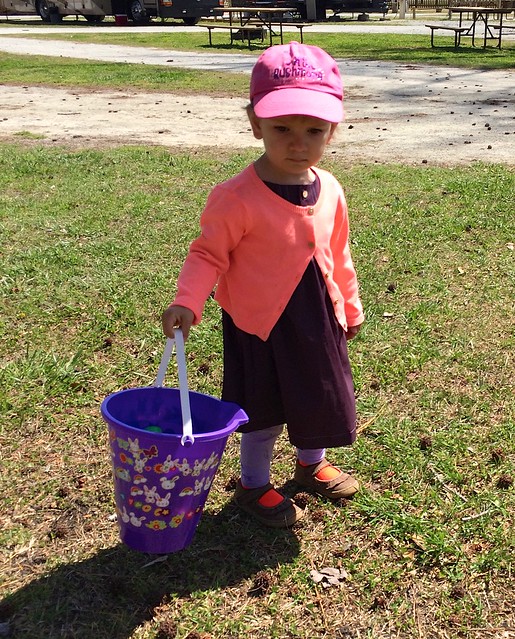
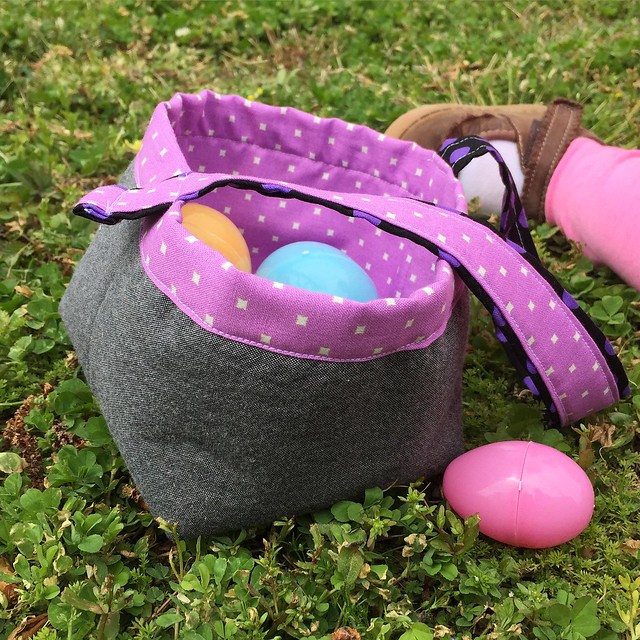
I made the Franklin dress pattern for my daughter for Easter.  Unfortunately, it ended up being a little chilly, so almost all of the pictures of her that day are covered up by a sweater.  Then, I made her an Easter basket from the Fabric Basket Tutorial from Ellison Lane, which she also ended up not using because a bucket was provided at the Easter Egg Hunt.  Oh well!  She had a blast running around and picking up eggs, and that is what mattered.
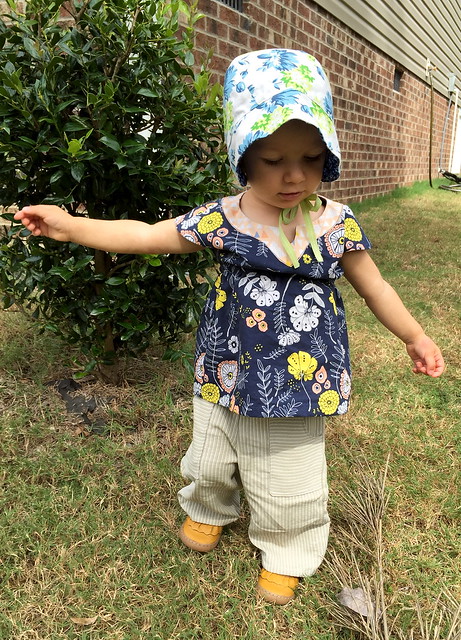
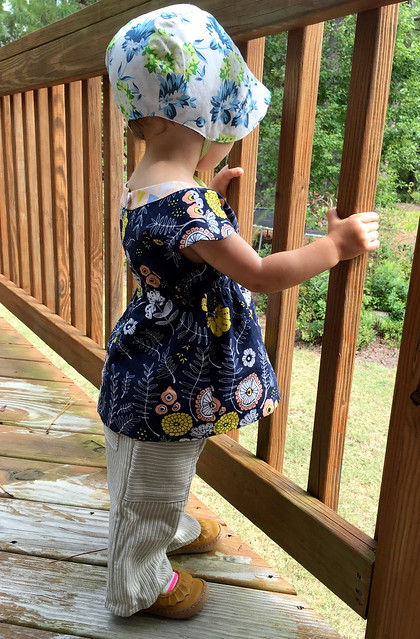
Pattern: The Franklin Dress is the first dress pattern offered by the Brooklyn Pattern Company.

Franklin Dress

Pattern Description (from designer): A surprisingly simple dress with playful details and endless options. Whether romping in the dirt with frogs in her pockets or strolling across the Brooklyn Bridge, both mom and daughter will appreciate the versatility. A pleated yoke frames the face while gathered sleeves add a special touch. Go casual with a sweet polka dot cotton or dress it up with linen or silk.

Pattern Price: $12

Fabric Required: For 12 month size, it requires 1- 1.5 yards depending on width.

Amount of fabric used: I used 1 yard of 54″ wide fabric and did not have garment sewing usable scraps after.

Sizing: Includes sizes 6 months – 8 years.  I made size 2T.  Actual measurements are not included, which I am so used to using to decide what size to make that I was lost without it.

Franklin Dress

Alterations: I made the pattern as written.

Instructions: Instructions are good and there is also a sew-a-long for beginners or anyone who needs extra help.  Diagrams are included in the pattern.  My only issue is below.

Pattern Issues: My only complain is that the diagram showing where to place the interfacing behind the buttonholes makes it look like it should be placed again the cut edge of the fabric, instead of inside the seam or even just centered on the line you are going to put the buttonholes on.  I knew it didn’t seem right as I was doing it, but I try to follow the instructions as written for the first time I make a pattern so I went with it in case there was some reason it was done that way.  There wasn’t.

Fabric Choice: I made it in a lovely purple stretch poplin purchased from Mood, now out of stock.  I originally purchased it for me (back when I had a short-lived misconception that I could make a woven shirt for myself out of 1 yard of fabric).  I used 1 yard of fabric for her dress.

Franklin Dress

Finished Product: It is a very sweet dress.

Husband’s opinion: Why did I make it a dress when we never dress our daughter in dresses?

Notes for future makes: The bodice width is a bit wide.  Not crazy wide, more room to grow wide, but if in doubt about size I would probably go with the lower size.  Also, I would shorten it to make as a shirt so she would wear it more often.

Final Thoughts: It’s a pretty easy sew that makes a cute dress.

Ellison Lane Fabric Basket as Easter basket

I had to include the Easter Basket somewhere!  It was used during the practice egg hunts, so it wasn’t a total waste.  I’m probably going to remove the handles and use it as a thread catcher.  I like how it turned it!

Linking up to Frances Suzanne’s Link Party for the Franklin Dress Flip this Pattern, even though I didn’t flip it at all.


Oliver & S Fairy Tale Dress Review

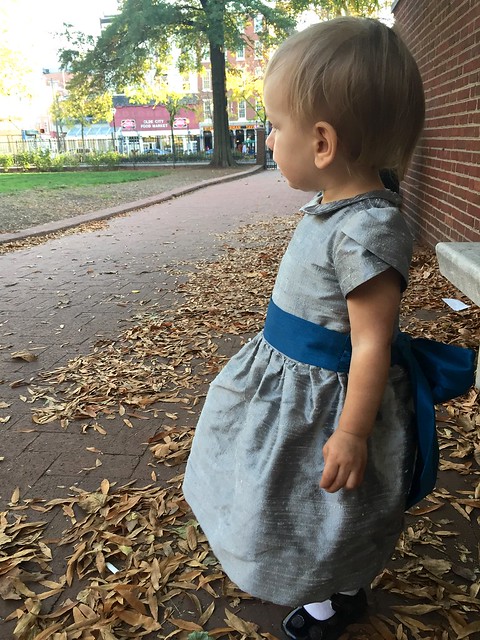
My first Fairy Tale Dress was almost a year ago, and I adjusted it to make my daughter’s baptismal gown.  At that time, I was still pretty new to garment sewing.  I think it was my third dress ever.  I chose to go from the Made by Rae Itty Bitty Dress, to the Made by Rae Geranium Dress, to the Oliver & S Fairy Tale Dress.  It was a pretty big learning curve.  Now that I have actually sewn the pattern as written, I feel better about writing a Fairy Tale Dress pattern review.

Oliver + S Fairy Tale Dress

I have to say I was much more confident this time than I was last time.  Although, last time I had the advantage of ignorance – I didn’t know enough to know that I had chosen a challenging pattern with silk and “scary” invisible zippers.  If I had realized what I was doing was supposed to be harder, I don’t know if I would have finished it so quickly.

Pattern: Oliver & S Fairy Tale Dress

Fabric Required: From pattern (44-45″ wide): 1 3/4 yards of main fabric, and 1 yard of lining fabric.

Amount of fabric used: A little under 1 yard of main fabric (52″ wide), and a little under 1 yard of lining fabric.  If anyone has a use for just over a yard of silver silk dupioni, please let me know!

Oliver + S Fairy Tale Dress

Sizing: I used the 12-18 month size for width, 18-24 month size for bodice length, and I added 2 inches to the 18-24 month skirt length to make it mid-calf instead of knee length.

Alterations: I had to lengthen the front of the bodice by 1/2″.  I just added the 1/2″ to the middle and tapered it to the normal length at the sides.  It was a small change, but helped fit over the toddler belly a little bit better.  I also tacked the collar down because it was flipping up too much for my taste when she tried it on pre-wedding.

  • Sash: I didn’t want to use either version of the sash as published in the pattern.  I was hoping to have my daughter wear this for Christmas so I didn’t want to sew the sash to the dress.  I liked the wide sash in the back, but sometimes the super wide sashes on the front of a dress overwhelms little girls.  I decided to use the pattern pieces for the back, but sew it to a narrower portion for the front of the dress.

Instructions: As expected with Oliver & S, these were good instructions.  I did use couple additional tutorials shown below.

Tutorials Used:

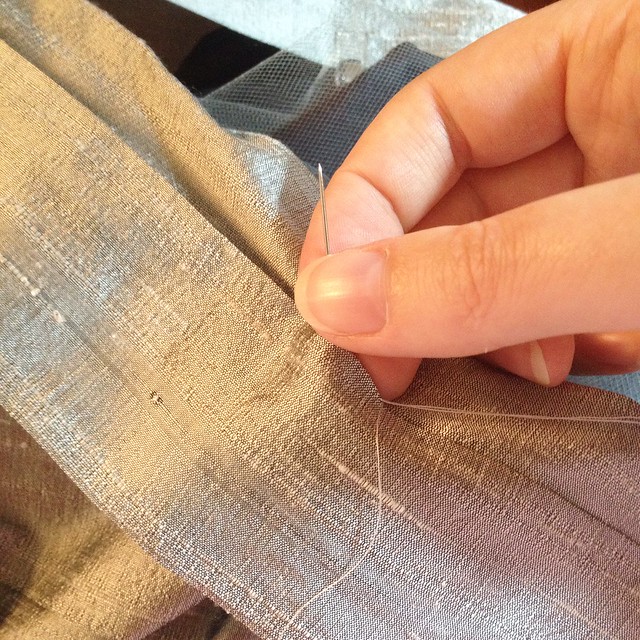
    • How to hand stitch a hem – I used the slipstitch to hem the outer dress.  I don’t hand sew many things, but it felt right for this dress.

Hand sewing silk hem

Pattern Issues: The only step that I had any issues with was attaching the zipper to the dress exterior.  In some of the diagrams it showed the seam finished, in others it wasn’t, and it didn’t mention in the directions the right time to finish the seam.  I was using a serger to finish the seams and chose poorly, because I should have finished that back seam before attaching the zipper.  I ended up serging from the bottom as close as I could to the zipper.  The rest of it gets encased in the lining.  This dress won’t be going through a washing machine, so it will probably be fine.

Although, I do have to add – why is there not a table with the width of the skirts for each size?  I hated having to print out 8 extra pieces of paper for the three skirt pieces when I knew I was just going to cut the skirt as one continuous piece.  This skirt doesn’t need side seams.  It makes it slightly easier to line stuff up, but as long as you mark where the side seams would have been there is not issue lining up the skirt to the bodice.

Fabric Choice:

– Outer: I used silk dupioni from NY Fashion Center Fabrics in 137 – Silver.  I was fortunate that they had a Labor Day sale that lowered the price point when I needed to order it.

– Tulle: I also ordered the gray tulle from NY Fashion Center Fabrics in the same sale.

– Lining The lining was a cheap voile from Fabric Mart that appears to be out of stock now.  I was too cheap, and should have used a better quality voile (even though it would have cost more).  It looks fine in the finished garment, but it was so thin that it was horrendous to sew and I was fighting it the whole time.  I think Tim Gunn has a quote that a successful garment starts at Mood, and he is so right.  I thought I had learned my lesson on cheap vs. good value fabric, but I’m still learning it over and over.

Oliver + S Fairy Tale Dress

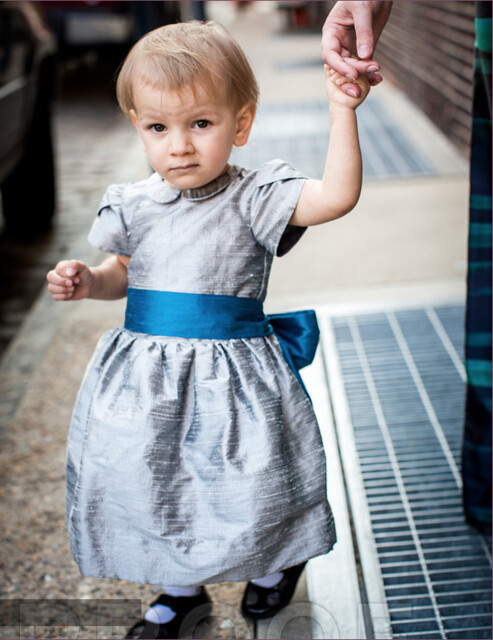
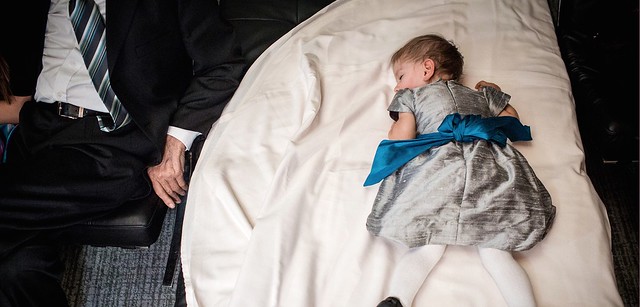
Finished Product: I love this dress as a party dress for a little girl.  The color isn’t the best color for my daughter’s complexion, but she was the flower girl for a wedding whose colors were grey and blue.  I only had 1/2 yard of the matching blue fabric, so I used that to make the sash.

Husband’s opinion: He loves this dress.

Final Thoughts: This is my second time making this dress, and I will probably make it again if another fancy occasion comes up.  I may have to use a different collar or something next time so people don’t realize I keep using the same pattern over and over!

Linking up to: Sew + Show Wednesday @ Straight GrainShow off Saturday at Sew Can SheThreading your way @ Threading my Way

Looking Back at 2014

2014 was a good year.  It was my second year at home with my daughter.  My husband was in the middle of grad school to get his Master’s Degree.  My brother-in-law got married.  And I kept sewing!

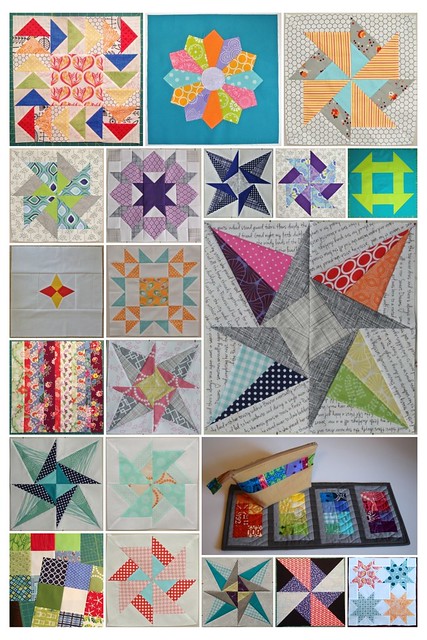
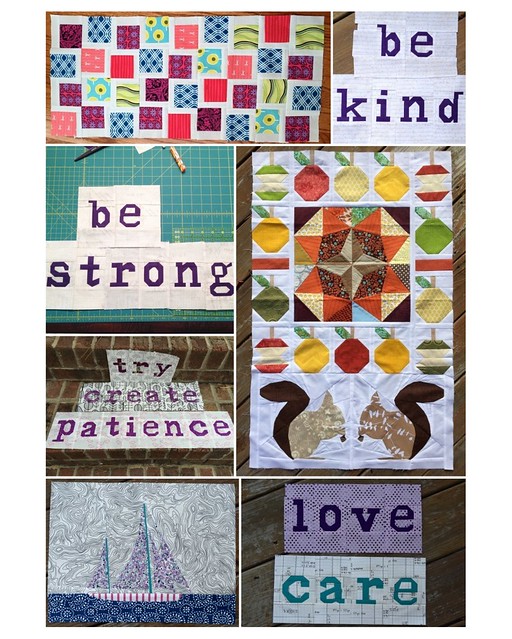
I didn’t realize how much I sewed until I started making mosaics and realized how many pictures I have!  I did not make as many quilts, because there are only so many quilts a person can use and because I choose to do more challenging work for the ones I did make.  This also reminded me that I need to start making blocks for my Real World Red and White quilt if I ever want to get it done.
2014 Quilting for me I also joined bees and a swap for the first time, so some of my quilting time was dedicated for other people.  I really enjoyed pushing my boundaries and learning new techniques as part of these bees, so I am continuing in Stash Bee this year – and already signed up for two mini quilt swaps!
2014 Bees and SwapsI joined the Plum and June New Blogger Group.  As a part of that group, I joined a round robin bee – the Round Trip Quilts group.  It’s seriously one of the hardest and most awesome quilty things I’ve done.   I love the challenge and creativity that our group is demonstrating each round.  I can’t wait to see how everyone’s quilts turn out!
2014 Round Trip Quilts Sewing
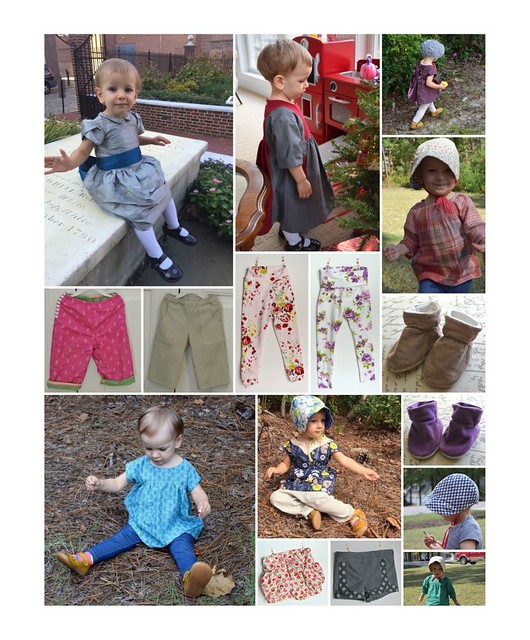
I also started sewing more and more clothes this year.  This isn’t near all of them.  Much of what I sew are basics like leggings and shirts that I apparently did not feel were photo worthy.  I should think about whether or not I feel that way for the future.  Also, fancy dresses are fun to sew, but don’t get worn.  Those leggings get worn to death.
2014 Sewing for my daughterAnd I embraced “selfish” sewing, and made a few things for myself!  Taking pictures of myself in clothes I’ve made is much harder than taking the pictures of a quilt block or of my daughter.  Not only does the light have to be good enough to take pictures, the weather has to be appropriate to wear the garment, it can’t be wrinkly from wearing all day, and my hair has to look acceptable.  Sewing bloggers, I salute you and your herculean efforts to document your makes.  In the coming year I want to become better about blogging what I’ve made for myself.
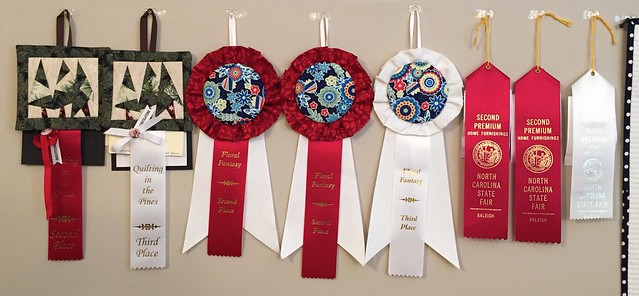
2014 Sewing for meI also entered a quilt show for the first time.  I didn’t really enter thinking I would win anything, but it does make the experience more fun 😉  I really entered because my local shows are full of quilts that all look the same.  I wanted to show that there are quilts that aren’t made from drab colors.  I wanted to enter a wearable category and show that you can quilt a sophisticated bag.  I hope my work demonstrated that you can be young and make technically sound work that is modern and beautiful.

I also have to brag on myself for a minute – I took 2nd in the Group category in the NC State Fair.  I was pretty proud of that because I had heard that the group and dual category are the most competitive categories.  Luckily I found that out after I entered – otherwise I may not have had the nerve to enter the group category.  Then I found out that a quilter who has been quilting longer than me and does amazing custom work had quilted the 3rd and 4th place quilts in the group category.  That made me feel pretty good!

2014 Quilt Show Season

Last year I tried to participate more in the bigger quilting world – through bees and swaps, and also through guest blogging.  I wrote a tutorial for a paper pieced block for Sew Mama Sew.  I guest blogged for Angela Walter’s Business of Machine Quilting Blog.  I took a couple longarm classes and learned some great techniques.

That’s my year in summary.  This coming year I want to piece a little bit more.  I have a to-do list that hopefully I can follow.  I want to quilt more.  I want to continue developing my skills – in piecing and sewing and quilting.  And accomplish all this while moving over the summer and potentially going back to school in the fall… eek.  Here’s to 2015!

Oliver and S Roller Skate Tunic Pattern Review

I’m continuing my Kid’s Clothes Week theme of fall useful clothing with my Roller Skate Tunic Pattern Review.

Roller Skate Tunic Pattern Review

Pattern: Oliver and S Roller Skate Tunic and Dress (digital version)  This is a great pattern for the digital side, because there is not that much to print.  It was a nice change from some of the huge patterns I have printed off lately.

Pattern Description (from designer): This cute and easy dress can also be made as a tunic, with two different styles for each length. All views include built-in cap sleeves, Empire-waist elastic casing, and keyhole-with-button opening at back.

Fabric Required: For 12-18 month size, 3/4 yard of both the lining and outer fabric.  One button for the back closing… a lion button makes any kid’s shirt better!

Oliver & S Roller Skate Tunic

Amount of fabric used: I’m pretty sure I could have cut it out of a half yard cut of fabric.

Sizing: My daughter’s chest size matched the 12-18 month size exactly, so I made the 12-18 width with 2T length.

Alterations: The only change I made was to add some length.

Instructions: This is a pretty simple shirt to construct, and the instructions are good (as always from Oliver and S).  The marking of the line where the elastic casing goes was a bit tedious, but there are better tools that make it easier (I just don’t own them).  The method to use carbon paper and a tracing wheel would be infinitely faster, easier, and more accurate.

Pattern Issues: I measured the elastic to be the exact width of her chest (plus the seam allowance) as directed, but I think it’s a little tight.  Not uncomfortable tight, but when she lifts her arms, the shirt rides up and stays up.  In my next version I will make the elastic a little bit looser so it hopefully won’t have that issue. You can see what I mean in the picture below…

Oliver & S Roller Skate Tunic

Fabric Choice: I used quilting cotton for the outside and voile as the lining.  The weight works well together.

Finished Product: Overall, I think it’s a cute shirt.  I already have another one cut out, it just needs to be sewn up.  I think with the cutout, the neckline is a little low on my daughter.  Maybe for her size, it gets low proportion wise?  I’ve seen a lot of other versions of this dress and never had thought before, but sometimes there is a little more food stuck in the top after a meal than is ideal.  Until she gets into larger sizes I don’t plan on using the cutout again.

Husband’s opinion: He doesn’t like how it rides up, but hopefully loosening the elastic will take care of that.

Notes for future makes: As stated above, I will make the elastic  a little bit looser in my next version and probably not use the cut out option until she is a little bit older.

Oliver & S Roller Skate Tunic

Final Thoughts: The Roller skate tunic is a well designed pattern that creates a good looking dress.  I like how it is lined, and think it is a very flattering and cute silhouette for a little girl.

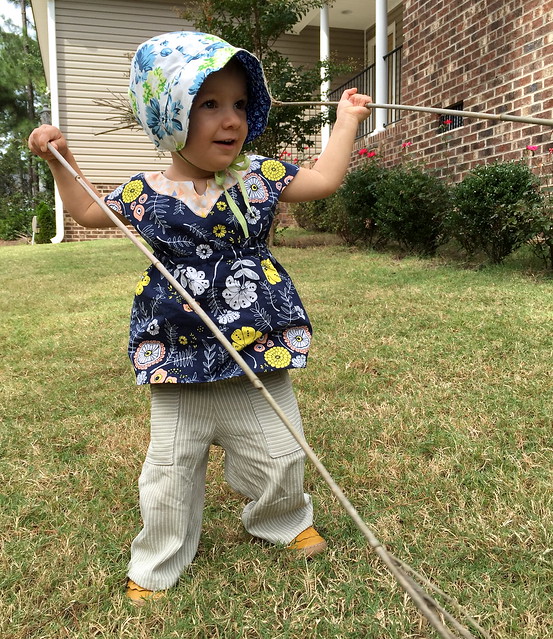
Also, the pants are the Oliver and S Sandbox Pants that I made for the Winter 2014 KCW (last January).