Afternoon Blouse Pattern

Pattern: The Afternoon Blouse by Jennifer Lauren Vintage

Afternoon Blouse

Pattern Description (from designer): An easy summer blouse perfect for afternoons sipping tea (or cocktails), the Afternoon Blouse has been designed with beginners and advanced sewers in mind.  For the beginner, the flowing design will help to build sewing confidence with its choice of two decorative necklines and 1940s-inspired kimono sleeves. For the advanced sewer, this gorgeous blouse can be made in one afternoon using silk or rayon – a luxurious, quick and satisfying make.  While the Afternoon Blouse has been designed to be tucked into high-waisted skirts and pants for a vintage look, it also works perfectly worn loose with jeans and sandals for the modern gal, making it a truly versatile blouse.

Purchase Price: Full price is $12.50 US, but she had a sale after Thanksgiving.

Fabric Required: Oddly specific… 1.58 yards of 60″ or 1.66 yards of 45″.  I would say the conversion from metric to US is why it is so specific, but the metric also goes out to 2 weird decimal places.

Amount of fabric used: I squeezed it out of 1.5 yards of 44″ wide material.  One of my facings had some imaginative cutting done to do so.

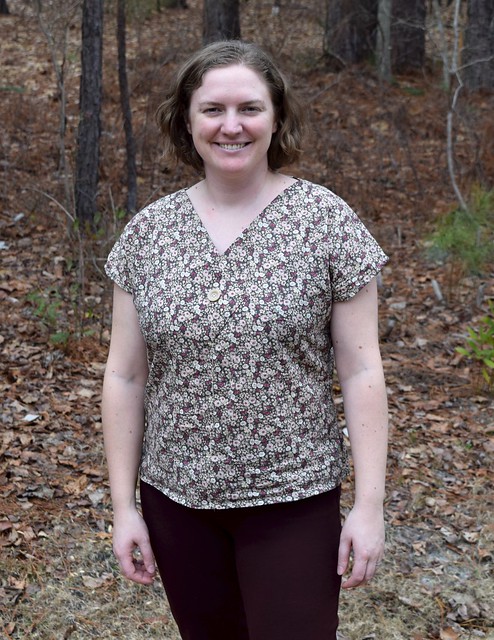
Sizing: I used a 16 for the shoulders (closer to my high bust measurement), then went out to an 18 at the bottom of the sleeves for my bust size, then came back in to a 16 for the hips.  It was really big in the waist/hip area, so I had to take it in some more.  It’s also a little bit shorter than I prefer my blouses.

  • There are no finished measurements, so I had to go off the size chart.  I guess I need to start measuring pattern pieces, but it annoys me to pay good money for a pattern then have to measure pieces of paper to decide what size to wear.  Anyway, the size chart recommended with my measurements to do an 18 bust, 20 waist, and 14 hips.  If I had done that, the shoulders would have been way too big and the waist way too big.

Alterations: Once I tried it on after sewing up the side seams, it was way too loose in the waist/hip area.  I took off the blouse and decided to trace the side seams off my favorite Belcarra Blouse.  That reduced the sizing from an 18 in the bust, to a 16 at the waist and 14 at the hip.  This helped immensely, but I still need to fix the tenting effect in the front of the shirt.

Afternoon Blouse

Instructions: The instructions are good.  This was the designer’s first pattern.  Most of my issues with the instructions are my personal preferences from sewing different patterns by different designers.

  • I personally prefer to hem the sleeve after I sew up the sides to avoid any interior seams showing, but doing it first does make it easier to iron.  I think the best solution is to iron the seamline early, then sew after the sides are done.
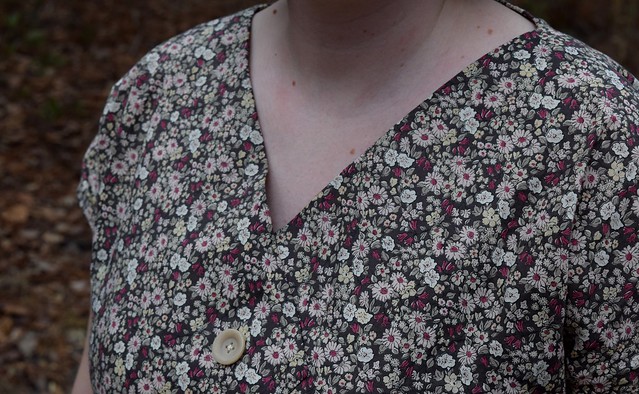
  • I also under stitched the neckline.  It was a little tough at the corners, but it really helped my blouse lay flat and keep the insides where they belong.  I think every pattern on earth, especially ones aimed at beginners should mention that step.  I think at the end, there may be a step (step 3 in the “To Make Up” section) that hints at under stitching, but it would be hard that late into the blouse.  It also mentions top stitching as an option, which I don’t think would look very good on this blouse.
  • Printing: I did like that the pieces were tiled so that I only had to print off the pattern for the front that I was using.  On a larger pattern, I would probably prefer some more overlapping to save paper, but on a blouse like this I really appreciated not having to print every single option.

Pattern Issues: Why does it not include finished measurements?!?!  I keep getting tempted by cute patterns without finished measurements.  I know it’s harder to do the bust measurement with kimono sleeves, but at least give me the waist and hip finished measurements so I don’t have to take the shirt in after I’ve already made it…

Afternoon Blouse

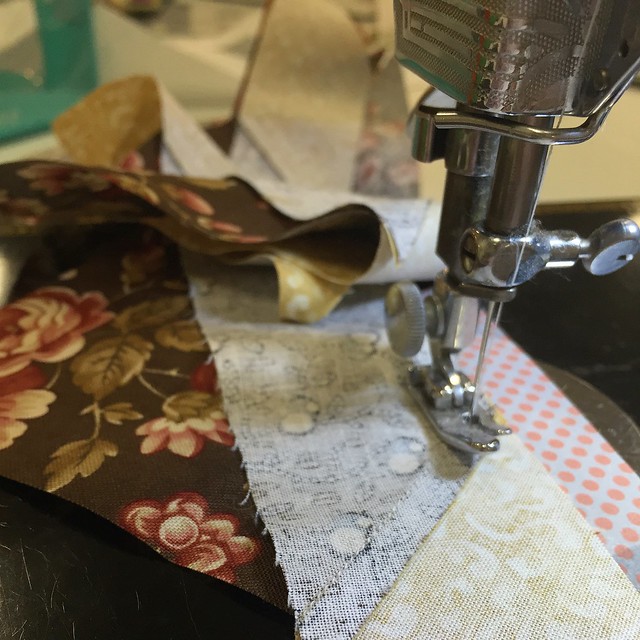
Fabric Choice: I used a wonderful 100% cotton lawn by Yuwa.  This stuff feels amazing.  It washes up beautifully, and I admit to googling the brand in an attempt to find more.  It’s that perfect lightweight cotton that isn’t completely see-through like voile, yet substantial enough that you can actually wear it outside of the house without worrying if your bra is showing through the fabric.  The one I purchased from Imagine Gnats appears to be out of stock, but Fancy Tiger and Miss Matabi seem to stock Yuwa regularly.

The other consideration is whether or not you want the neckline detail to show.  I love this fabric, but it is so busy you can’t see that aspect of the shirt.  A solid or plainer design would show that much more.

Finished Product: I like the neckline and kimono sleeves.  I am probably going to end up with way too many blouses with kimono sleeves, but I like them.  I can see making this shirt again, and maybe trying the other neckline option.

Afternoon Blouse

Notes for future makes:

  • Make a swayback adjustment.  Just make one in every single pattern you will ever consider sewing in your entire life.  You know you need it, so don’t be lazy and just do it!
  • Also, add a couple inches to the length.  I’m a shorty, but I have a long torso and a short human to chase around, and I like my middle to be covered.
  • It has a weird tent like effect in the front.  None of the pictures of other people’s versions seem to do this, so I’m not sure why mine is.  I think I will add a dart next time to take in some of that excess.

Final Thoughts: Overall, I like this blouse and plan to make it again with a couple fit adjustments.

Longarm Quilting

Before I had to take my machine down, I was able to do actually do some longarm quilting on it!

This first quilt is a stack and whack quilt that a local lady made.  My daughter thought it was the coolest thing every because it had lions and tigers and all sorts of African safari animals.  She is obsessed with Katy Perry’s “Roar”, so animals that roar are the best.

Meander quilting

She wanted an allover meander, and it suited what she was looking for.

Meander quilting

The next quilt was a string quilt.

Baptist fan panto

I quilted a baptist fan panto on it.

Baptist fan panto

The maker of this quilt is donating it, and I hope that the future owner appreciates all the hard work that went into this quilt.  It’s really lovely!  Thanks for trusting me to quilt for you!

Hunter’s Star Class

At the beginning of May, my guild (Tarheel Quilter’s Guild) hosted a workshop by Jane Godshall on how to do a “Rapid Fire” Hunter’s Star.  I don’t get to attend classes near as often as I would like, so I jumped on the opportunity!

My travel machine is my trusty Featherweight.

Featherweight sewing

The rapid fire method to make these blocks isn’t very intuitive, but it does produce an accurate block that is pretty easy to assemble and chain piece.

These aren’t my normal colors, but this quilt is intended to be a gift.  Can I finish by Christmas?  We’ll find out!

Hunters star traditional arrangement

One of the fun things she had us do was to layout our blocks in different variations other than a traditional Hunter’s Star.

Alternate hunters star

It was interesting to see how different you could make these blocks look!

alternate hunters star

This was a demo quilt brought by the teacher.  I like the layout, and am thinking about doing this for my quilt.  I just need to decide what fabric I want to use as my light.

Jane Godshall Hunters Star

One of my friends from the guild is much further along on her work – Aby from Aby Quilts.  She is combining the Hunter’s Star with a LeMoyne Star and it’s looking really good!

Thanks Tarheel Quilters Guild for a fun day!  I was very thankful that I had the opportunity to learn a new technique and spend a day with a great group of ladies 🙂

Linking up to:

WiP Wednesday @ Freshly PiecedLet’s Bee Social Wednesday @ SewFreshQuiltsNeedle and Thread Thursday @ My Quilt InfatuationQuilty Thankful Thursday @ Quilting Jet GirlWhoop Whoop Fridays @ Confessions of a Quilt AddictFabric Frenzy Friday @ Ft. Worth Fabric

Mini quilts everywhere

Spools Mini

I started this little mini quilt as part of a Quilting Circle that I go to once a month with Abigail from Aby Quilts.  In December, we were gifted a kit to bring to make the mini in January.

spool mini quilt

I’m never one to finish things quite as directed, so mine looked a little different than the planned version, but I was proud of myself for finishing the top, making a backing, attaching a label and getting it ready for quilting.  I should add that I did all of this the first week of February – no UFO’s for me!

baptist fan quilting

I decided to use this mini to try out the baptist fan design because it’s such a classic design, but I had not done it before.  There are a few things you have to figure out the hard way the first time you do this pattern because it is very obvious if you don’t nest it correctly.  I learned a few lessons with this design on my own work which should keep me from making those mistakes on someone else’s quilt.

As a long armer, I feel like it’s my job to be concerned about tiny mistakes that no one else will ever notice, but that doesn’t mean I can’t enjoy my cute little mini.

I was originally very bothered by the small mistakes I had made in this mini.  I was actually seriously considering tearing out all of the stitching and starting over.

Instead, I stopped and asked myself why I made this mini.

Is it for a show?  No.

Is it to demo my quilting?  No.

This mini will hang on my mini wall as a souvenir of the enjoyable times that I had with a wonderful group of ladies in the Quilting Circle.

I wasn’t even going to share this quilt because the mistakes bother me.  But, everyone makes mistakes!  It’s so easy to get caught up in the perfect world that we curate for the internet… to not show something that didn’t turn out just how we imagined.  I shared this because it’s part of my quilting journey.  It’s not going to win any shows or blow anyone’s socks off with its originality, but it’s mine and I like it.

So, I am concluding this project in the same way Angela concluded her post – a finished quilt is better than a perfect quilt top.  This little mini will hang in honor of good memories and a good lesson.


Linking up to Linky Tuesday @ Freemotion by the RiverFinish it up Friday @ Crazy Mom QuiltsWhoop Whoop Fridays @ Confessions of a Quilt AddictTGIFF

Rainbow Mini Swap

I have to admit I’ve gotten caught up in the mini quilt mania that is going around, and also gotten caught up in a few swaps.  It’s not like I really have extra time to be devoting to swaps, which is why I’m probably not going to participate in any more big swaps (until the next amazing opportunity comes up that I can’t say no to), but I really enjoy that they push me out of my comfort zone and challenge me to come up with new designs and color palettes that I wouldn’t necessarily come up with on my own.

Rainbow Mini Swap Complete

The latest swap was the Rainbow Mini Swap.  Rainbow is a big trend right now that I am embracing, albeit as a late adopter.  I made this mini quilt for @SGThings (Instagram).

Rainbow mini ready to be quilted

At my recent Carolina Longarm Association meeting, one of the newer members was surprised that I put small things on my longarm.  I think she felt like it wasn’t worth the effort to load or didn’t make very many small items.  I put everything on the longarm, big or small!

Rainbow Mini Swap detail


I used a light yellow thread throughout the quilt to blend with all the colors, but it may have blended a little too well because you can’t see some of the custom quilting I did at all!  The text on the white background has ribbon candy in it.

Rainbow Mini Swap detail

My partner mention that Anna Maria Horner was one of her favorites, so I tried to incorporate several of her fabrics.  I made a coordinating zipper pouch as well, using the tutorial from The Busy Bean.

Rainbow zipper pouch

This is the mini that I received from @SewGiddy.  I love this block, but it’s on my never-ending list of blocks that I haven’t gotten to making yet.  At least I have it look at in the meantime!  My daughter is going to have a field day with those fabric markers when I let her loose with them.

@Sewgiddy Mini Swap package received


Linking up to some of the following: Fabric Tuesday @ Quilt StorySew Cute Tuesday @ Blossom Heart QuiltsScraptastic Tuesday @ She Can QuiltLinky Tuesday @ Freemotion by the RiverLet’s Bee Social Wednesday @ SewFreshQuiltsNeedle and Thread Thursday @ My Quilt InfatuationFinish it up Friday @ Crazy Mom QuiltsWhoop Whoop Fridays @ Confessions of a Quilt AddictTGIFFFabric Frenzy Friday @ Ft. Worth FabricShow off Saturday at Sew Can She