Pilot Hat Review

Pilot Hat Review

This is a project summary of the “Pilot Hat” pattern by See Kate Sew.  I bought this pattern during her Black Friday sale last year, made it in February, and am just now blogging it.  It is sized to fit from 18M to 7/8.

See Kate Sew Cozy Pilot Hat

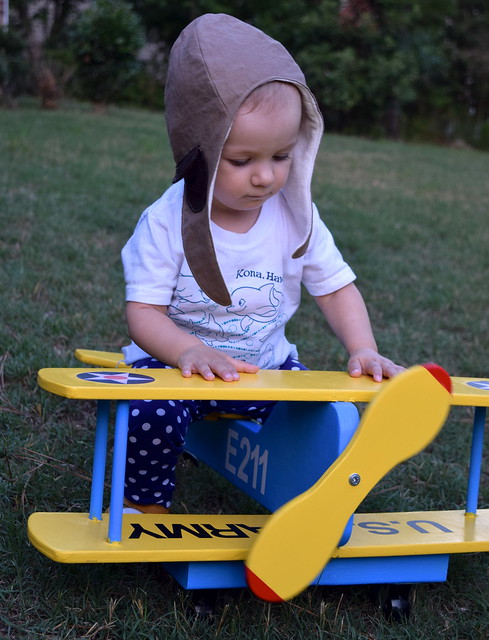
I originally thought that it would fit my daughter next winter and beyond, but then when I checked the sizing, she was a 12 month old wearing the 2T size.  Granted, she has a large head.  Her head circumference was 19.5 when I made it, and I made the 18M-2T size which is recommended for a 19 inch head.  It fits her well, but probably won’t after her next growth spurt – I’ll have to size up.  Then again, it’s been a few months since I made it and it still fits, so maybe I’m good for a little while longer.

See Kate Sew Cozy Pilot Hat

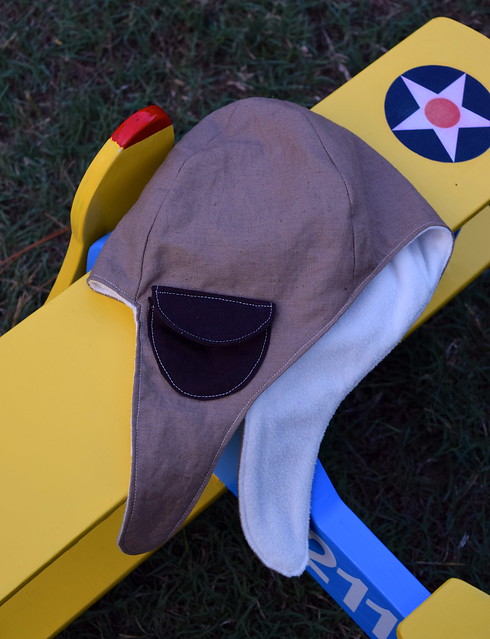
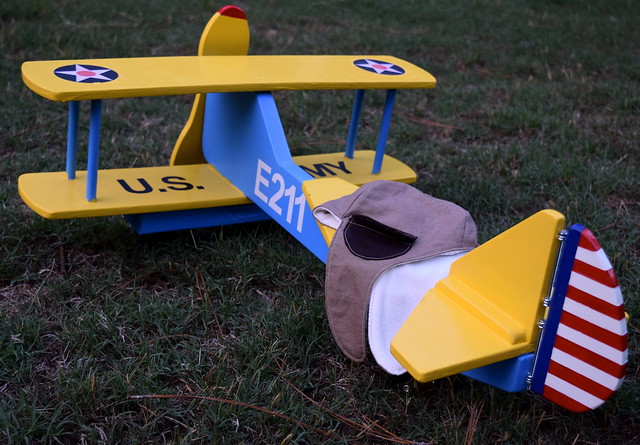
I made this using linen for the outer fabric and a light fleece for the inner fabric.  Both were pre-washed prior to sewing.  I like the fabric combination.

I chose not to add the velcro enclosure.  My daughter prefers to put this hat on when she starts playing with the airplane and then take it off about 2 minutes later, so the velcro is unnecessary.

See Kate Sew Cozy Pilot Hat

Pilot Hat Review: As far as the pattern, I’m mostly happy with it…  I think it’s overall a cute pattern.  I think the angular top is a bit odd and slightly alien-ish.  Traditional pilot hats were not shaped like that so I’m not quite sure why the hat is shaped that way.  I sewed it with a larger seam allowance at the very top in an attempt to minimize that aspect of the hat and you can still see it a little.

Wooden AAC Plane

The instructions were adequate.  I would have preferred a few additions, such as a diagram showing where she measured the head for fit recommendations or a table with the finished size so that I could better decide what size to make.  I also wish she would proofread a little bit better.  On page 11, the instructions said, “… cut out bow pattern pieces located on page xx.”  I know that’s a small detail, but her patterns (while reasonably priced) cost enough that I expect them not to have basic typos like this.  If you have a free tutorial or the pattern cost next to nothing, I am more accepting of typos, but these are small and easy to catch so it makes me wonder about the testing process.

See Kate Sew Cozy Pilot Hat

One other issue I had with this pattern was that it did not call for topstitching, or ironing of any seams.  I added it everywhere – partially because I like the finished look of it and partly because I know that it helps a garment (or hat) wash and wear better.  I know that I can put this hat through a washing machine and it will come out  fine.  The ironing thing is a personal preference, I suppose, but if I had not made other hats before I don’t know if I would have known to do it and would not have as good of a result.  I think that for a pattern that seems to be aimed at beginners, it doesn’t have quite enough detail.

Wooden AAC Plane

Overall, it’s a cute hat, and with some modifications I will probably make this again.

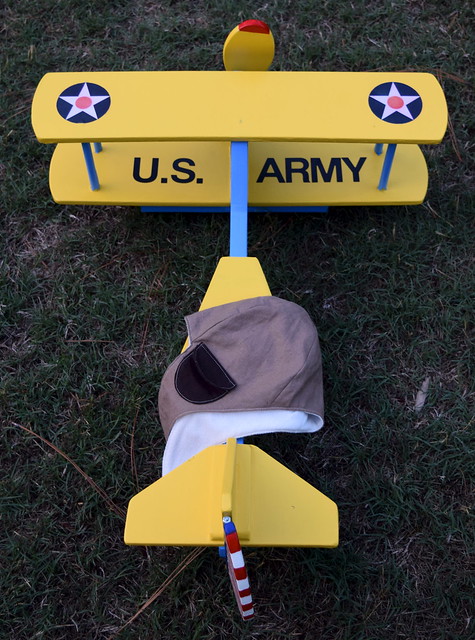
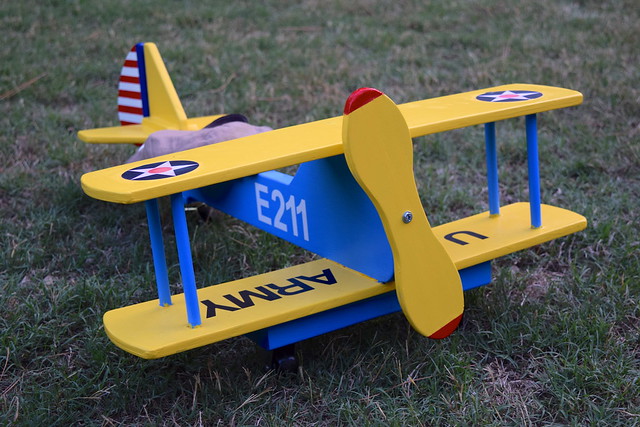
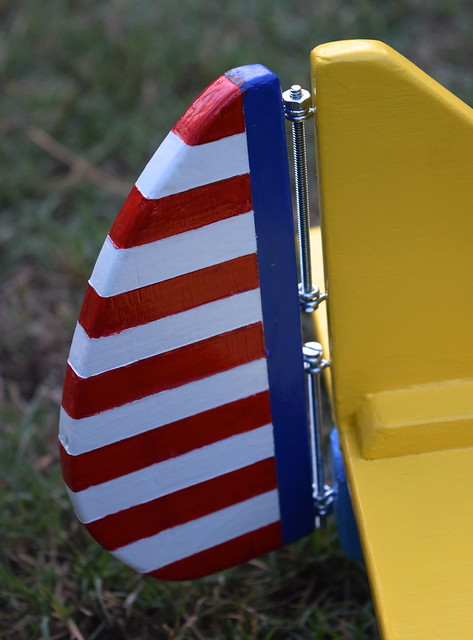
The hat was an accessory to go with the absolutely awesome airplane my husband made the little girl for her birthday.  She enjoys pushing it around, making the rudder flap, spinning the propeller, and scooting around in circles on it.  She knows that the hat goes with the airplane, but it usually doesn’t last long.  Probably because the hat is lined with fleece and it’s really hot in June in North Carolina.  The airplane is made to look like an old World War II Army Air Corps trainer.  I may be slightly partial, but I think he did an incredible job on the plane!

-Heather

Linking to: Anything Goes MondayFabric Tuesday @ Quilt StorySew Cute Tuesday @ Blossom Heart QuiltsLet’s Bee Social Wednesday @ SewFreshQuiltsNeedle and Thread Thursday @ My Quilt InfatuationFinish it up Friday @ Crazy Mom QuiltsWhoop Whoop Fridays @ Confessions of a Quilt AddictTGIFF , Fabric Frenzy Friday @ Ft. Worth FabricSewjo Saturday at My Go-Go LifeShow off Saturday at Sew Can She, and Sewing Saturday at Simple Simon & Co


Bee Blocks – Received!

It is always fun to receive bee blocks!  I try to do the 4×5 Modern Bee quarterly, which is nice because it has instant gratification as far as bees go.  You send your blocks and receive your blocks at the same time.  This spring I was in hive 3, and was fortunate to receive the following blocks to add to my Real World Red & White Sampler:

Spring 2014 4x5 Modern Bee Hive 3

1. Dawn, 2. Christina (illy23), 3. Brandy (Jade Rose), 4. Sarah (Coincidentally Quilting), 5. Cinda (Sewbusy64), 6. My Double Pinwheel

I am also part of the Stash Bee, which is a more traditional monthly bee where you send away a block each month, and then have to wait until your month to get all your blocks in return.  When it’s your month though – it’s magical!  Everyday going to the mailbox felt like my birthday.

Hive 12 did an amazing job on my blocks.  I requested that they do my Square Dance block using my paper piecing tutorial in gray and shades of aqua.  As you can see below, they did beautiful work.

Square Dance Quilt

Thank you to the ladies of Hive 12: Heather (Quilts in the Queue), Cheryl (Texas Quilting Gal), Jennifer (Taken Patiently), Michele, Kristel (Work in Progress Girl), Laura (Sew Frou Frou Quilter), Toni (Gypsygirl Wanderlust), Genevieve, Francis (Quilts n Stuff), and Willa.


-Heather


Linking up to:

Anything Goes MondayFabric Tuesday @ Quilt StoryLet’s Bee Social Wednesday @ SewFreshQuiltsNeedle and Thread Thursday @ My Quilt InfatuationWhoop Whoop Fridays @ Confessions of a Quilt AddictFabric Frenzy Friday @ Ft. Worth Fabric, and Sewjo Saturday at My Go-Go Life.


Sewaholic Belcarra Blouse Review

Belcarra Blouse Review

I am going to give a quick spoiler and say I love the Belcarra Blouse by Sewaholic!  Continue reading my Belcarra Blouse Review to see why…

Sewaholic Belcarra Blouse

This blouse has a similar look to a blouse I purchased and really like (but it is slightly too big, and made from a kind of weird polyester that is not comfy when it’s super hot out – which North Carolina is HOT in the summer).  Originally, I was going to try to trace the pattern and make it smaller, but honestly – that was not going to happen anytime soon and I wanted a shirt to wear this summer.  So, when I saw this blouse came in a PDF, and was on sale for just under $10, I had to go for it!

Pattern: Belcarra Blouse by Sewaholic.  I used the PDF version of the pattern and I made view A.

Fabric: lightweight 100% cotton

Sewaholic Belcarra Blouse

Sizing: I discovered from this pattern that I am not a pear shape, which is what Sewaholic designs for.

I was a 16 in the bust, 12 in the waist, and 10 in the hip.  I had seen an awesome Madras version on Meg’s blog where she mentioned she went down a size and used the finished measurements to find the size that gave her 2 inches of ease.  I made the same choice, and cut a straight size 14.  The fit looks pretty good in the chest and waist, but I did take it in around the hips – probably to about a 12.

I must admit that about halfway through making this shirt, I had one of those making moments when you question every decision you’ve made associated with a project.  As in, maybe I should have made a muslin?  Did I cut out the right size?  Why did I make this with good fabric that cost $15 a yard?  In my case, I had a major doubt about what size I cut out.  I actually took the shirt with only the shoulder seams sewn into the bathroom, where I was pinching the seams to try and tell if it would fit around my chest or not.  Thankfully, the finished sizes on the pattern were correct, and my chest did fit into the shirt!

Fabric Used: According to the pattern, a size 14 View A shirt should take between 2-2 1/4 yards of fabric (depending on width).  I was able to cut it out of less than 1.5 yards.  I did piece together the neck binding, but that doesn’t show so I didn’t care that it had an extra seam.  Maybe it’s my quilting background that makes me a ninja at maximizing fabric usage?

Instructions:  This blouse is fairly simply to construct, but any questions I would have had were answered in the sew-along.  The instructions and photos in the sew-along made this easy.  The finishes on this project are awesome.  I felt like an amazing seamstress while I was making this.  The pattern pieces have the seam allowance printed on them, which is a nice touch.

Belcarra Blouse

Pattern Issues: I had a little bit of odd fabric that had to be eased in when sewing the sleeves to the front piece.  It was not excessive, and that edge is on the bias, so it is possible it stretched (but I was super careful not to move that fabric, so who knows?)  The neck is also wide.  Bra choice will have to be considered when I wear this.

Fabric Choice: This pattern recommends lightweight cotton, which is what I used, and it is great.  It is going to be so comfortable to wear this summer.

Finished Product: I love how this shirt turned out!  It is going to be in heavy rotation this summer.

Using as scrap – wearable inside the house – wearable outside the housewearing outside the house and will proudly say I made it

Husband’s opinion: The first thing my husband said when he saw it (about halfway through construction) was that it didn’t look handmade, which I take as a compliment 🙂

Belcarra Blouse

Final Thoughts: I may try narrowing the neck on my next version because it does occasionally show my braw strap.  I will definitely grade down to a 12 in the hips.  I’m still debating whether or not to try doing a 12 with a FBA.  I think it could potentially fit slightly better, but this one fits fine.  We’ll see how motivated I get before I make my next one… and there will be a next one!

Linking up to Fabric Frenzy Friday @ Ft. Worth Fabric, Show Off Saturday at Sew Can She, and Sewing Saturdays at Simple Simon & Co.

I also entered this in the New to Me Indie Pattern Contest at The Monthly Stitch.