Fresh Sewing Day – January Summary

January flew by!  I can’t believe it’s already time to do a summary for Fresh Sewing Day and the Small Blog Meet.  For those coming from the Small Blog Meet, I am a quilter that loves to piece and quilt, and sew clothes for my 1 year old daughter.  Welcome, and please check out the other projects on my blog.

I joined two bees so far this year.  I’m really enjoying it so far.  It’s a lot of fun to do colors and blocks that I wouldn’t have thought of myself.

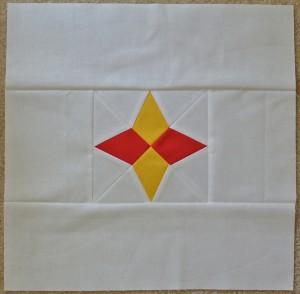
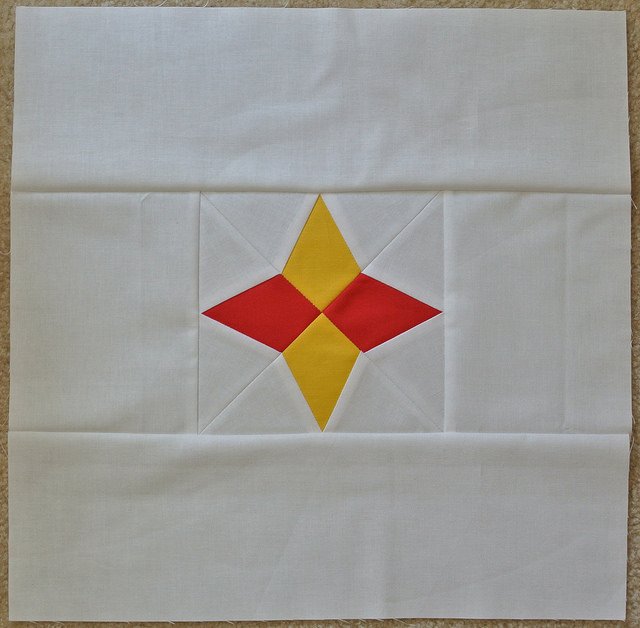
For the Stash Bee, I made this red and yellow block for Heather from Quilts in the Queue.

That Stash Bee Hive #12 January Bee

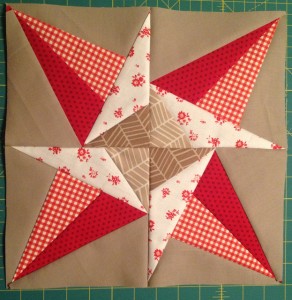
I made my test block for the 4×5 Modern Bee.

4x5 modern bee hive #4 test block

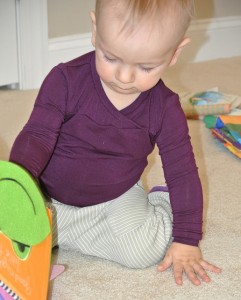
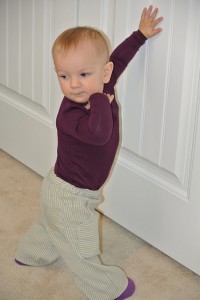
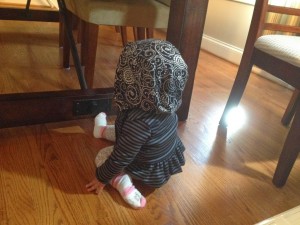
I also participated in Kids Clothes Week.  Part 1 of my week can be found here.  The pants were really the highlight of the week.  I finished up the week by turning the Oliver and S Hopscotch Knit top into a onesie.  The completed outfit is shown below.

She kept pulling on the neck, I think because it is much stretchier than the onesies she normally wears.

O+S Hopscotch knit onesie and Sandbox Pants
It’s such a soft knit, I kind of wish it was for me.  However, I only had 1/2 a yard, so I managed to get a 12-18 month onesie and thought I was doing good.
O+S Hopscotch knit onesie and Sandbox Pants
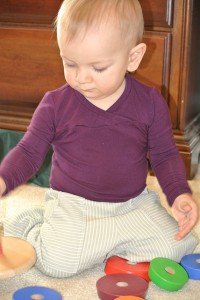
The linen pants are a little big despite being 12-18 months, but I’m ok with that because I love them and hopefully they will still fit this fall.
O+S Hopscotch knit onesie and Sandbox Pants
And now, she shows off the whole outfit 🙂
O+S Hopscotch knit onesie and Sandbox Pants
Thanks for checking out my blog, and I hope you stick around and see what else I have here!  

Go Army! Beat Navy! Baby shirt :)

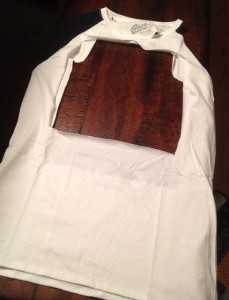
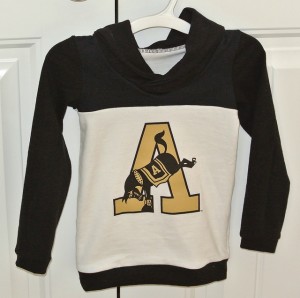
The greatest rivalry in college football – Army vs. Navy was the second weekend in December.  That was awhile ago, and I had this post half written forever so I finally decided to finish it and hit publish anyway.  Since we didn’t have any plans to do anything to celebrate, originally I was not going to make anything for the little girl.  Then my husband asked if we had anything for her to wear.  I then sorted through some drawers to get rid of too small clothes and I found a shirt that would make the most adorable Army baby shirt.  Fast forward a couple hours, and I cut up two (scratch that – three) adult women’s t-shirts to make 1 baby shirt.  Not sure how that happens…

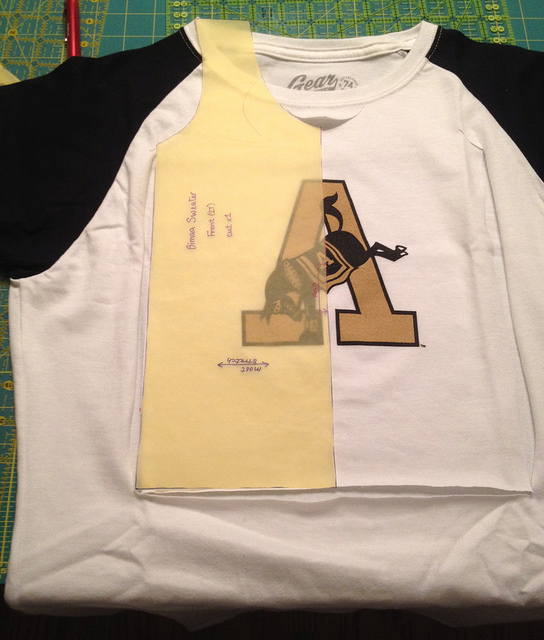
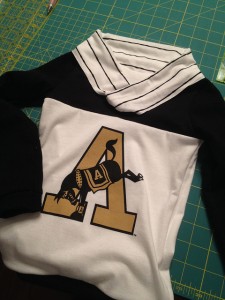
I’m doing another version of the Bimaa from LouBee Clothing, this time with the shawl collar.  My last version is here.

The front of the shirt didn’t go up high enough for the pattern, so I used the arm of the shirt to cut out the extra fabric I needed.

Bimaa Sweater in progress

Bimaa Sweater in progress

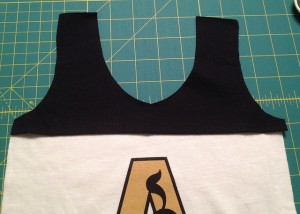
The sleeves and cuffs came from the back of another black t-shirt I had set aside to make a t-shirt quilt out of.  The shawl collar was supposed to be the only new fabric in this shirt (Thank you, Girl Charlee Black Friday Sale).  Look ahead to see what really happened.

This is what is left of my former t-shirt!  Just imagine another black shirt without a back – the black doesn’t photograph well.  Turns out this is how it takes two three women’s shirts to make one baby shirt.

Bimaa Sweater in progress

Once I cut out all the pieces, I rethreaded the serger with black thread.  Does anyone else have trouble deciding what thread color to go with on a multi-color project?  I considered using black and white as needed, but that seemed like a lot of thread changing.  In the end, when I had to piece together the front pattern piece there was black fabric in almost every single seam so I went with black.

When it came time to put the shawl collar on, I didn’t like the striped fabric.  It would have worked, but it wasn’t quite as athletic as I was going for with the color blocking and logo on this shirt.

Bimaa Sweater in progress

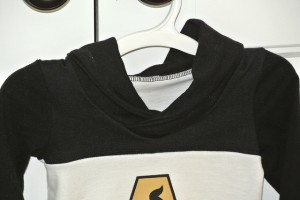
That led to the 3rd t-shirt being cut up.  I need a black collar.  Luckily, I am never going to wear my old unit’s t-shirt again so it doesn’t matter that I cut the bottom six or so inched off to make this collar.  I love it with the black collar!

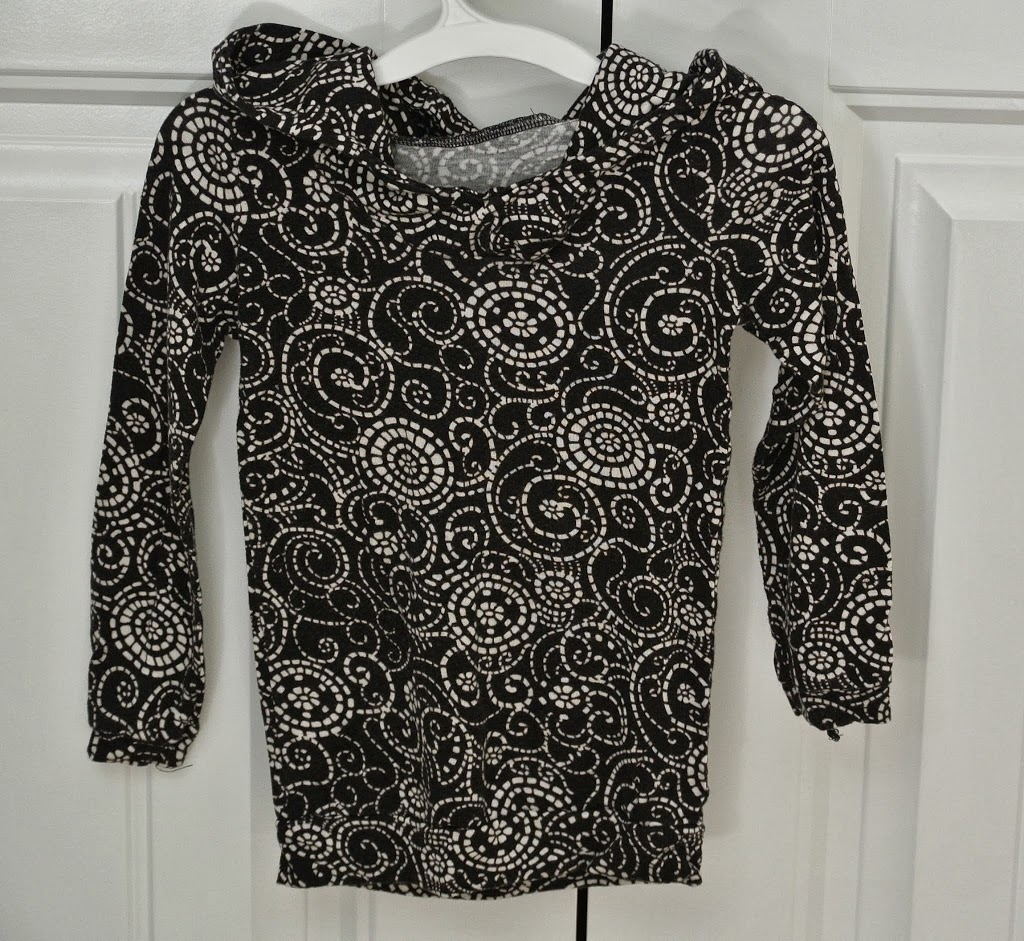
Bimaa Sweater

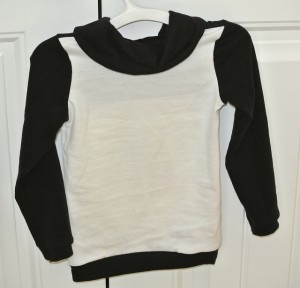
Here is a closeup of the shawl collar.  I tried to lighten up the photo to see it better, but it is still kind of hard to see.  Black is hard to photograph!

Bimaa Sweater

The back – slightly wrinkled from the fit test.

Bimaa Sweater

Game Day outfit is below!  She was almost adorable enough to make up for the terrible football game.

Bimaa Sweater

Then, because it seemed logical, I didn’t want the fabric I used for the collar to go to waste, and I had an extra black color block piece for the front… I cut out another bimaa.  The next one is below.

Bimaa Sweater

Linking up to Whoop Whoop Fridays at Confessions of a Fabric AddictAnything Goes Monday at Stitch by Stitch, and You Flew Sewing Linkup at Feather’s Flights.

Spinnaker Quilt for my dad

Now that Christmas is over, I can share the Spinnaker Quilt that I made for my dad.

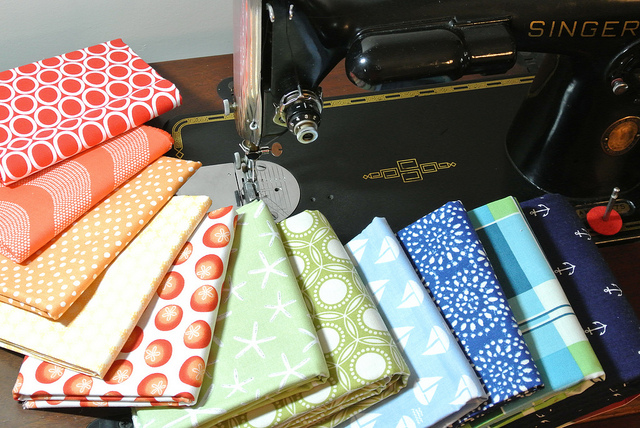
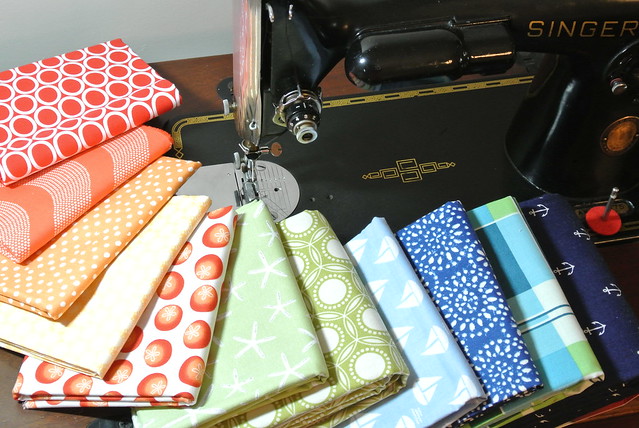
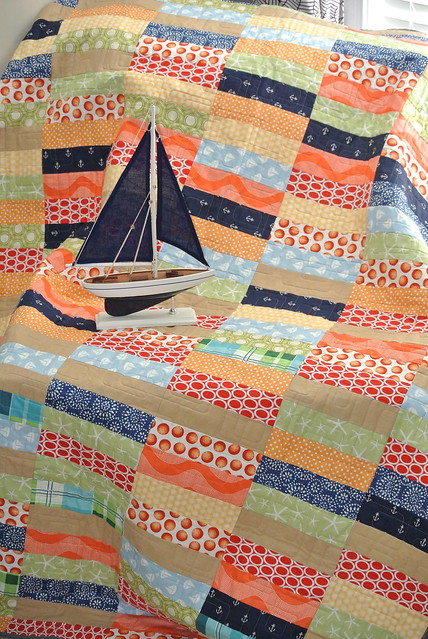
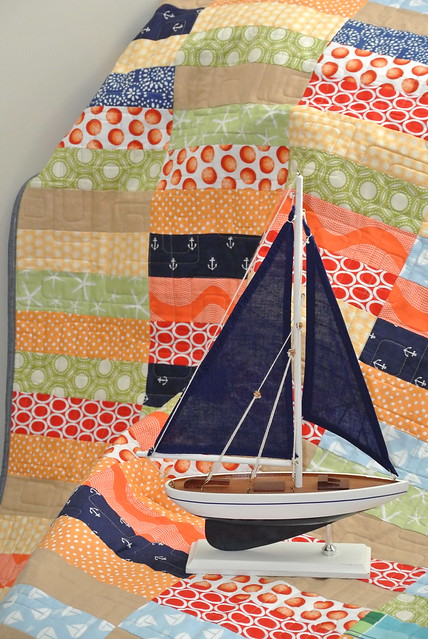
This summer I went to visit my parents and Grandmother in Wisconsin.  While I was there, my dad described a skirt he had seen and asked if I could recreate a quilt like it.  He wanted a quilt made up of rectangles about 2 inches by 8 inches in yellow, red, and green with some white in there to calm it down a bit.  His major descriptor was that he wanted it to be bright and cheerful.  Later, the request was modified somewhat as he said it reminded him of the colorful spinnaker sails at a sailboat regatta.

I had already pulled some nautical fabrics before the spinnaker theme was requested, so I knew I was going in the right direction.  My dad grew up around boats, and had a boat most of his life.  Some of my fondest memories growing up are from sailing down the Columbia River at dusk.

The making of the Spinnaker Quilt

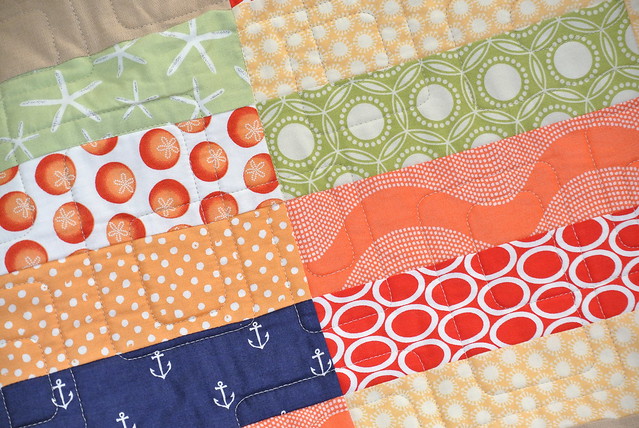
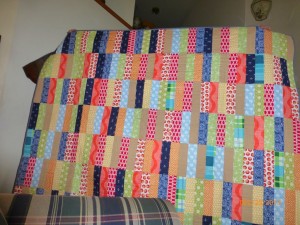
Each of the 238 rectangles in this quilt measure 2.5 inches by 8 inches prior to sewing.

The making of the Spinnaker Quilt

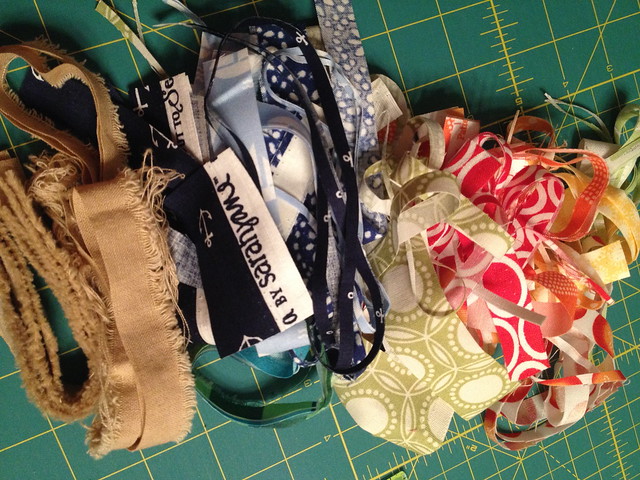
My trimmings turned out quite pretty, at least more so than usual.

The making of the Spinnaker Quilt

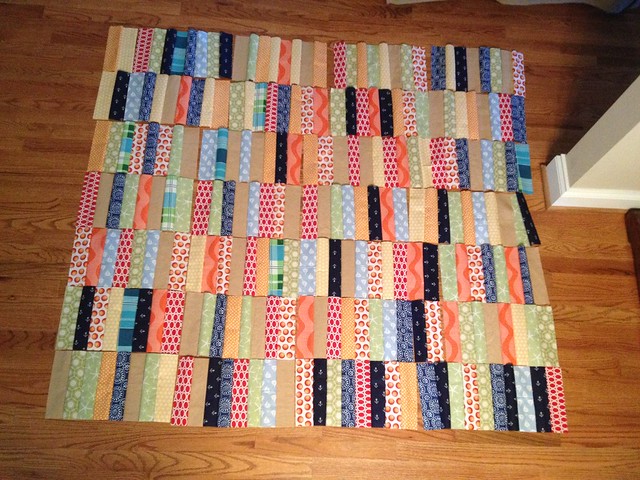
The layout is 34 rectangles vertically and 7 rectangles wide.  The top photo is prior to being sewn together – it was a risk to use the design floor with baby and dog around.

The making of the Spinnaker Quilt

The making of the Spinnaker Quilt

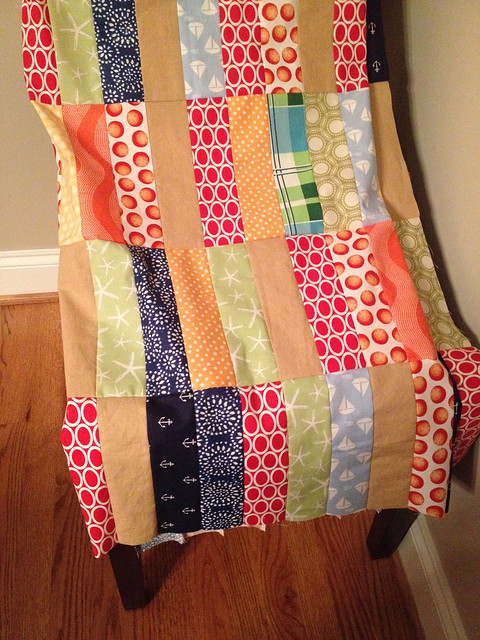
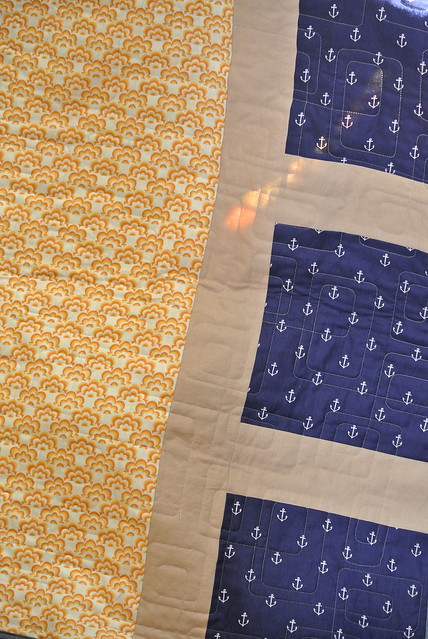
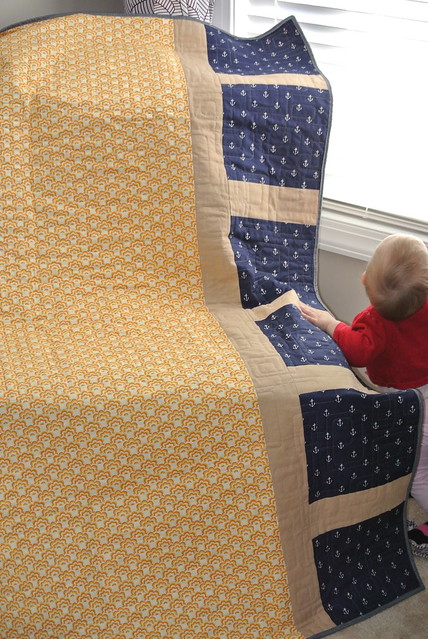
The back is pieced – I didn’t have enough of the one main fabric, so I pieced in the linen and anchor fabric as a design choice.  Plus, I think pieced backs are kind of fun.

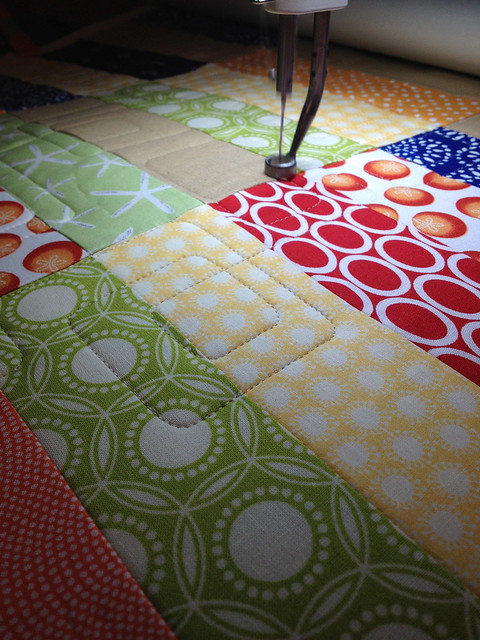
I chose to quilt it with a new panto – rounded rectangles.  I wanted something masculine, yet the rounded edges helped to soften the design.  I think a sharp quilting design would have been too much for this quilt.

The making of the Spinnaker Quilt

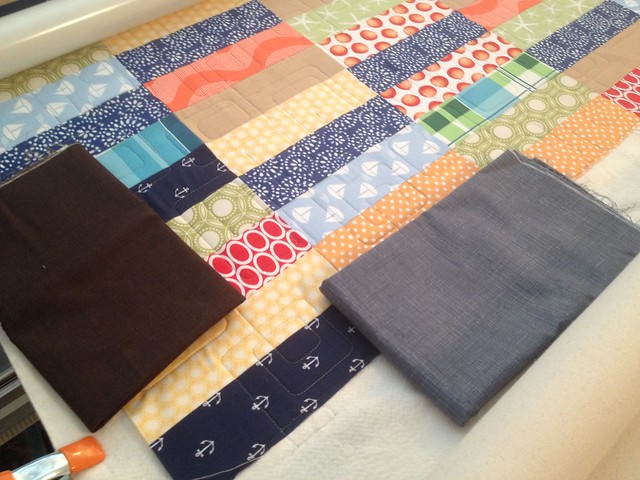
I debated about the binding, but after getting some confirmation from instagram friends, I went with the gray binding.  It fit the nautical theme much better.

The making of the Spinnaker Quilt

The making of the Spinnaker Quilt

And now for the stream of finished pictures… The quilt had been finished for several days before I finally had a sunny day to take them!

Spinnaker Quilt

Spinnaker Quilt

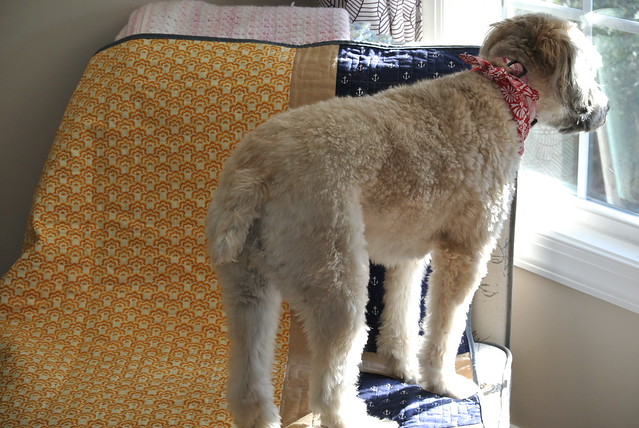
I had trouble taking pictures of the back thanks to my helpers – my two girls.  First, the dog wanted to see what was going on outside.

Spinnaker Quilt

After I closed the window, the daughter walked over trying to figure out why she couldn’t see outside.

Spinnaker Quilt

It’s a very large throw, which made it a little difficult to get a photo of the entire thing inside my dry house.  I don’t risk quilts outside when it is wet.

Spinnaker Quilt

Spinnaker Quilt

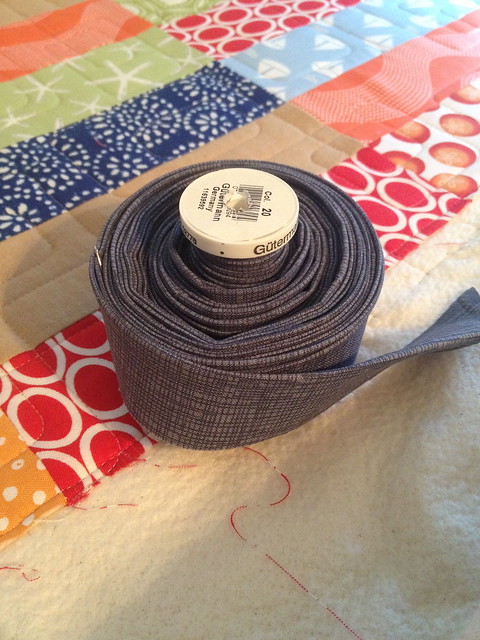
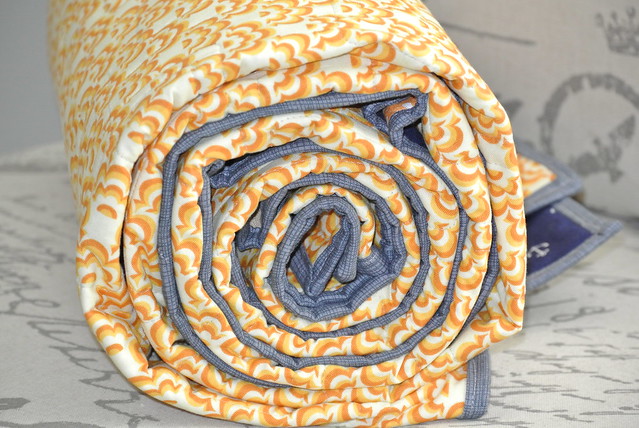
Lastly, the roll shows the binding color the best.

Spinnaker Quilt

My dad loved it! Below is my dad’s view of the quilt being shown off Christmas morning.  So much so that he said it was too nice to use and that he wanted to just hang it up.  Luckily, my mom (who crochets, and therefore understands that things are made to be used) told him it was too nice not to use and that he has to use it.  A successful Christmas quilt!
Spinaker QUilt

Linking up to: Quilt StoryYou Flew Tuesdays at Feather’s FlightsFinish it Up Friday at Crazy Mom QuiltsFriday Favs Party at Nap Time Crafters, Anything Goes Mondays at Stitch by Stitch, and while not quite a work in progress (because I couldn’t share it during the progress) Work in Progress Wednesday at Freshly Pieced.

How to sew a baby Santa Hat tutorial

I was searching for a tutorial on how to make a baby Santa hat, and found crochet and knitting tutorials and patterns galore but nothing for sewing with knits or fleece.  I played around and made a couple cute versions for my daughter, so hopefully this very loose tutorial can help someone else.

If you choose to do the traditional santa hat, it is a bit easier.  I used a serger for this project, but it was really just because I have a new serger that I was excited and wanted to use.  A regular sewing machine would work just as well.

1. Measure your child’s head.  My daughter’s head was a little over 18.25 inches in circumference.

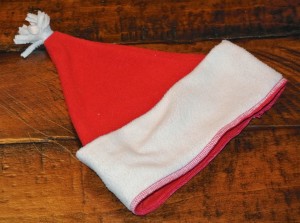
2. Make hat width about half of the child’s head size.  I made it 9 inches wide.  Cut bottom 9 inches wide, and then go up about 2 inches on the left and right sides of the hat.  For the band, cut white fleece rectangle 18 inches (double the red part’s width) by 6.5 inches.  Make sure the direction of stretch is widthwise when cutting all pieces.

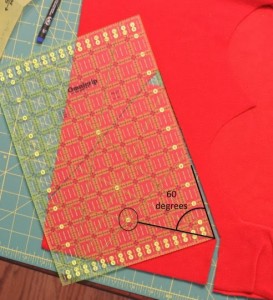
3. Cut the angle for the Santa Hat.  I made mine 60 degree angles using the marking on my quilting ruler.  I just cut up and let them intersect.

4. I cut the top part off because of how I was attaching the fleece pom pom.  If you are hand sewing, I would just leave the angle and sew it on once completed.  Don’t try to serge the fleece with the pom pom in it.  Don’t ask me why I know that.  Just trust me… it’s not worth trying to do no matter how clever it seems.

Example pom pom tutorials: 

5. Sew together the red top angled part of the hat.  If you are using a regular sewing machine, a straight stitch would work for this part.

6. Sew the white rectangle band piece with right sides together on the short end.  Fold the band in half with right sides together.  Sew the white band and red hat together.  If you are using a regular machine, I would use a zig zag stitch for this part so that it will have some stretch to fit on your child’s head.

7. Fold the band down and it is ready for wear!

The skull cap version is a little bit more complicated, but not if you have a hat pattern.

Step one: Get hat pattern.  If you have a knit hat on hand that fits, you can trace it and then add seam allowances to get the proper size.  If you want to make a size 0-3 months, you can use the pattern provided at Zaaberry.  Her instructions on how to assemble the hat are very good and very well photographed, so I recommend using her tutorial for assembly.  
Step two: Cut out two hat pieces and one band piece.  The main hat pieces will be red and the band will be white.  Take care to make sure the direction of the fabric stretch is horizontal so that it can stretch and stay on your little one’s head.  
Step three: Make white pom pom or get pom pom for top of the hat.  Or buy some pom poms from the store, whatever is easiest.  Whatever method you use, make sure there is some thread or fleece or other method of attachment to sew into the hat.  If not, you can hand sew it on at the end.  
Step three: Prepare and Sew together the hat pieces.  Fold the hat piece in half and sew the cut out portion first.  Repeat for second piece.  Then put the right sides together and sew the half moon shape leaving the opening for the head.  Sew the rectangle band piece with right sides together on the short end.  Fold the band in half with right sides together.  
Step four:  Sew the band and hat together.

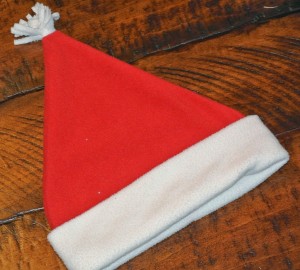
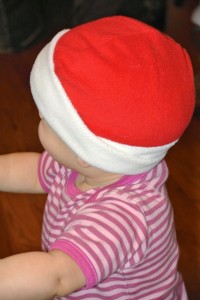
fleece baby santa hat

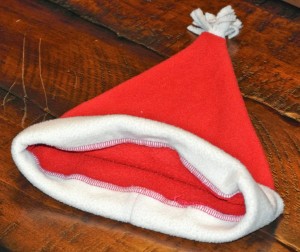
I originally had planned to sew a pom pom on the top, but it really fits better under a hood without one. The colors still read Santa hat without the pom pom.  Enjoy!

Linking up to: Make it, Wear it from The Train to CrazyFabric Tuesday at Quilt StoryYou Flew Tuesdays at Feather’s Flights, “We did it Wednesday” at Sew Much Ado and Friday Favs Party at Nap Time Crafters.

I love my new serger!

No seriously, I can’t believe I didn’t get one sooner.  I love my serger.  I have the super-basic Brother 1034D.  It was supposed to be my birthday present back in May, but I wasted months trying to figure out why there is such a price jump in sergers and if the more expensive ones are worth it.  I chose to get a basic serger and then I will get a cover stitcher at a later date.  The combined cost will be less than many of the fancy sergers I was considering.  Despite all my debating, I finally got my serger and I love it!

Why do I love it?  It is amazingly fast, and the finish looks great.  It is also easy to use.

I was a little intimidated at first, mostly because people talk about how hard sergers are to thread and to get the tension correct.  I watched the video tutorial, and then set out to serge.  I was a little upset at first because out of the box, the thread kept breaking and it was not working like the video.  Then I discovered one of the spools had the edge with the cut in it up, so the thread kept getting caught and breaking.  One of the bonuses of this almost tragic frustration is that I got really good at threading it almost immediately.  In fact, I prefer rethreading it when I change thread color to doing the tie and pull thread through method that even the video recommended.

How did I get to love my serger so fast?  I used it on real projects to learn.  I know people advise you to practice on scraps first, but I get bored.  So, after about 12 inches of sewing on scraps I jumped to real projects.

I had two knit projects cut out ready to go: the Bimaa Sweater (LouBee Clothing) and the Lily Blazer (Peek-a-boo Pattern Shop).  It turns out I did not choose the easiest projects – not that the patterns are difficult in any way – I chose difficult fabrics.

For the Bimaa, I chose the lightest knit ever from JoAnn Fabrics.  I made a 2T, because my daughter’s measurements put her in the 12 month size but I’ve read that it fits tight and I wanted it to fit over onesies.  I should have done the 12 month length with the 2T width because the body and sleeves are about 2 inches too long.  Oh well, room to grow right?

I followed the advice from the video tutorial to change the feed differential to 0.7 for light knits and had no issues putting the Bimaa together.  The serger goes so fast I had to get over my quilter’s need to pin every two inches (and more often on curves).  I felt very proud of my first knit garment when I finished it.  There are a few seams that are not as attractive as they could be on the starts and stops, but it’s a learning process.

The only odd thing about this pattern is that the hood is huge!  My daughter has a large head – like 96th percentile huge head – and she swims in it.  It is also so big that it pulls the shirt too far back because of too much fabric weight, so it pulls at the neck.  If I were to ever make this hoodie in the smaller sizes I would probably try to draft down the hood a little.  Most likely, I just won’t make the hood option again until she is older.  I will probably do the shawl option next.

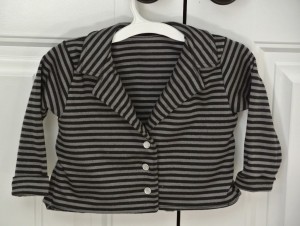
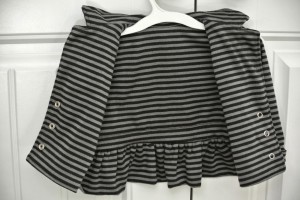
For the Lily Blazer I chose a beautiful stripe that I am pretty sure I also got at JoAnn Fabrics.  Knit stripes are probably not a good choice for a second garment ever made on the serger, but I went for it!

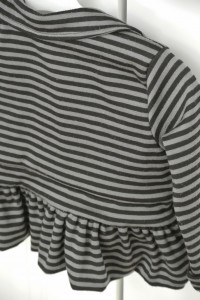
Most of the stripes ended up matching, so I’m pretty happy with it.  I made the 12 month size.  I love the ruffle on her butt when she is crawling around.

The only other change I made was to use snaps instead of buttons because they are easier to dress her with.

The way this is constructed it becomes fully lined when you are done which is very nice.

My only complaint is that the sleeves are too long with the cuff.  I should have followed the baby example the pattern came with where the designer didn’t add the cuff and just hemmed the sleeves.  Then, the length would have been perfect.  As is, I fold the cuff up completely and the serged edge shows.  The black thread against the dark fabric isn’t really noticeable so in reality, I’m probably the only person that will notice.

I can’t wait to keep using my new toy!

Linked to: Make it, Wear it from The Train to Crazy, Fabric Tuesday at Quilt StoryYou Flew Tuesdays at Feather’s Flights and Friday Favs Party at Nap Time Crafters.
Oliver and S Fairy Tale Dress Christening Gown

A tale of two christening gowns: The heirloom and the Oliver & S Fairy Tale Dress

Situation: The first was my baptism dress from when I was baptised and my mother passed it on to me to use with my daughter.  I was baptized at 6 months so I thought it would fit my 9 month old daughter.  Unfortunately, it did not fit.  That left my mother and I to start making a dress Thursday morning for church on Sunday morning at 9:00 am with the added detail that 6 additional family members were arriving Saturday afternoon, so it had to be finished before then.

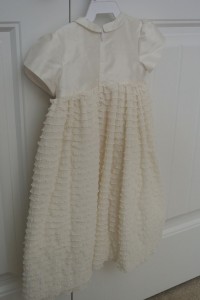
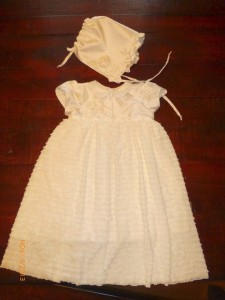
Solution: We chose to flip the Oliver & S Fairy Tale Dress.  I wanted a peter pan collar and sleeves with an empire waist to echo my original dress that my mother had made.  The fairy tale dress gave me that bodice top and the adjustments gave the long traditional bottom.

To accomplish this I had to make a couple minor adjustments to the pattern.  I cut off the fitted dress at an empire waist height, and adjusted the skirt length to go down to the floor.  I also took a lot of the gathering out of the skirt because of the silk dupioni fabric I chose to use, and I also felt like it would be overwhelming for such a little girl.

My daughter measured 19.5 inches at the chest which put her as a perfect size 6-12 months, but due to the compressed time frame I didn’t have time for a muslin and couldn’t risk it not fitting.  Therefore, I made the 6-12 month size with the 12-18 month width as you can see in the bodice pattern photo.  After it was finished, she had enough room that I’m sure the 6-12 month width would have fit perfectly fine but I just couldn’t risk it turning out too small.

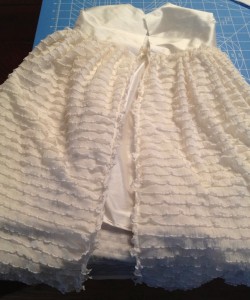
I also added ruffle fabric for the skirt.  I made the ruffle fabric about 4-5 inches longer than the silk just to cut down on bulk and make it easier for my daughter to move and easier for me to hold her.

To add the ruffle fabric I used the silk as the lining, but not as the lining like the pattern calls for.  Due to the thinness of the ruffle fabric, I could not use it as an outer layer to attach the zipper to.  I treated the silk and the ruffle as one (outer) layer of fabric with no lining.  This (combined with the empire waist) led to a couple minor differences from the pattern: 
– The skirt seams had to be finished because they were not sandwiched within the lining.  The ruffle fabric does not fray so it did not need to be finished – I just cut it at the length I wanted.  

– I did not use a side seam for the ruffle layer.  I used the entire width of fabric by the length I wanted for the skirt and only had the back seam.
– Shorter zipper: with the empire waist there is no need for such a long zipper.  I ended the zipper about three inches below the empire waist and it was long enough to get my daughter in and out easily. The instructions for an invisible zipper were good, but I hadn’t done one in forever so the Coletterie tutorial helped fill in the blanks for me.  

– Lining: My mom hand stitched the lining down on the inside of the dress.  We also left the seam of the skirt and bodice upwards instead of ironing it down like the pattern calls for.  That seam was then covered by the bodice lining.  
– Hook at top of zipper: I left it off and it stayed closed just fine throughout the day.  

This was the late night photo when we finished the dress Friday night – ahead of schedule!!

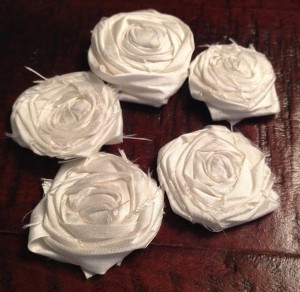
I added some silk flowers to both the bodice and the bonnet.  I used this tutorial from Just Another Hang Up for the flowers.

 The bonnet is a combination of several tutorials that I found online because I didn’t find a single one that was what I wanted.  I got the shape from this one and the ruffle from this one.

I love how the combination turned out!  The tulip sleeves, peter pan collar, and ruffle fabric made such a sweet dress.  This may have taken more time to make than the time she wore it for, but I really love it and maybe someday this can be worn again.  The wrinkles show she wore it most of the day.
Lastly, a vintage view of a beautiful girl in a dress made by her mom and grandma on a quilt made by me.

Linking up to Show and TellMade By Hand, Fabric Tuesday and You Flew Tuesdays.