Oliver and S Fairy Tale Dress Christening Gown

A tale of two christening gowns: The heirloom and the Oliver & S Fairy Tale Dress

Situation: The first was my baptism dress from when I was baptised and my mother passed it on to me to use with my daughter.  I was baptized at 6 months so I thought it would fit my 9 month old daughter.  Unfortunately, it did not fit.  That left my mother and I to start making a dress Thursday morning for church on Sunday morning at 9:00 am with the added detail that 6 additional family members were arriving Saturday afternoon, so it had to be finished before then.

Solution: We chose to flip the Oliver & S Fairy Tale Dress.  I wanted a peter pan collar and sleeves with an empire waist to echo my original dress that my mother had made.  The fairy tale dress gave me that bodice top and the adjustments gave the long traditional bottom.

To accomplish this I had to make a couple minor adjustments to the pattern.  I cut off the fitted dress at an empire waist height, and adjusted the skirt length to go down to the floor.  I also took a lot of the gathering out of the skirt because of the silk dupioni fabric I chose to use, and I also felt like it would be overwhelming for such a little girl.

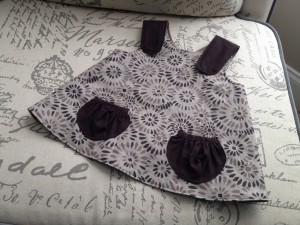
My daughter measured 19.5 inches at the chest which put her as a perfect size 6-12 months, but due to the compressed time frame I didn’t have time for a muslin and couldn’t risk it not fitting.  Therefore, I made the 6-12 month size with the 12-18 month width as you can see in the bodice pattern photo.  After it was finished, she had enough room that I’m sure the 6-12 month width would have fit perfectly fine but I just couldn’t risk it turning out too small.

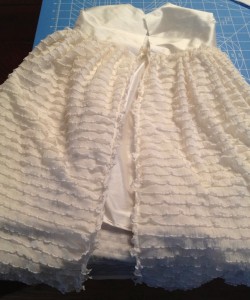
I also added ruffle fabric for the skirt.  I made the ruffle fabric about 4-5 inches longer than the silk just to cut down on bulk and make it easier for my daughter to move and easier for me to hold her.

To add the ruffle fabric I used the silk as the lining, but not as the lining like the pattern calls for.  Due to the thinness of the ruffle fabric, I could not use it as an outer layer to attach the zipper to.  I treated the silk and the ruffle as one (outer) layer of fabric with no lining.  This (combined with the empire waist) led to a couple minor differences from the pattern: 
– The skirt seams had to be finished because they were not sandwiched within the lining.  The ruffle fabric does not fray so it did not need to be finished – I just cut it at the length I wanted.  

– I did not use a side seam for the ruffle layer.  I used the entire width of fabric by the length I wanted for the skirt and only had the back seam.
– Shorter zipper: with the empire waist there is no need for such a long zipper.  I ended the zipper about three inches below the empire waist and it was long enough to get my daughter in and out easily. The instructions for an invisible zipper were good, but I hadn’t done one in forever so the Coletterie tutorial helped fill in the blanks for me.  

– Lining: My mom hand stitched the lining down on the inside of the dress.  We also left the seam of the skirt and bodice upwards instead of ironing it down like the pattern calls for.  That seam was then covered by the bodice lining.  
– Hook at top of zipper: I left it off and it stayed closed just fine throughout the day.  

This was the late night photo when we finished the dress Friday night – ahead of schedule!!

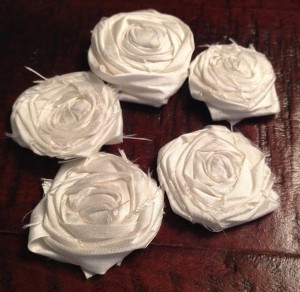
I added some silk flowers to both the bodice and the bonnet.  I used this tutorial from Just Another Hang Up for the flowers.

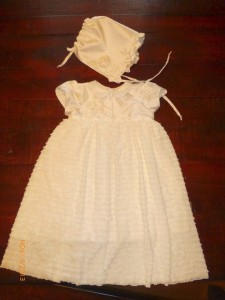
 The bonnet is a combination of several tutorials that I found online because I didn’t find a single one that was what I wanted.  I got the shape from this one and the ruffle from this one.

I love how the combination turned out!  The tulip sleeves, peter pan collar, and ruffle fabric made such a sweet dress.  This may have taken more time to make than the time she wore it for, but I really love it and maybe someday this can be worn again.  The wrinkles show she wore it most of the day.

Lastly, a vintage view of a beautiful girl in a dress made by her mom and grandma on a quilt made by me.

Linking up to Show and TellMade By Hand, Fabric Tuesday and You Flew Tuesdays.

Kids Clothes Week, Fall 2013

I was very excited to participate in Kids’s Clothes Week for the first time!  This is pretty much what I got done for the week, but I was showing real time progress over on Instagram throughout the week.

First, the plan.  There have been many versions of the plan.

Version 1 – make 3-4 bonnets to last through winter into spring, 2 O+S seashore dresses, and a fall themed pinafore.   Now, why did it seem like a good idea to make two O+S summer dresses in October?  I wanted one as her Army vs. Navy outfit, and figured while I was at it I should also make the next size up for next summer.  I wanted the upper portion embroidered with the Army logo, but after many hours of searching I realized West Point has its copyrights locked up so tight you can’t even find a legitimate way to do what I wanted to do.  Also, realistically we are going to be sitting on our couch watching the game so it doesn’t matter what she wears.  Seashore dresses out.

Version 2 – I bought a serger (yay!), so what better time than the present to learn how to use it?  I saw Bimaas and leggings in my future.  Turns out the serger doesn’t come with thread and the instructions I need to watch on a windows computer.  My windows laptop died over a year ago.  Moving on…

Version 3 – Get ready for a Southern Winter Kids Clothes Week.  This still includes a bonnet and pinafore.  Now, I added flannel lined Quick Change Trousers, baby mittens, lumberjack hat, scarf, and O+S hood.  Neither winter hat was completed.

Pinafore: The pinafore needs two buttonholes.  In my defense, my regular machine decided it doesn’t want to sew without leaving huge thread nests from the bobbin so this was/is on hold while I bought a vintage buttonholer off eBay for my Featherweight, which is what I’m sewing on this week.

The pinafore is using the free pattern from Smashed Peas and Carrots.  I added the pockets on one side, and fall appliqué on the other side.  It is made of linen, and once I get buttons put on will be super cute. These in-progess pictures show the idea.

Side 1:

Side 2: 

Fall applique
Fall baby dress

Baby mittens- version one and two complete.  The concept is good, but my daughter has really long fingers so they just barely fit.  This was my priority because it was 40 degrees several mornings this week and she doesn’t like to keep her hands under the blanket.  I used the tutorial from Speckled Owl Studio.  The only challenge was that tutorial was really meant for newborn mittens to keep babies from scratching themselves as opposed to winter gloves, so I had to do some adjusting.  I used corduroy and fleece to warm them up.  I am still working on sizing because my second version was too large and she just pulled them off her hands in two seconds.

homemade fleece mittens

Bonnet- this bonnet makes my heart heavy.  I absolutely love how it turned out!  The problem is that it is huge!  Her old ones were getting small so I decided to go up two sizes, and it will not fit this winter.  Maybe next week I can face making another smaller one.  This matches the pinafore perfectly, so it would be a shame to not have her wear them together.

Handmade baby bonnet

Winter Quick Change Trousers: I used the pattern from Handmade Beginnings by Anna Maria Horner.  The last pair I made was huge, so I reduced the front piece by an inch on each side.  This was probably a little too aggressive, about 1/2 inch would have probably been perfect.  I also added the tuxedo strip for some fun.  The butt is also the gray elephant fabric, and I love the elephant butt on these!  The inside shown is flannel.  The large size is nice in winter because they do fit over her knit pants.  I used the width reduced 9 month size with 12 month length.

Handmade fleece lined baby pants
Fleece Booties: Also a must in the cold.  I used the tutorial from Dorothy Was Here.  I used the size exactly as is, and they fit my 8.5 month old perfectly.  I will probably have to size them up for another pair before the winter is over.  I would also like to try using the non-stick fabric on the bottom like she suggested, but I couldn’t find any at my fabric store during Kids Clothes Week.  
Handmade winter baby shoes

The combined result of this efforts is my little warm girl below 🙂  Although, we did add two more blankets because it was freezing this morning.  Not too bad for a week’s effort!  Kids Clothes Week has been a blast and I can’t wait for the spring version!

Edited to add:
Linking up to Show and Tell, Made By Hand, and Make It, Wear It.