School Bus T-shirt Review

This is continuing the theme of t-shirts that are long enough to cover my daughter’s upper body.  Given that it has been 90 degrees for the last few days, these were made last fall when it was still cold.  If she needed short sleeve shirts for summer, I would make this pattern again.  The School bus t-shirt is a simple pattern that will be in use for a long time.

Pattern: School Bus T-Shirt from Oliver and S

School Bus T-shirt

Pattern Description (from designer): This basic kid’s T-shirt sewing pattern can be made several different ways. With a long-sleeve and two short-sleeve options, you’ll get endless use from this easy and quick-to-sew style.

Pattern Retail Price: $8.95

Fabric Required: 3/4 yard for up to size 8

Amount of fabric used: I got away with about 1/2 yard, would be less for short sleeves.

School Bus Tee

Sizing: Comes in 6 month to 4 years, then the next size range is 5 years to 12 years.  I made a 2T based on chest measurements with 4T length.

Alterations: I added another inch to the second one because the length on the first one was perfect for now.

Instructions: This is a simple shirt, but the instructions are detailed and have enough information for someone who has never made a t-shirt before.

Pattern Issues: None.  I had to add a lot of length, but I have to do that to all patterns and store bought shirts are too short.

Fabric Choice: I used pink thermal and deer thermal that I bought from Nature’s Fabric last year.  I had a yard of each, and made a long sleeve shirt last winter and this winter from them.  Unfortunately, I don’t think I have enough useable scraps to keep using these fabrics.  I should buy more of the deer while it’s in stock, because she loved it.

School Bus Tee

Finished Product: The school bus t-shirt is a cute, simple tee that is long enough to wear in public (because I can make it longer!).

Notes for future makes: Add more length –  4T + 1″

Final Thoughts: I’m happy to have a simple t-shirt pattern to use until she hits size 12.


Lover’s Knot Quilt Pattern

I’m excited to share my latest quilt design – the Lover’s Knot quilt pattern that is featured in Make Modern magazine, issue 11!

Make Modern Issue 11 Cover

My work probably fits in the modern traditional style of quilting the best, and this latest quilt reflects that aesthetic.

Lover's Knot Quilt

This is an old block- probably.  Barbara Brackman’s Encyclopedia of Pieced Quilt Patterns labels it as a “lover’s knot” from the Old Chelsea Station Needlecraft Service (OCS).  This company began in 1933, but this block has no date and doesn’t really look like what most quilters would consider to be a lover’s knot.  Even before this company started, this name has been assigned to a wedding ring-style quilt, a snowball/flowerish quilt block, and various other pieced blocks.

Lover's Knot Quilt

I had never seen this block made before, and I thought it would be a beautiful quilt, so I made the paper pieced pattern for it and made the quilt in bright spring colors against a low volume background.

Lover's Knot Quilt

I really wanted the pink to stand out, so I stitched just inside of the pink spikes.  The diamonds have swirls and pebbles, and the low volume starts have straight line quilting to echo the outside shape.  I quilted some easy curves inside the turquoise centers.

Lover's Knot Quilt

This quilt is 48″x64″, so it makes a nice lap quilt or can be made for a baby that you really, really like.  I love the secondary patterns this design makes, and want to make a larger version in blues if I get some free time this summer.

Lover's Knot Quilt

The pattern is in Issue 11 of Make Modern, which was just released on May 20, 2016.  There are some other great patterns in this issue, as well as interesting articles.  Stacey O’Malley of Slo Studio made an amazing quilt that uses hourglass blocks and inset circles.  Alyce Blyth of Blossom Heart Quilts has an article on the math to do biased binding, and Sandi Hazlewood of the Crafty Planner recaps QuiltCon.

It was also fun to share the issue with Leanne (Devoted Quilter) – who was part of the Round Trip Quilts Bee I did last year (she made the X marks the spot mini with curved piecing and purple!), and Anne (Hudson Valley Quilts) who wrote an article about online learning and is part of the Hudson Valley Modern Quilt Guild with me!

Lover's Knot Quilt Pattern

I also was a featured maker this month, so if you want to see more of my work or hear my opinions on quilting, you can check that out 🙂

Meet the Maker feature

Make Modern has offered a special discount code for contributors to share – enter issue11friends at checkout to get your copy of issue 11 for just $6 AU.  I always love this magazine, and read my copy on the train on my iPad (which is nice, because then I don’t have to recycle it when I get to the city, like I do with most magazines).

Linking up to some of the following: Main Crush Monday @ Cooking Up QuiltsFabric Tuesday @ Quilt StorySew Cute Tuesday @ Blossom Heart QuiltsLet’s Bee Social Wednesday @ SewFreshQuiltsNeedle and Thread Thursday @ My Quilt InfatuationFinish it up Friday @ Crazy Mom QuiltsWhoop Whoop Fridays @ Confessions of a Quilt AddictTGIFFShow off Saturday at Sew Can She

2+2 Blouse Pattern Review

My daughter thinks that dinosaurs are awesome, and loves purple.  Luckily, Lizzy House made this amazing purple dinosaur fabric while she is in this phase!

2+2 Blouse

Pattern: Oliver & S 2+2 Blouse

Pattern Description (from designer): Here comes the school bus! Girl’s tunic-length, A-line blouse features neckband ties, gathered front with applied patch, and button back, options for long and short sleeves.

Pattern Retail Price: $13.95

Fabric Required: 1 yard for 2T, view A

2+2 Blouse

Amount of fabric used: I was happy I had the full yard because I wanted to make sure the dinosaurs lined up.

Sizing: 6 months – 8 years

Alterations: I added extra length so she can wear it longer.

Instructions: Mostly easy to follow.  The gathering in the front was a little confusing the first time I did it because I was having trouble picturing what fabric was ending up covered versus needing to be finished.  It’s not quite as neat as I would like, but next time I make this I’ll be fine.

2+2 Blouse

Pattern Issues: None

Fabric Choice: This is a quilting cotton, which works well for this pattern.  Does it get better than purple dinosaurs?  Not for my purple-loving, dinosaur obsessed daughter!

2+2 Blouse

Finished Product: This shirt is adorable.  My daughter is not quite sure what she should do with the ties though.  Sometimes she ignores them, some days she pulls on them continuously.

Notes for future makes: Add more length.  I think I made it 2T with 4T length, and I wish I had added a little more length so she can wear it longer.

Final Thoughts: I wasn’t sure how my daughter was going to feel about the buttons all the way down the back, but she doesn’t seem to even notice them.  This is a cute shirt, and even though it’s a bit of work, it’s adorable and I want to make it again.

Introducing: Forging Steel Quilt Pattern

I am excited to share my latest pattern with you: Forging Steel.  This pattern is optimized to make use of charm squares or layer cakes so you can use your favorite fabric collections!

Forging Steel Quilt Pattern

You may remember Forging Steel from Issue 8 of Make Modern magazine.  This is probably one of my favorite quilts.  I love how the swirls on the background stand out against the bright fabrics of the blocks and border.  This quilt uses an anvil block as the base, but with more half square triangles!  The border brightens the quilt, and updates a traditional pattern, while leaving plenty of negative space to play with quilting.

In this expanded and updated version, I have included expanded illustrated instructions for the lap/large baby quilt from the magazine, as well as a large twin/double and queen-sized versions of the quilt.  There are now 2 block sizes, 3 quilt sizes, and 2 methods to learn to make half square triangles (2 at a time and 4 at a time).

Forging Steel front view

The traditional anvil block gets a modern update with negative space, and a HST border.  Make it in light or dark fabrics, scrappy, or even from two colors to get a more traditional look.  I’ve used four square patches for the block centers in my Cotton & Steel version to create additional scrappiness or one large block in the Milliefleur version to show off Bari J’s amazing fabrics.

Forging Steel Milliefleur

Go crazy with the quilting, because this quilt has plenty of opportunities for you to practice new fills or to perfect your favorite design.  Or, you can do a simple allover and let the fabric shine.

Forging Steel Milliefleur

The quilt pattern is available in lap, twin/double, and queen.  I call it a twin/double because it’s really the recommended double size, but it looks good on a twin bed.  As you can below, it has a nice overhang on a twin sized bed.  This bed frame has a footboard, so that’s why the foot of the bed is hanging a bit oddly.

Twin Forging Steel Milliefleur

This pattern is on sale for an introductory price of $7.50 through May 20th.  Find it on Craftsy from Quilts Actually.

Please share if you make this quilt by tagging your creation with #forgingsteelquilt!

Linking up to some of the following: Fabric Tuesday @ Quilt StorySew Cute Tuesday @ Blossom Heart QuiltsLet’s Bee Social Wednesday @ SewFreshQuiltsNeedle and Thread Thursday @ My Quilt InfatuationFinish it up Friday @ Crazy Mom QuiltsWhoop Whoop Fridays @ Confessions of a Quilt AddictTGIFFFabric Frenzy Friday @ Ft. Worth FabricShow off Saturday at Sew Can She

From the Bookshelf: The Ultimate Guide to Machine Quilting

This Spring, I had the opportunity to view a copy of The Ultimate Guide to Machine Quilting prior to its release.  Both Angela Walters and Christa Watson are incredibly talented quilters, so I was very excited to see their book with tips on both sit-down and long-arm quilting.

Ultimate Guide to Machine Quilting cover
Photo credit: Brent Kane and Martingale

I have to admit, I was initially a bit skeptical that a book split in half aimed at both long-arm and sit-down quilters could truly have enough information that was applicable to both types of quilters to make it valuable to everyone, but these ladies have figured out a way to do it.  The fills and designs that they use are almost universally applicable (except for the spiral design Christa uses on the Exploding Star quilt – that is too much of a hassle for a longarm!).

As I was reading though this book, I was quilting “Forging Steel”, and used it as an opportunity to try out some of their suggestions.  Angela is well known for her point-to-point quilting, and she shows a couple examples of it in the book. I used it in one of the blocks for my quilt as well, although you can see it far better on the back of the quilt.

Forging Steel Milliefleur

I also used the wavy lines for another block.

Forging Steel Milliefleur

I like the clamshell design, so it’s not new to me, but it was a good reminder to see it as an option.

Forging Steel Miloliefleur

In addition to numerous quilting designs, there are also 10 quilt patterns.  They are generally simple, because they are meant to be quicker to sew so you can get them pieced and start practicing quilting faster.  I can definitely see myself making one of these patterns in the future if I need a quick baby quilt.

You can see some of the quilting better on the back of the quilt!  Busy fabric tends to hide dense quilting.

Forging Steel Milliefleur

I don’t always agree with all advice given in the book – Christa presses her seams open, and I am a devoted press to the side quilter, but I know that is an age old argument so I won’t hold it against her.

Overall, this was a good quilting book.  I would say it is aimed a more of a beginner-intermediate level quilter, so if you are a masterpiece quilter you will probably not get very much out of this book unless you want to learn more about the modern style of quilting.  If you are starting out, I think this is a great resource because they do a really good job of making quilting accessible, and challenging you to do some free motion quilting instead of just straight lines.

If you are interested in the Ultimate Guide to Machine Quilting, it is available from Christa, Angela, their publisher, Amazon, etc.

Eleanor Dress

This winter I was really tired of buying shirts for my daughter that were too short, so I made several shirts and dresses for her that are long enough for her to not immediately grow out of.  I had made a previous version of the Eleanor Dress pattern as a shirt, but can’t find a picture of it – despite the fact that she wore it all last winter!  I really like the dress version of this pattern.

Pattern: Eleanor Dress from Shwin Designs

Eleanor Dress

Pattern Description (from designer): Everyone loves a knit dress, comfy and easy to wear. The pattern also has the option for a top. This knit dress pattern comes with many options to create simple by stylish knit dresses. From an oversized collar to ribbing at the neck, long or short sleeves and every combination of them all. This one pattern will take you through many seasons and with the sizes 12m-8years included it will take you through many years of wear.

Pattern Retail Price: $9 for PDF

Fabric Required: 3/4 yard for 2T

Amount of fabric used: I was using leftover fabric from another project so I don’t know exactly what I had, but the amount seems accurate.

Sizing: Includes 12 months to 8 years.  My daughter’s chest was in the 2T range, and that’s what I made and I am pleased with the fit.  Due to the stretch of the fabric, she is still wearing this dress even though she is now wearing 3T and slim-fit 4Ts in RTW.

Alterations: I made this exactly as designed.

Instructions: They are step by step instructions with a photo for each step.  The samples are in a solid color so it is easy to see what is happening, and I like that the short sleeve and long sleeve samples were in different colors so I skip the instructions that didn’t apply to the version I was making.

Pattern Issues: None.

Fabric Choice: I used an athletic fabric that I bought from Fabric Mart last year on a super sale.  I think it’s meant for leggings, but it makes a really cozy shirt/dress.

Eleanor Dress
Finished Product: This dress is cute.  My daughter loves the pockets.

Notes for future makes: Baste the pleats down prior to sewing the skirt to the bodice.

Final Thoughts: I will probably make the short sleeved version again as it warms up.  It’s a cute dress that my daughter didn’t want to take off after trying it on to make sure it fit.  Now that she is getting into the “dresses are the best” phase, she likes it even more!  I like it because it is a dress that she can still run around with her friends in.


Last Round – Round Trip Quilts

So this is a little late, it was actually mailed last fall, but took me awhile to add pictures and such.  This round robin quilt ground lasted a little over a year, and I think we produced some pretty great quilts.  Hopefully everyone else also feels that way!

For the last round, I had Jennifer of Not Just Jennifer‘s quilt.  I had gotten a little bit behind on Leanne’s quilt with my move last summer, but I really intended to get Jennifer’s done on time.  Then I decided on a super detailed design that would take forever, my parents came to visit, and I started school…

Round Trip Quilts

Her quilt is in honor of New Hampshire.  There are many other season represented, but I felt like a quilt in honor of New Hampshire had to have winter.

I debated what I wanted to do, and started with a skier.  I used the Vintage Skier pattern from During Quiet Time because in my mind it was quicker to use her pattern than to make a different winter scene myself.  This is a beautiful and detailed pattern, so I’m not quite sure what would have been faster!

Round Trip Quilts

Next, I thought about what really represents New Hampshire.  My husband suggested the Old Man of the Mountain as quintessentially NH. I search for a pattern, but could only find one that the website didn’t appear to sell anymore.  So, I went on EQ and designed the Old Man.  I realize that there is probably not a huge demand for this, but if anyone else ever needs a pattern for the Old Man of the Mountain, I put my version on Craftsy.

Old Man of the Mountain

So, now I had a skier and the Old Man of the Mountain.  I decided to do snowflakes between the two bookends and have some snow and rocks and mountains that I would improv to fill in the difference.  I reduced the size of all of the snowflakes because the full size would have been too overwhelming for the section.  I guessed at a % to print at and hoped for the best!

The turquoise and blue snowflakes are Snowflake #7 from the Canuck Quilter.

Round Trip Quilts

The purple snowflake is from Sewing Under Rainbow.

Round Trip Quilts

I continued to fill in the space between the snowflakes, which looks easier than it is.  I was cursing my decision to have snow covered mountains and rocky ground as I was trying to match both those seams up!  I really love how it turned out though, so it was worth it in the end.

The only thing I’m slightly disappointed by is the blending of this row with the previous quilt.  You know when in your mind you think you put the correct colors in, but when you’re done it’s off?  I used a couple different blues in the sky to try to mimic the scrappy backgrounds above it, and from a distance it’s still just a huge block of blue.  The white seams also look super annoyingly obvious right now, but I know that they will even out on top of some batting once they are quilted.  Also, I know I own white on white fabric but I haven’t seen it since I moved.  I’m probably going to find it in about a year stuffed inside some vase we never use or somewhere equally stupid.  Thus – why I used solid white.

Round Trip Quilts

Jennifer, I apologize for taking forever to finish my contribution to your quilt, but I hope that you think the wait was worth it.  If not, I will totally take the winter portion back and make a wall hanging.  I’m kidding, but not totally 😉

Ladies of Round Trip Quilts, it was a pleasure to work with all of you and I’m really glad I got to have this experience with all of you.  Someday I would love to meet all of you in person!

Linking to some of the following: Fabric Tuesday @ Quilt StorySew Cute Tuesday @ Blossom Heart QuiltsLet’s Bee Social Wednesday @ SewFreshQuiltsNeedle and Thread Thursday @ My Quilt InfatuationFinish it up Friday @ Crazy Mom QuiltsWhoop Whoop Fridays @ Confessions of a Quilt AddictTGIFFPaper Piecing Party @ Quilt Art Designs

Liberty & Linen Meadow Quilt

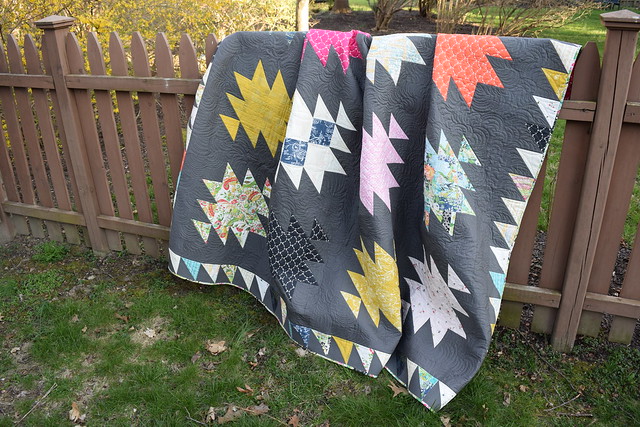
Long, long ago I saw Lizzy House‘s Meadow quilt when she got it back from Angela Walters, and I thought it was such a lovely quilt.  But, she was not selling the pattern.  She was teaching it as a workshop, and was not going to teach down by me (I was living in North Carolina at the time), so I put it out of my mind.

Fast forward a bit, and I moved to New York in Summer 2015.  I had started following most of the quilt groups in the area, to include the ones that were a little far away – like the Central NJ Modern Quilt Guild.  Then, the Central NJ Modern Quilt Guild announced that they had space in their Meadow workshop and that they were opening it up to non-members.  I think I emailed them that same day to find out the details and to get my slot.

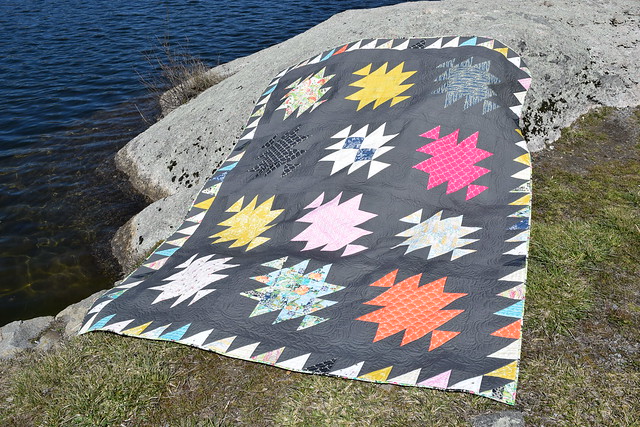
This quilt covered multiple bases for me.  I had declared to myself that this year was going to be the year that I tried curved piecing and took classes that would introduce me to new techniques.  I wanted to do more custom quilting.  I wanted a queen sized quilt for my bed.  I wanted to use the beautiful Liberty fabrics I had been stashing.  This quilt covers all of that!

Meadow quilt detail

In mid-August, I set up some podcasts and drove about 2 hours down to this workshop.  It’s always a little weird walking in to a place where you don’t know anyone with your arms full of fabrics and a machine, but the ladies of the Central NJ Modern Quilt Guild were wonderful and welcomed me right away.  Seriously, if live closer than 2 hours from their meetings, you should join their guild because they are a great group!

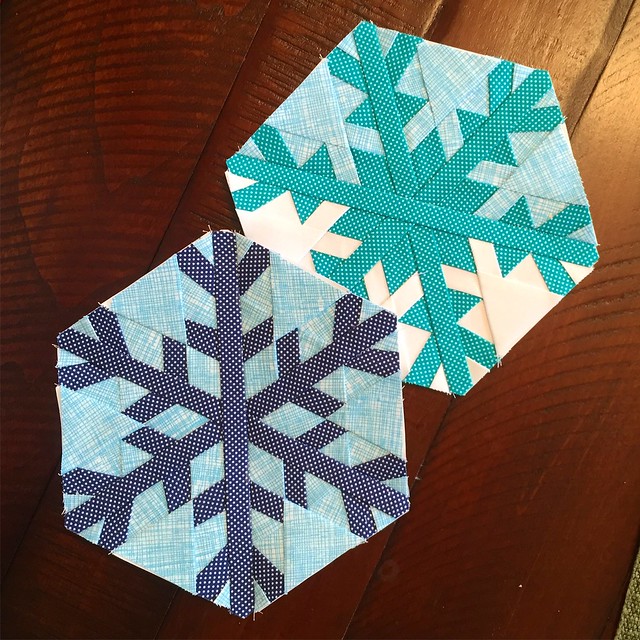
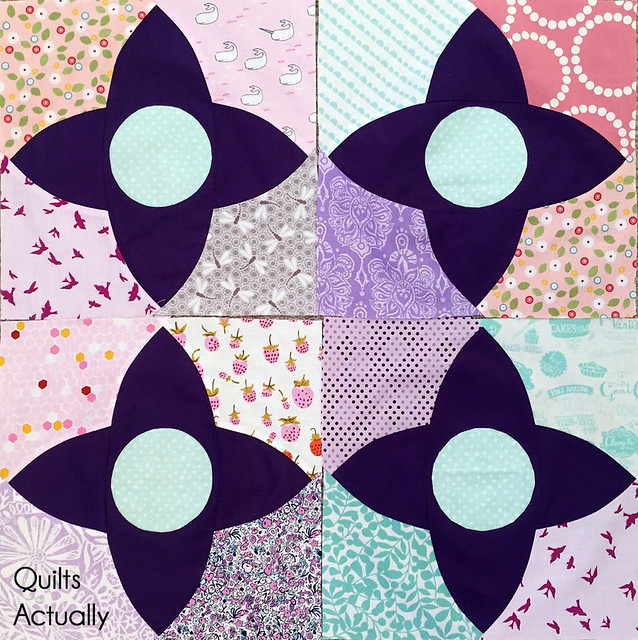
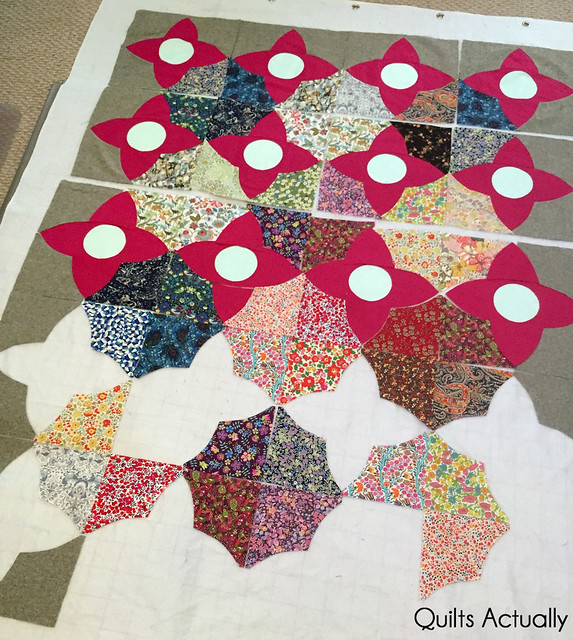
The entire workshop was such a pleasure.  Lizzy is a very warm and genuine person, and a great teacher.  All of us made at least one block, and had the opportunity to sit down with her and plan out our entire quilt.  I made two blocks (because when I have the opportunity for uninterrupted sewing, I use it), and they are the ones on the left below.

Meadow Quilt Practice Blocks

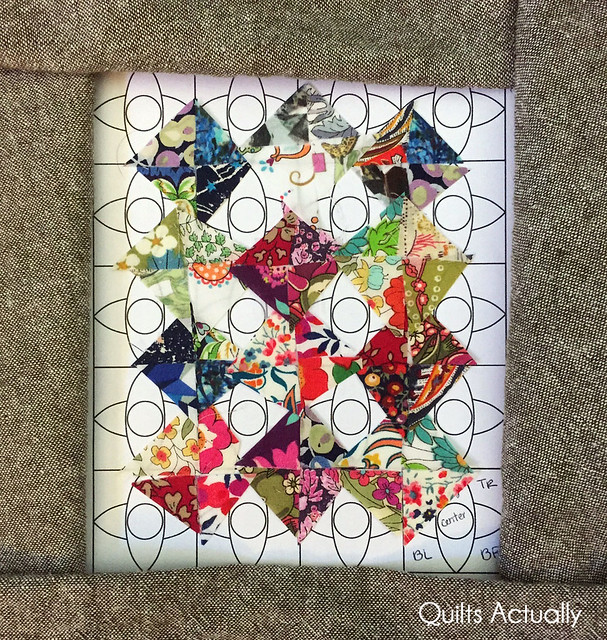
We had so much fun going through my fabric to make the piles that would turn into a block.  Then I photographed the piles and glued swatches of them to the layout so I could remember how I wanted to do it.

Meadow plan

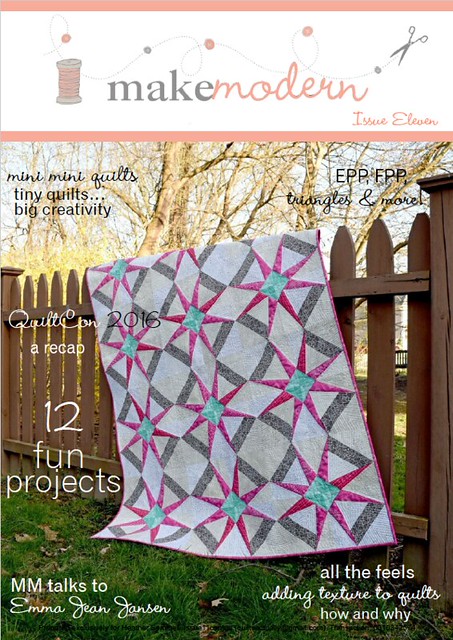
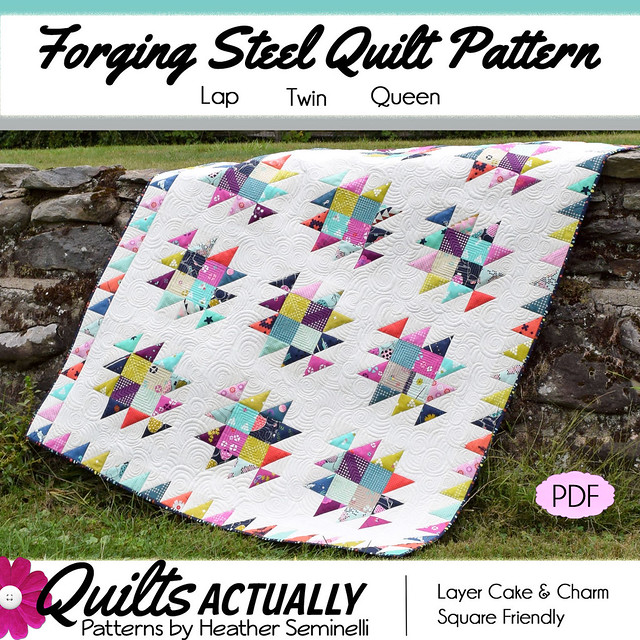
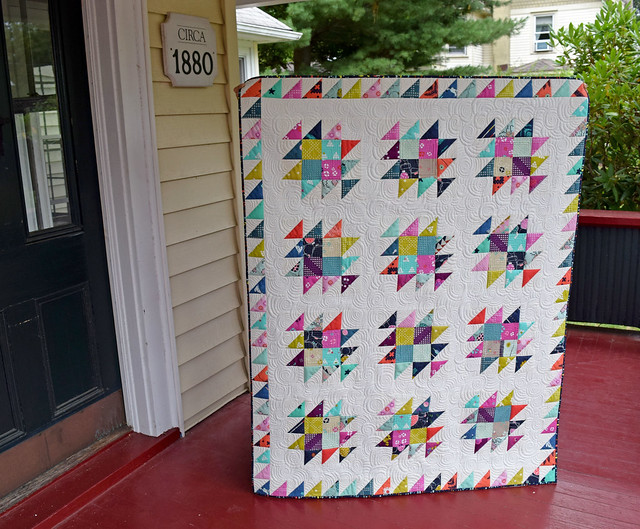
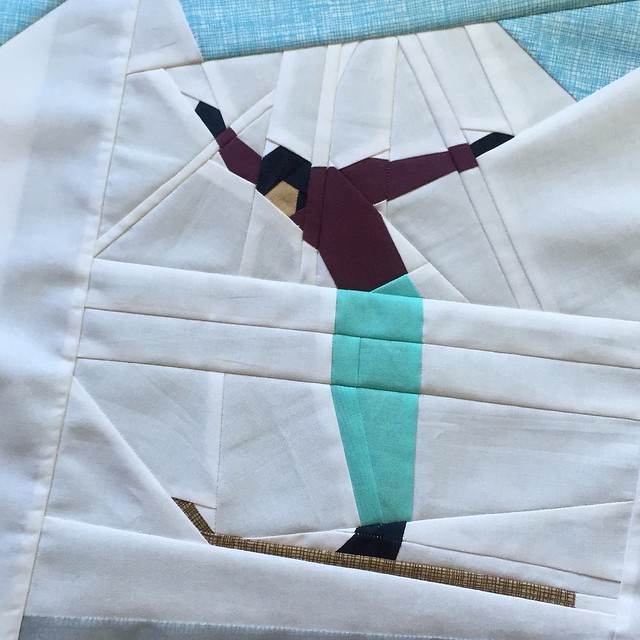
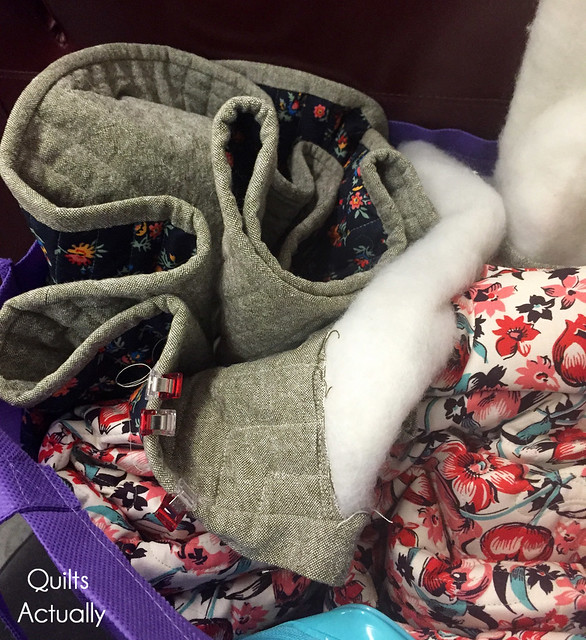
After the workshop, I intended to get started on the quilt right away.  Instead, it sat in the bag I had brought it home from the workshop in.  My parents came to visit.  Then my Forging Steel Quilt was due for Make Modern.  I had to finish my part of the Round Trip Quilts Round Robin.  In late September, I decided what background I wanted to use and ordered more of it so I would have enough to make the quilt queen sized.  In October, I finally made a couple more practice blocks to make sure I could remember how to do the pattern and finally started my quilt!

Meadow quilt in process

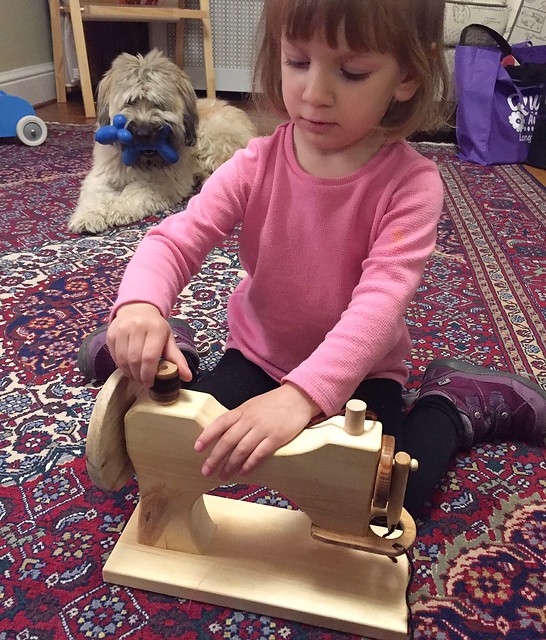
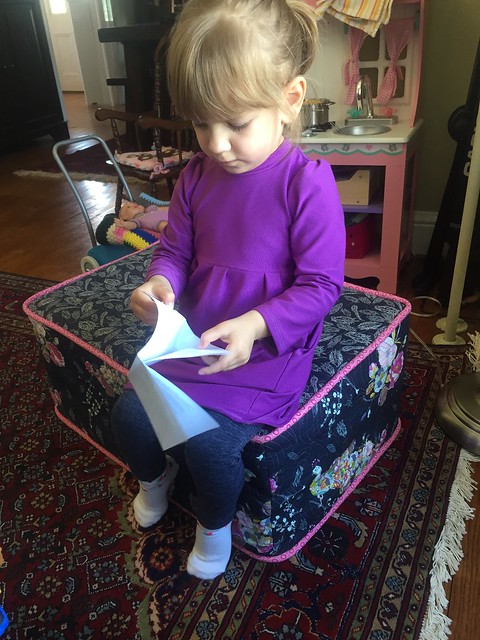
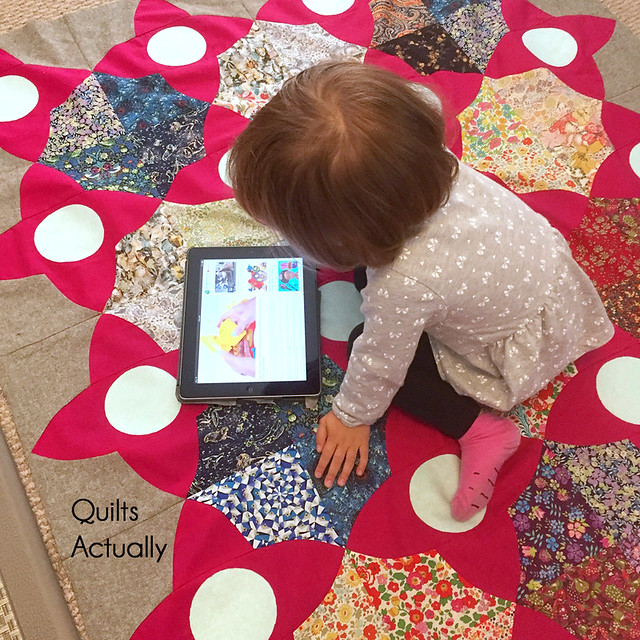
There was a little girl who decided she should get this quilt, and wanted to use it before I even had time to add borders, or quilt it!

Meadow-top-preuse

I used Quilter’s Dream wool batting for this quilt, and it is my new favorite batting.  It shows the quilting definition so well, and is amazing to sleep under.  The wool is light and breathable and warm and perfect.  I plan to use wool for every bed size quilt I make between now and eternity.  That’s how much I love this batting inside a quilt.

Meadown quilt on longarm

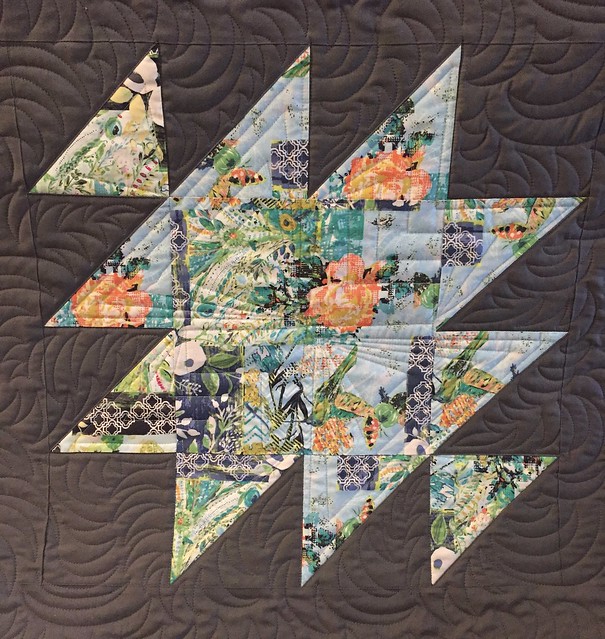
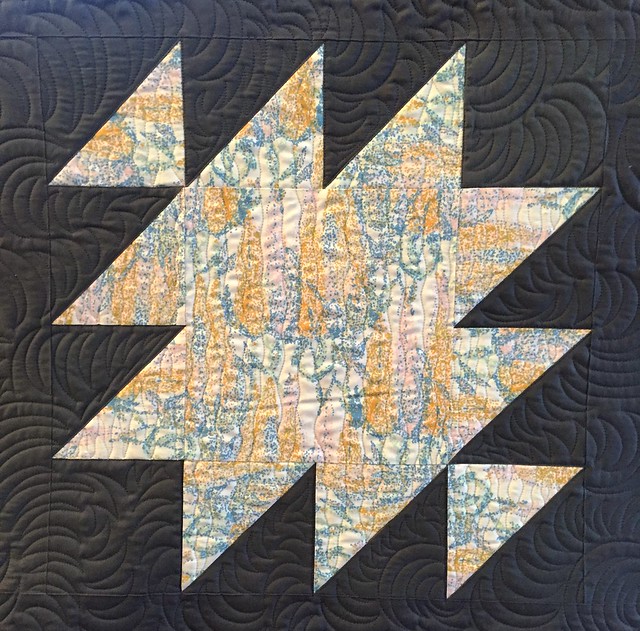
There are a couple thread changes on this one.  I used pink variegated Fantastico for the flower, and a mint So Fine for the flower centers and in the olive border.

I brought the quilt with me on train to school on November 2nd so I could get most of the binding done, and finished the binding and quilt sleeve on the 3rd before running down to NJ to drop it off at the Brownstone Quilt Guild’s show.  That day there happened to be another passenger knitting, and me sewing the binding, so the conductor joked it was the “crafting express.”  I wish there was a such thing!  I would get so much done if I could use my machine on the train…

Binding Meadow on the train

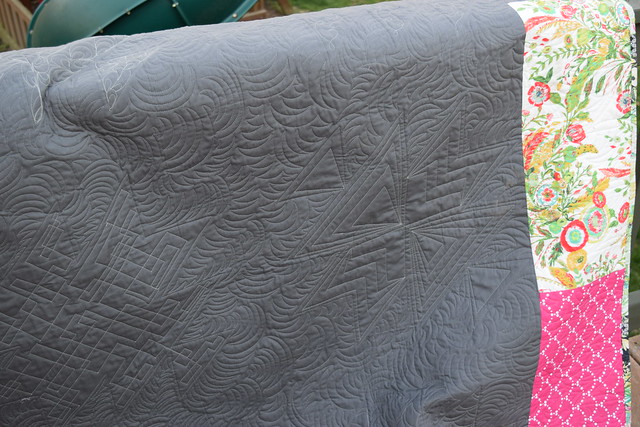
This shot was shortly after I started using it on my bed. I woke up one morning, and the light was absolutely perfect to show off the quilting.

Meadow Quilt on bed

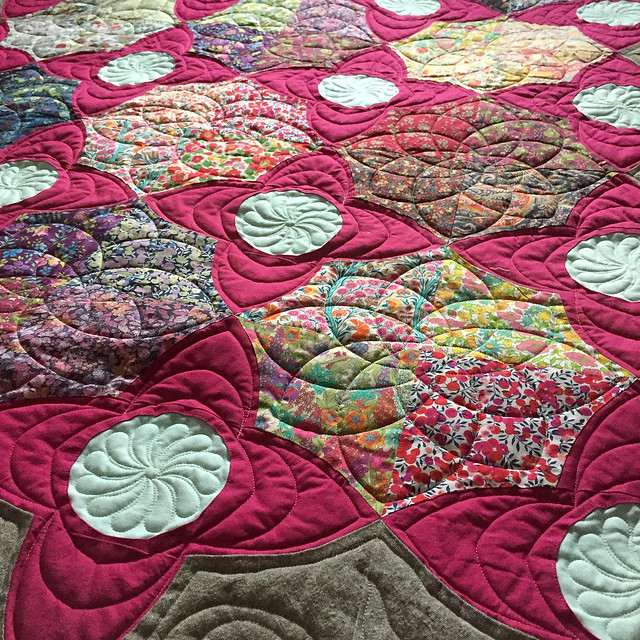
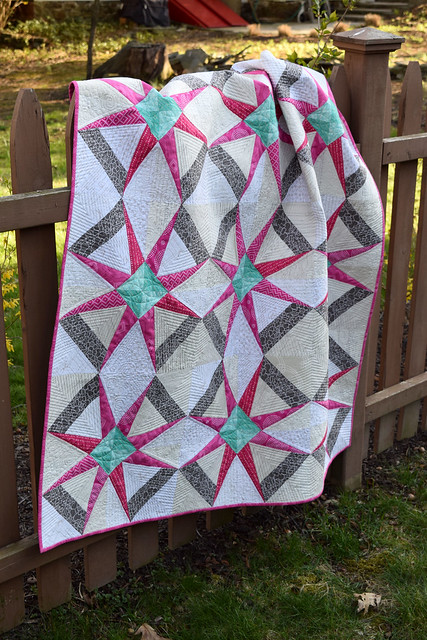
The flower outsides are all assorted Liberty fabrics, and the outer border is Essex yarn dyed linen in olive.  The backing is Shelburne Falls by Denyse Schmidt.  I used Dress Floral in Maple and Multi Floral in Maple.

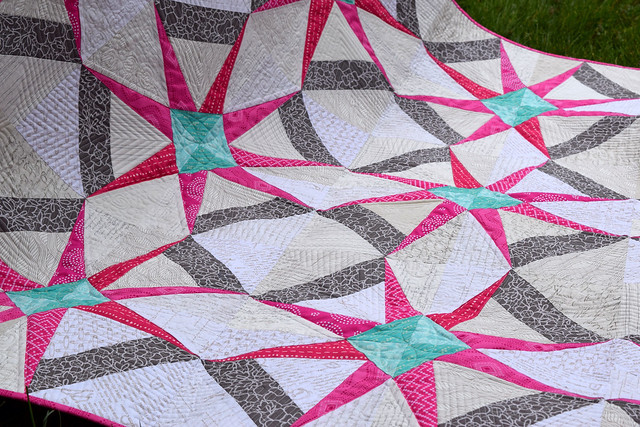
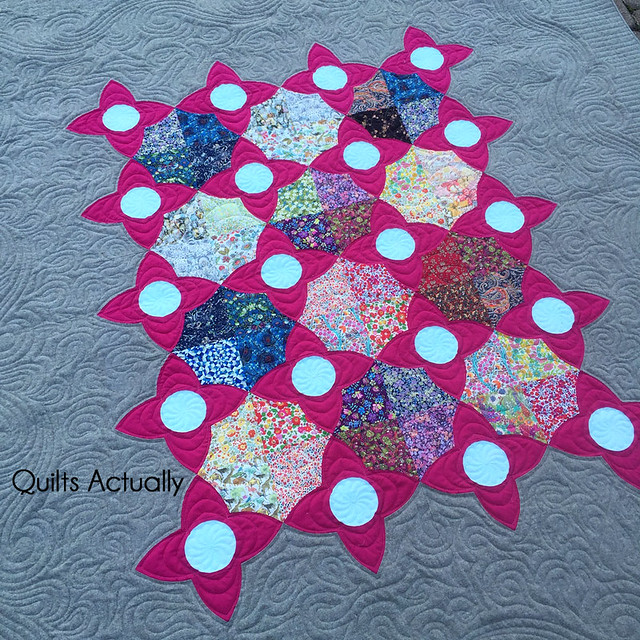
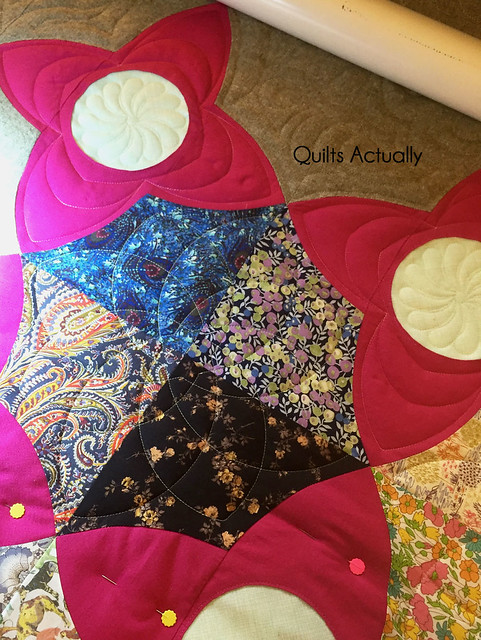
I wanted to do sort of a medium custom level quilting on this Meadow Quilt.  I knew I wanted the border.  I did the straight lines in the outer most portion because I like the contrast and knew that part would not be seen as much because it hangs off the bed.  The area between the border and the flowers is a loose freehand fill.  I didn’t want something super dense, although that would have been beautiful.

The design I used on the flowers and Liberty portions can be seen better in previous photos.  I designed the pattern used in the Liberty portion, and I really like how it filled the area without overwhelming the beautiful fabric I used.  I saw one Meadow Quilt finished after mine that has a design in the petals that I wish I would have thought of, but I still haven’t seen another one with a design I like better than what I used in the Liberty section.

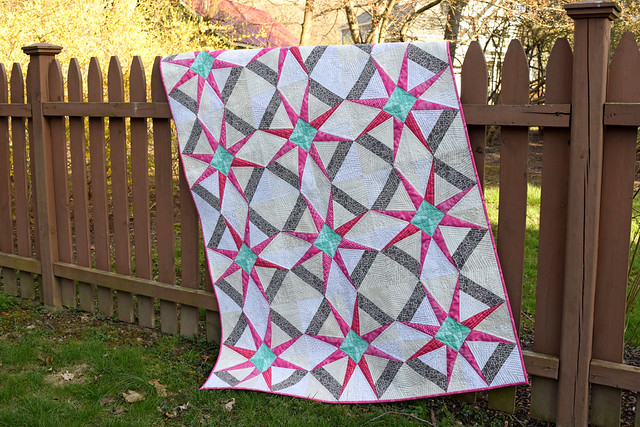
I am so happy with my queen quilt that I get to sleep under every night.  I had never made myself a queen sized quilt until now, and I wish I would have done it a lot sooner.

Measurements: 88″ x 100″

Liberty and Linen Meadown Quilt

Oh, and I got an Honorable Mention in the Quilt Show that had helped push me to get this finished.  This is a quilt more for use than for show, so I’m happy with it.

Linking up to some of the following: Fabric Tuesday @ Quilt StorySew Cute Tuesday @ Blossom Heart QuiltsLinky Tuesday @ Freemotion by the RiverLet’s Bee Social Wednesday @ SewFreshQuiltsNeedle and Thread Thursday @ My Quilt InfatuationFinish it up Friday @ Crazy Mom QuiltsWhoop Whoop Fridays @ Confessions of a Quilt AddictTGIFFLink a Finish Friday @ Richard and Tanya QuiltsShow off Saturday at Sew Can She

Squared Away Table Pattern

Quilted Placemats pattern

I’m excited to share my latest pattern – the Squared Away Table Pattern!

Squared Away Table Square Cover

These placemats were originally published in Make Modern magazine, issue 5.  The rainbow version I made for the magazine are on my kitchen table right now.  We use them constantly.

Squared Away Placemat

In this full length pattern, I have included expanded and illustrated instructions and a matching table runner.  The placemats are 11.5″ x 15.75″ and the table runner is 11.5″ x 24.75″.

This set was a Christmas present for my brother and his girlfriend.  I tried to walk the fine line between masculine and still a little bit of pink for fun.

Squared away table

They are quilted with the onion skin panto that I love so much.  It gives so much motion to the piece, and provides great contrast to the straight lines of the pattern.

This pattern is available through Craftsy – Squared Away Table Pattern for $5.  It’s a beginner friendly project that would be a great for many different people:

  • introduce a friend to quilting
  • decorate for a season or holiday using specialty fabric
  • use your scraps
  • use your favorite fabrics in a place you can see them everyday – the kitchen table!
  • quick gift

I would love to see your versions of the pattern.  If you make this, please tag it with #squaredawaytable so we can all see your work!

Linking up to some of the following: Fabric Tuesday @ Quilt StorySew Cute Tuesday @ Blossom Heart QuiltsLet’s Bee Social Wednesday @ SewFreshQuiltsNeedle and Thread Thursday @ My Quilt InfatuationFinish it up Friday @ Crazy Mom QuiltsWhoop Whoop Fridays @ Confessions of a Quilt AddictTGIFFFabric Frenzy Friday @ Ft. Worth FabricShow off Saturday at Sew Can She


December 2015 SMS Winner & Crochet Gift Ideas

Congratulations to #1 Stacy!!  I’ve never seen the random generator pick #1, so I think that is pretty cool, even though the odds shouldn’t be any more or less in favor of any numbers.

SMS Dec 2015 Winner

I will be getting in touch with Stacy to send her a copy of the pattern.  For everyone else who entered, thank you!  I really appreciate your ideas, and am sharing some below in case it helps anyone else.

Crocheter Gift ideas: