Round Trip Quilts is the round robin bee I am currently a part of – Jennifer has a much better summary of the round robin on her web page than I am even going to attempt to cover. We are on our last round now! I can’t believe we’ve been doing this almost for a year. It’s a been a fun challenge!
I am totally stealing photos from my bee-mate’s blogs to illustrate the progression, but I personally find the progressions to be the most interesting part of these quilts – and there are links to their posts to see all the details. Wow, this is a run on sentence! Good thing I’m not an english teacher…
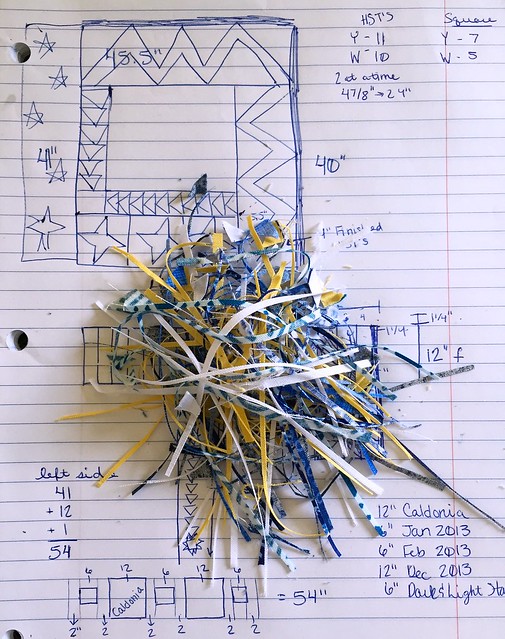
I have had Leanne from Devoted Quilter’s quilt for the last 2 rounds. We had to do a bit of rearranging after one member had to drop out, so that’s why I had her quilt twice in a row. As you can see from my scribbles, I had a couple ideas of what I wanted to do, and was wishy-washy for a little while before finally just doing almost exactly what I was going to do in the first place.
Leanne wanted stars and components of stars. Her original center was 4 Ohio stars set on point.

Mary of See Mary Quilt added the next border – with some stars and some color that Leanne had requested added.
Chelsea at Patch the Giraffe added some flying geese and lovely color to the mix!
Christina at WiPs and Tuts added some more stars to the mix. Another thing I love seeing happen after each round is the direction that each person considers to be up changes.

Kim from Ties that Bind Quilting added a zig zag to the quilt. Kim’s zig zag is the top part with the all white background.
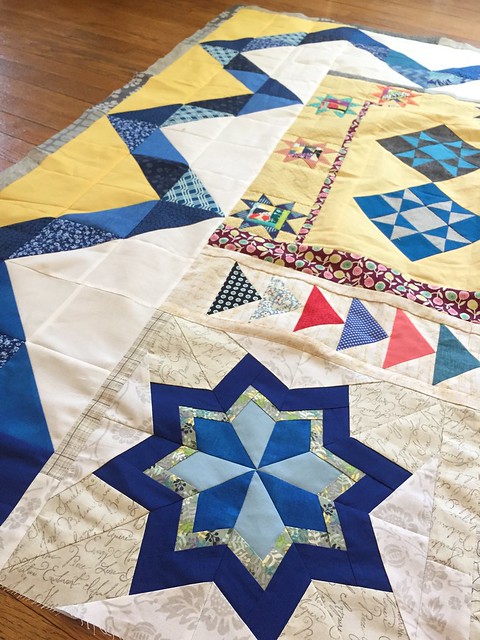
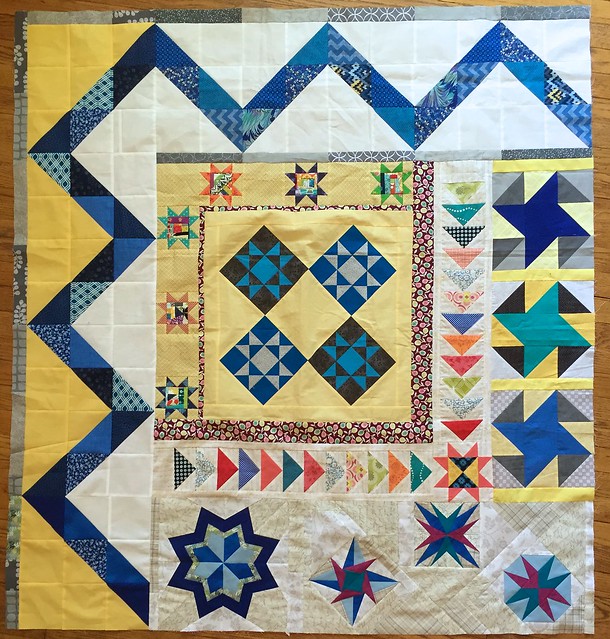
Then it was my turn… I wanted to bring out some of the elements from the center toward the outside of the quilt. I kept Kim’s zig zag going, but I used yellow to bring the yellow center outward.
Next, I wanted to play with some paper pieced stars and improv piecing. I used (from left to right) the Caldonia Star from 627 Handworks, January and February 2013 Lucky Stars BoM Club, Dark & Light Star from Quilter’s Cache. I did gray low volume fabric for the background to pull the gray out from the original center blocks. I chose to concentrate on making the stars in light and dark blue from Leanne’s center with the turquoise and fuchsia accents from Mary’s border.
Leanne, I hope you like where your quilt is going! I tried to leave you a lot of space to have some fun quilting on because I know you are enjoying FMQ-ing a lot lately.
Jennifer, I apologize for being so ridiculously late mailing this to you. I knew I was moving, and had planned to be done much earlier, but it just didn’t happen.
Linking up to some of the following: Fabric Tuesday @ Quilt Story, Sew Cute Tuesday @ Blossom Heart Quilts, Scraptastic Tuesday @ She Can Quilt, Let’s Bee Social Wednesday @ SewFreshQuilts, Needle and Thread Thursday @ My Quilt Infatuation, Finish it up Friday @ Crazy Mom Quilts, Whoop Whoop Fridays @ Confessions of a Quilt Addict, TGIFF, Fabric Frenzy Friday @ Ft. Worth Fabric, Paper Piecing Party @ Quilt Art Designs

