School Bus T-shirt Review

This is continuing the theme of t-shirts that are long enough to cover my daughter’s upper body.  Given that it has been 90 degrees for the last few days, these were made last fall when it was still cold.  If she needed short sleeve shirts for summer, I would make this pattern again.  The School bus t-shirt is a simple pattern that will be in use for a long time.

Pattern: School Bus T-Shirt from Oliver and S

School Bus T-shirt

Pattern Description (from designer): This basic kid’s T-shirt sewing pattern can be made several different ways. With a long-sleeve and two short-sleeve options, you’ll get endless use from this easy and quick-to-sew style.

Pattern Retail Price: $8.95

Fabric Required: 3/4 yard for up to size 8

Amount of fabric used: I got away with about 1/2 yard, would be less for short sleeves.

School Bus Tee

Sizing: Comes in 6 month to 4 years, then the next size range is 5 years to 12 years.  I made a 2T based on chest measurements with 4T length.

Alterations: I added another inch to the second one because the length on the first one was perfect for now.

Instructions: This is a simple shirt, but the instructions are detailed and have enough information for someone who has never made a t-shirt before.

Pattern Issues: None.  I had to add a lot of length, but I have to do that to all patterns and store bought shirts are too short.

Fabric Choice: I used pink thermal and deer thermal that I bought from Nature’s Fabric last year.  I had a yard of each, and made a long sleeve shirt last winter and this winter from them.  Unfortunately, I don’t think I have enough useable scraps to keep using these fabrics.  I should buy more of the deer while it’s in stock, because she loved it.

School Bus Tee

Finished Product: The school bus t-shirt is a cute, simple tee that is long enough to wear in public (because I can make it longer!).

Notes for future makes: Add more length –  4T + 1″

Final Thoughts: I’m happy to have a simple t-shirt pattern to use until she hits size 12.


2+2 Blouse Pattern Review

My daughter thinks that dinosaurs are awesome, and loves purple.  Luckily, Lizzy House made this amazing purple dinosaur fabric while she is in this phase!

2+2 Blouse

Pattern: Oliver & S 2+2 Blouse

Pattern Description (from designer): Here comes the school bus! Girl’s tunic-length, A-line blouse features neckband ties, gathered front with applied patch, and button back, options for long and short sleeves.

Pattern Retail Price: $13.95

Fabric Required: 1 yard for 2T, view A

2+2 Blouse

Amount of fabric used: I was happy I had the full yard because I wanted to make sure the dinosaurs lined up.

Sizing: 6 months – 8 years

Alterations: I added extra length so she can wear it longer.

Instructions: Mostly easy to follow.  The gathering in the front was a little confusing the first time I did it because I was having trouble picturing what fabric was ending up covered versus needing to be finished.  It’s not quite as neat as I would like, but next time I make this I’ll be fine.

2+2 Blouse

Pattern Issues: None

Fabric Choice: This is a quilting cotton, which works well for this pattern.  Does it get better than purple dinosaurs?  Not for my purple-loving, dinosaur obsessed daughter!

2+2 Blouse

Finished Product: This shirt is adorable.  My daughter is not quite sure what she should do with the ties though.  Sometimes she ignores them, some days she pulls on them continuously.

Notes for future makes: Add more length.  I think I made it 2T with 4T length, and I wish I had added a little more length so she can wear it longer.

Final Thoughts: I wasn’t sure how my daughter was going to feel about the buttons all the way down the back, but she doesn’t seem to even notice them.  This is a cute shirt, and even though it’s a bit of work, it’s adorable and I want to make it again.

Eleanor Dress

This winter I was really tired of buying shirts for my daughter that were too short, so I made several shirts and dresses for her that are long enough for her to not immediately grow out of.  I had made a previous version of the Eleanor Dress pattern as a shirt, but can’t find a picture of it – despite the fact that she wore it all last winter!  I really like the dress version of this pattern.

Pattern: Eleanor Dress from Shwin Designs

Eleanor Dress

Pattern Description (from designer): Everyone loves a knit dress, comfy and easy to wear. The pattern also has the option for a top. This knit dress pattern comes with many options to create simple by stylish knit dresses. From an oversized collar to ribbing at the neck, long or short sleeves and every combination of them all. This one pattern will take you through many seasons and with the sizes 12m-8years included it will take you through many years of wear.

Pattern Retail Price: $9 for PDF

Fabric Required: 3/4 yard for 2T

Amount of fabric used: I was using leftover fabric from another project so I don’t know exactly what I had, but the amount seems accurate.

Sizing: Includes 12 months to 8 years.  My daughter’s chest was in the 2T range, and that’s what I made and I am pleased with the fit.  Due to the stretch of the fabric, she is still wearing this dress even though she is now wearing 3T and slim-fit 4Ts in RTW.

Alterations: I made this exactly as designed.

Instructions: They are step by step instructions with a photo for each step.  The samples are in a solid color so it is easy to see what is happening, and I like that the short sleeve and long sleeve samples were in different colors so I skip the instructions that didn’t apply to the version I was making.

Pattern Issues: None.

Fabric Choice: I used an athletic fabric that I bought from Fabric Mart last year on a super sale.  I think it’s meant for leggings, but it makes a really cozy shirt/dress.

Eleanor Dress
Finished Product: This dress is cute.  My daughter loves the pockets.

Notes for future makes: Baste the pleats down prior to sewing the skirt to the bodice.

Final Thoughts: I will probably make the short sleeved version again as it warms up.  It’s a cute dress that my daughter didn’t want to take off after trying it on to make sure it fit.  Now that she is getting into the “dresses are the best” phase, she likes it even more!  I like it because it is a dress that she can still run around with her friends in.


1/2 yard skirt

I managed to make a 2nd item for Kids Clothes Week!  This was just a quick rectangle skirt made from 1/2 yard of fabric with a gathered waist and a deep hem, but it was the perfect spirit item to wear to my husband’s picnic for his department at NC State.

NC State Skirt


This fabric was printed ridiculously off grain, so I cut based on the print rather than the grain, and then ironed it into submission.

NC State Skirt


It was a little long – like Little House on the Prairie long, so I hemmed it up 3 inches, and it’s still slightly long.

NC State Skirt


It was a quick and easy skirt – or would have been if I didn’t have the owner of said skirt on my lap “helping” unthread the serger and sewing machine.  She loved the attention she got wearing the skirt, and many of the students loved her support of their school.  Plus, it’s long enough that it will still fit if my husband goes back to NC State to get his PhD someday 😉

Go Wolfpack!


Little Zippy Top

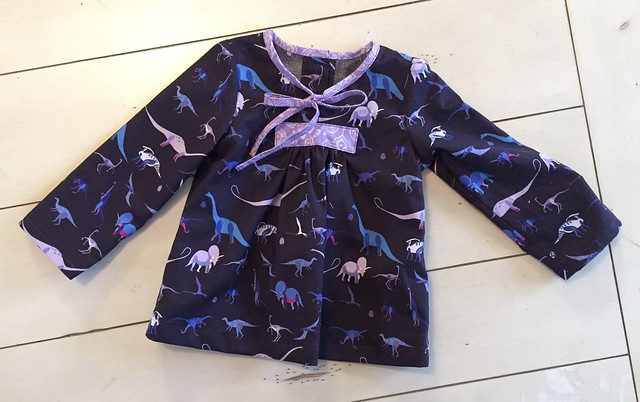
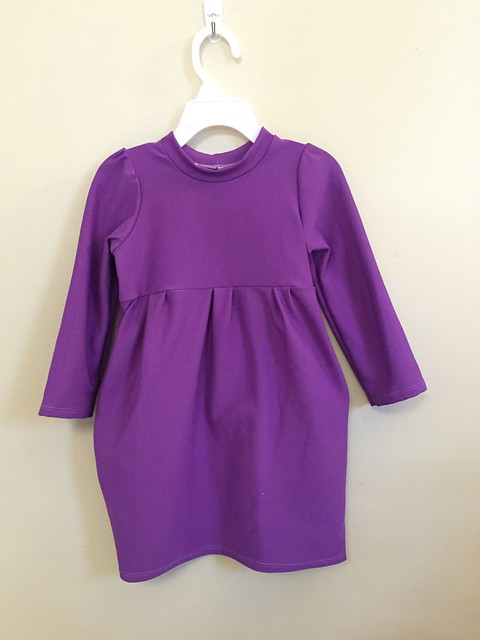
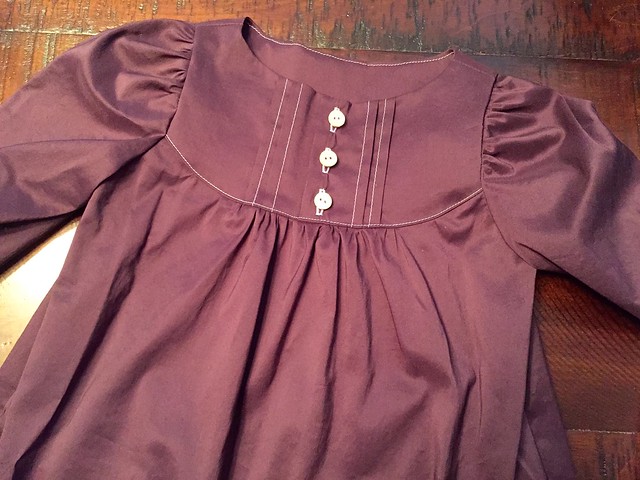
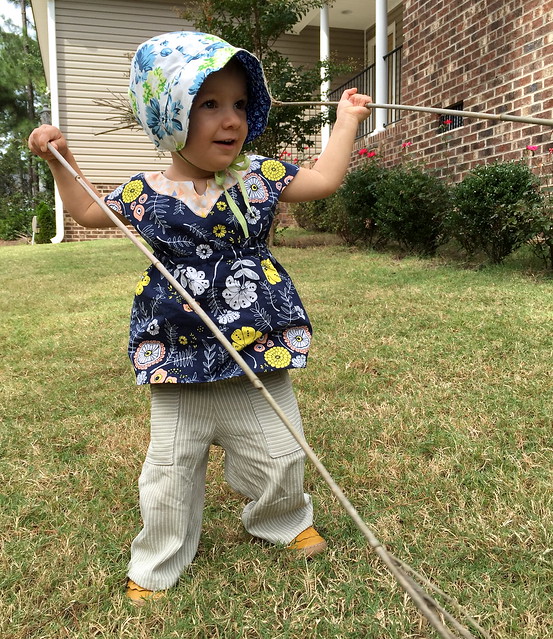
I originally had not planned to participate in Kid’s Clothes Week this week because I have quite a few other obligations that need to be finished.  Then, I was working on a particularly frustrating quilt top, so I needed to just take a break from quilting/piecing for a morning.  I decided that following an easy pattern was just what I needed before tackling that other project.  Therefore, I present to you the Little Zippy Top.

Little Zippy Top

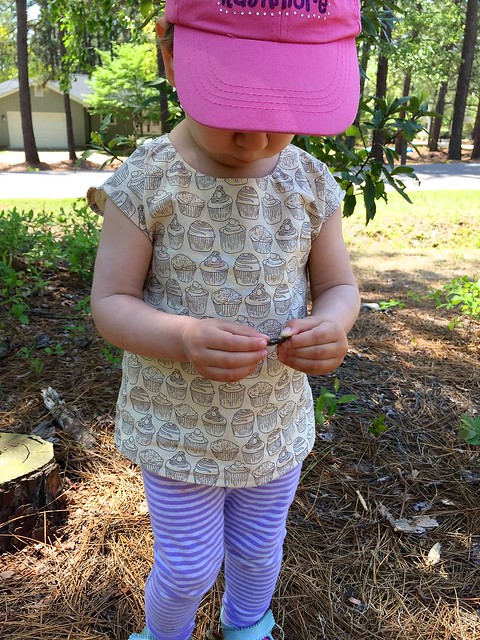
Pattern: Little Zippy Top from See Kate Sew

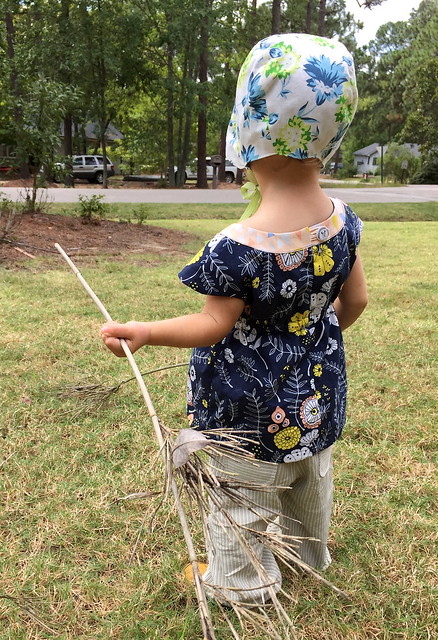
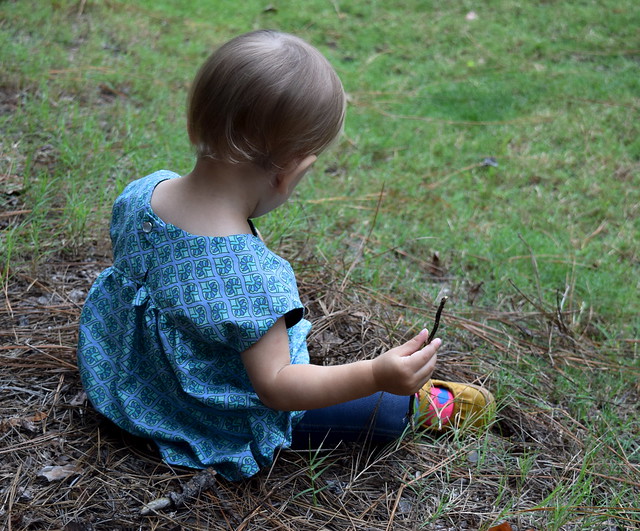
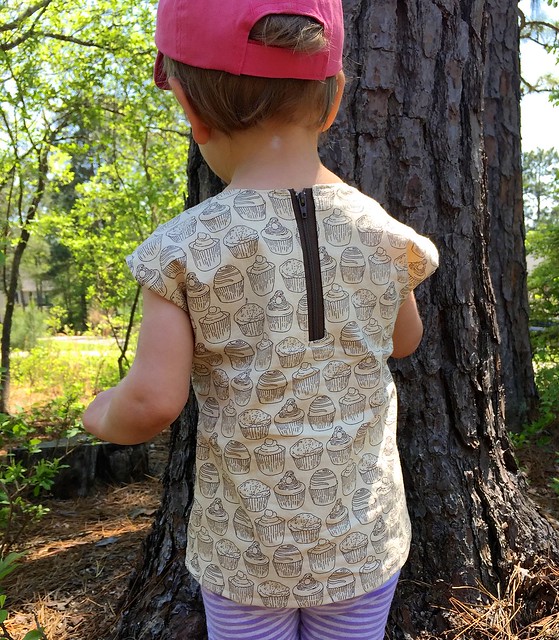
Pattern Description (from designer): This top is a versatile woven top with an exposed zipper on the back! Make it with all your favorite fabrics! This top is perfect for beginners and quick and fun to sew! Requires very little fabric and a little zipper!

Pattern Price: $9 full price, but watch for sales.

Fabric Required: 1/2 yard for size 4T and smaller

Amount of fabric used: 1/2 yard!

Sizing: Comes in size 18M to 10.

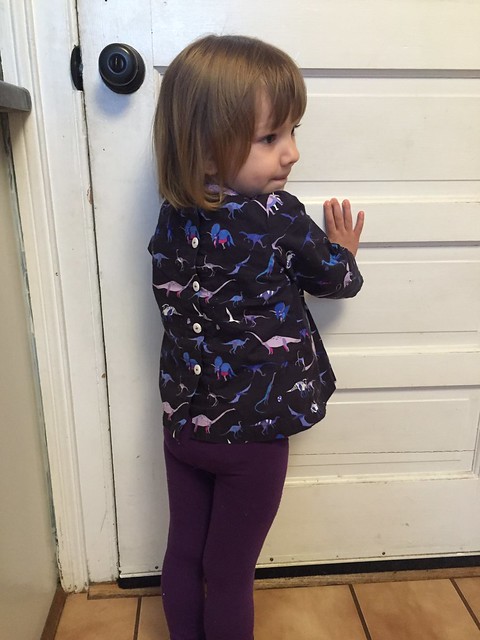
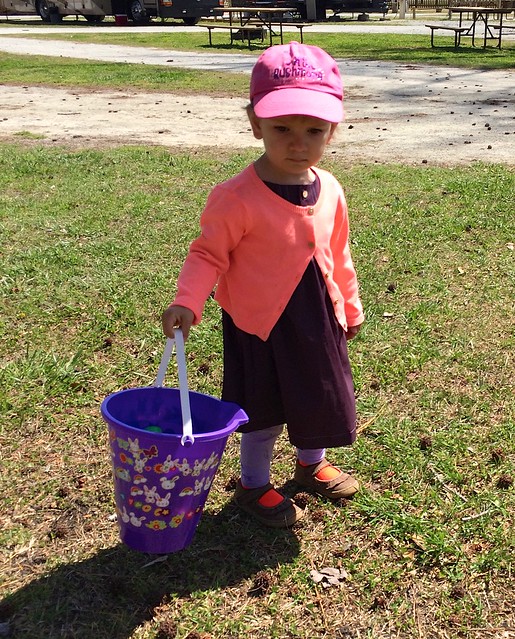
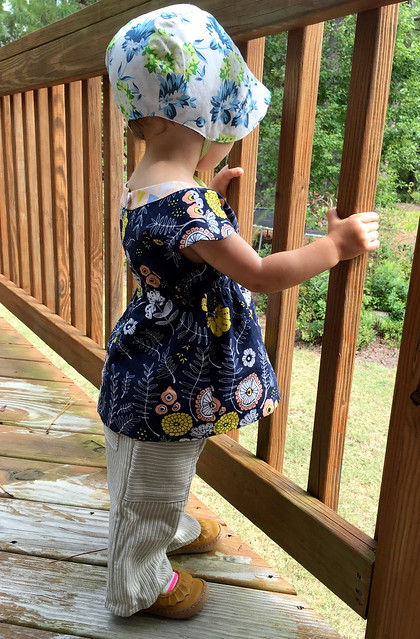
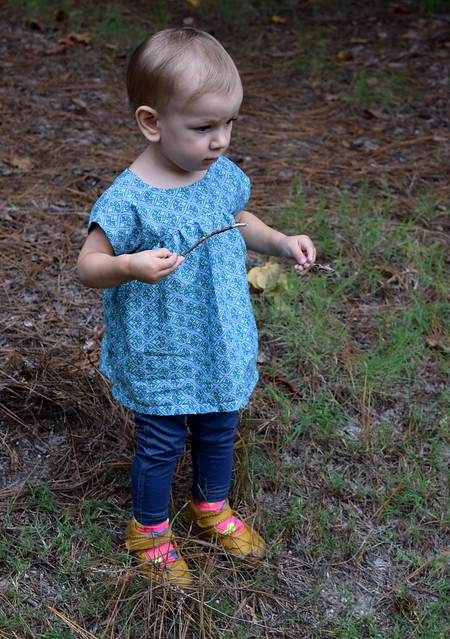
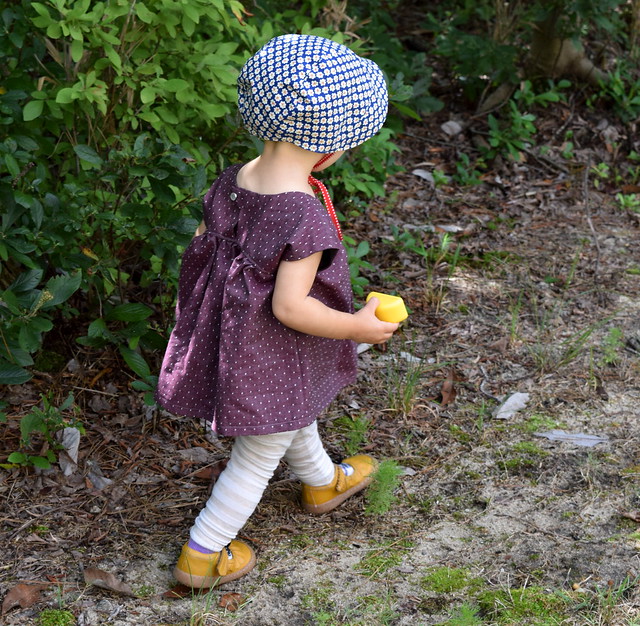
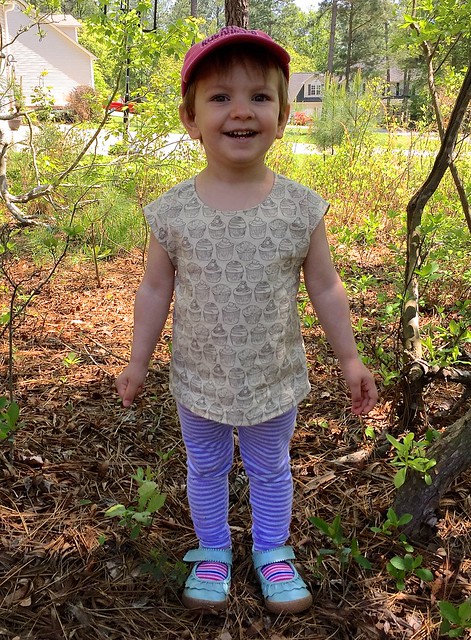
Alterations:  This shirt is a little short, in my opinion.  I used the 4T length hoping to get a little more wear out of the shirt, and it needed that length just to be wearable now on my daughter.

Little Zippy Top

Instructions: Some of the steps were in a little bit of a weird order.  For example, you don’t stay stitch the neckline until step 6 by which point you’ve already handled it quite a bit so if it was going to stretch out, I think it would have by then.  I also prefer to do prep-type work at the beginning, but that’s my personal preference versus a pattern issue.  For example, step 7 is to fuse the interfacing to the facing pieces.  That’s something I prefer to do first before I get into sewing the piece of clothing.

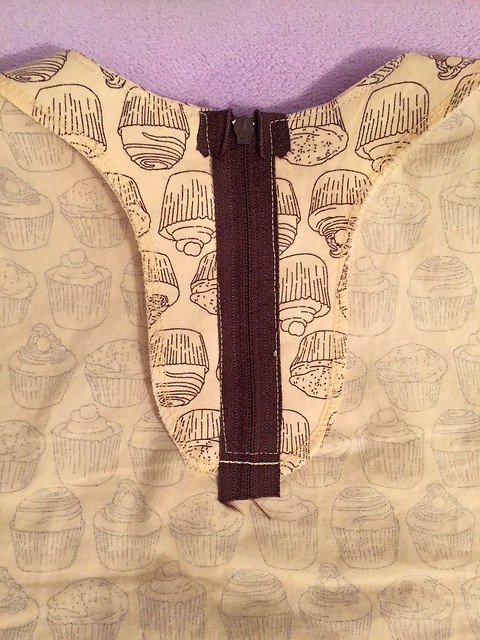
Pattern Issues: Instructions are adequate, but not my preferred style of construction.  For example, you don’t under stitch the facing to the seam allowance.  Instead, you just topstitch the whole neckline.  Which is fine, but that step has you also topstitch around the zipper opening prior to the zipper being installed, which leads you to have to install the zipper while insanely carefully trying to topstitch over the line of stitching already there.  I probably made more work for myself by under stitching the neckline, then installing the zipper and just continuing on to topstitch around the neckline in one go.

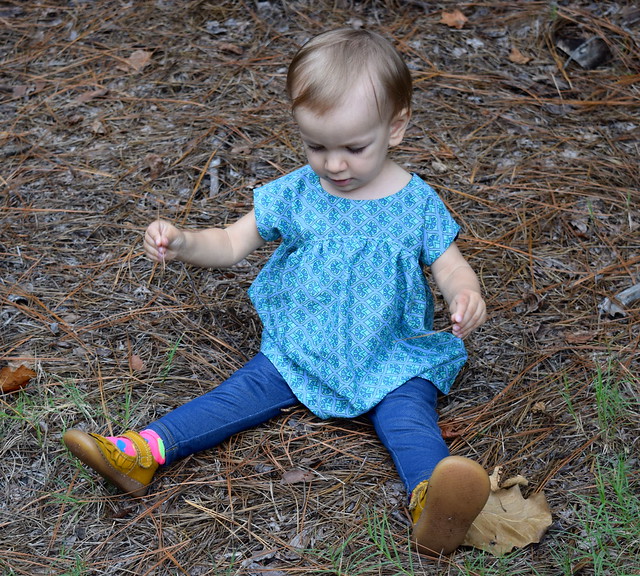
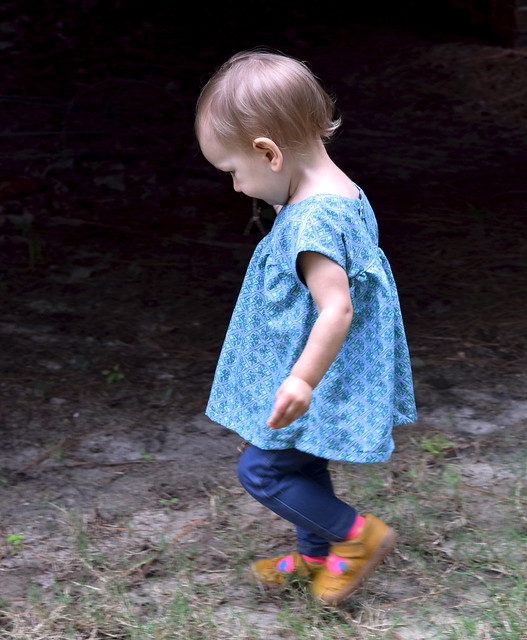
Fabric Choice: Cute cupcake fabric that was on sale from Fort Worth Fabric Studio.  The actual name of the fabric is Love At First Bite by Color Bakery for Windham Fabrics.  Quilting cotton works fine for the shirt.

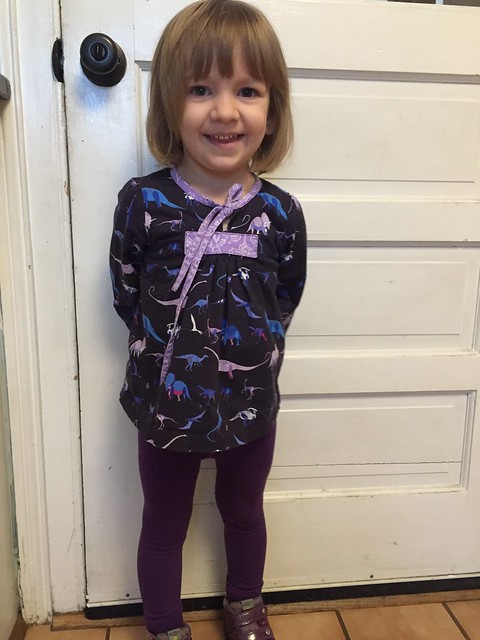
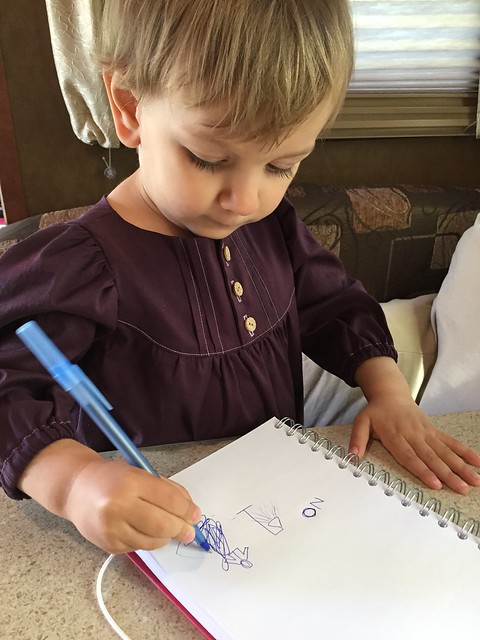
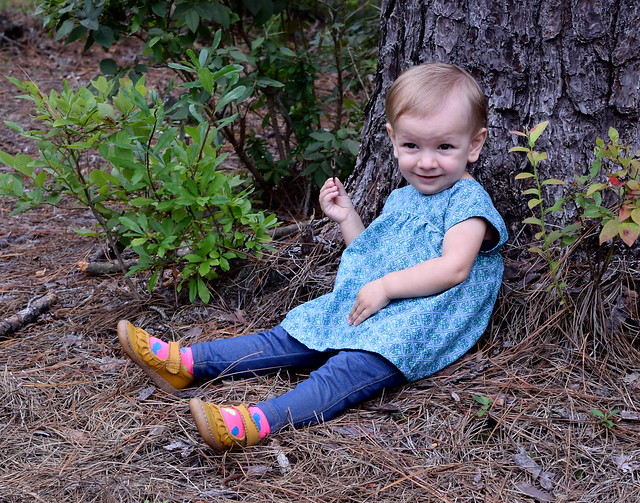
Finished Product: It’s a cute shirt.  I wish the neck was a little bit higher in front.  Sometimes the shirt has a tendency to sit forward a little more than it should, so that may be why the neckline looks lower than it should.

Little Zippy Top

Husband’s opinion: I like the exposed zipper, and the fabric.

Notes for future makes: I think I will go up a size in width, and at least one more size in length (to 5T for a little girl that wears 2T in ready to wear).  My daughter is pretty skinny, but likes to “help” put her clothes on by sticking her arms out straight in whatever direction that makes it impossible to get a woven shirt on, so I’m hoping a little extra width will help make dressing her a little bit easier.

Little Zippy Top

Final Thoughts: I had high hopes for this shirt being one that I go to again and again, but I’m not sure that I will.  It’s like when someone tells you a restaurant has the best hamburger they’ve ever had in their entire life… your hopes get high and no hamburger is going to live up to what you have built up in your head.  I had higher hopes for this pattern, so I think that’s why I’m a little disappointed.

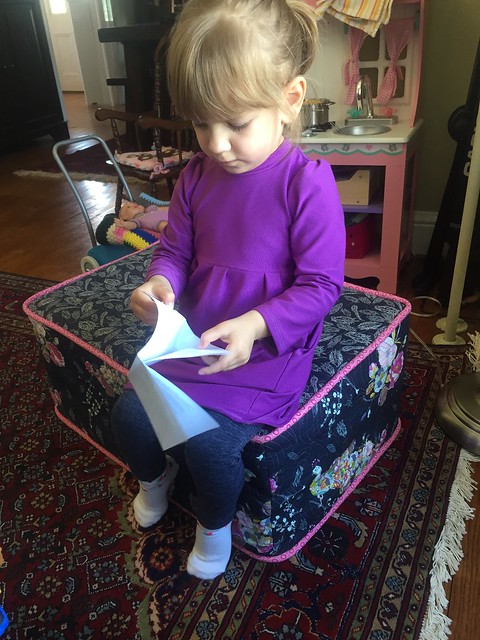
I didn’t keep track of time, but it wasn’t quite as fast of a make as I was hoping.  Then again, if I made multiples, it would go faster.  Making sure the zipper is evenly installed takes longer than buttonholes and sleeves do for me.  I also don’t really like how the zipper is installed.  The zipper seemed to be annoying my daughter last night when we were sitting on the couch together.  I still like how little fabric it uses, so I may try it again just for that reason.

I guess for now, I’ll see how often I dress her in it before deciding if it’s a total win or bust.

Franklin Dress

I made the Franklin dress pattern for my daughter for Easter.  Unfortunately, it ended up being a little chilly, so almost all of the pictures of her that day are covered up by a sweater.  Then, I made her an Easter basket from the Fabric Basket Tutorial from Ellison Lane, which she also ended up not using because a bucket was provided at the Easter Egg Hunt.  Oh well!  She had a blast running around and picking up eggs, and that is what mattered.

Pattern: The Franklin Dress is the first dress pattern offered by the Brooklyn Pattern Company.

Franklin Dress

Pattern Description (from designer): A surprisingly simple dress with playful details and endless options. Whether romping in the dirt with frogs in her pockets or strolling across the Brooklyn Bridge, both mom and daughter will appreciate the versatility. A pleated yoke frames the face while gathered sleeves add a special touch. Go casual with a sweet polka dot cotton or dress it up with linen or silk.

Pattern Price: $12

Fabric Required: For 12 month size, it requires 1- 1.5 yards depending on width.

Amount of fabric used: I used 1 yard of 54″ wide fabric and did not have garment sewing usable scraps after.

Sizing: Includes sizes 6 months – 8 years.  I made size 2T.  Actual measurements are not included, which I am so used to using to decide what size to make that I was lost without it.

Franklin Dress

Alterations: I made the pattern as written.

Instructions: Instructions are good and there is also a sew-a-long for beginners or anyone who needs extra help.  Diagrams are included in the pattern.  My only issue is below.

Pattern Issues: My only complain is that the diagram showing where to place the interfacing behind the buttonholes makes it look like it should be placed again the cut edge of the fabric, instead of inside the seam or even just centered on the line you are going to put the buttonholes on.  I knew it didn’t seem right as I was doing it, but I try to follow the instructions as written for the first time I make a pattern so I went with it in case there was some reason it was done that way.  There wasn’t.

Fabric Choice: I made it in a lovely purple stretch poplin purchased from Mood, now out of stock.  I originally purchased it for me (back when I had a short-lived misconception that I could make a woven shirt for myself out of 1 yard of fabric).  I used 1 yard of fabric for her dress.

Franklin Dress

Finished Product: It is a very sweet dress.

Husband’s opinion: Why did I make it a dress when we never dress our daughter in dresses?

Notes for future makes: The bodice width is a bit wide.  Not crazy wide, more room to grow wide, but if in doubt about size I would probably go with the lower size.  Also, I would shorten it to make as a shirt so she would wear it more often.

Final Thoughts: It’s a pretty easy sew that makes a cute dress.

Ellison Lane Fabric Basket as Easter basket

I had to include the Easter Basket somewhere!  It was used during the practice egg hunts, so it wasn’t a total waste.  I’m probably going to remove the handles and use it as a thread catcher.  I like how it turned it!

Linking up to Frances Suzanne’s Link Party for the Franklin Dress Flip this Pattern, even though I didn’t flip it at all.


Oliver & S Fairy Tale Dress Review

My first Fairy Tale Dress was almost a year ago, and I adjusted it to make my daughter’s baptismal gown.  At that time, I was still pretty new to garment sewing.  I think it was my third dress ever.  I chose to go from the Made by Rae Itty Bitty Dress, to the Made by Rae Geranium Dress, to the Oliver & S Fairy Tale Dress.  It was a pretty big learning curve.  Now that I have actually sewn the pattern as written, I feel better about writing a Fairy Tale Dress pattern review.

Oliver + S Fairy Tale Dress

I have to say I was much more confident this time than I was last time.  Although, last time I had the advantage of ignorance – I didn’t know enough to know that I had chosen a challenging pattern with silk and “scary” invisible zippers.  If I had realized what I was doing was supposed to be harder, I don’t know if I would have finished it so quickly.

Pattern: Oliver & S Fairy Tale Dress

Fabric Required: From pattern (44-45″ wide): 1 3/4 yards of main fabric, and 1 yard of lining fabric.

Amount of fabric used: A little under 1 yard of main fabric (52″ wide), and a little under 1 yard of lining fabric.  If anyone has a use for just over a yard of silver silk dupioni, please let me know!

Oliver + S Fairy Tale Dress

Sizing: I used the 12-18 month size for width, 18-24 month size for bodice length, and I added 2 inches to the 18-24 month skirt length to make it mid-calf instead of knee length.

Alterations: I had to lengthen the front of the bodice by 1/2″.  I just added the 1/2″ to the middle and tapered it to the normal length at the sides.  It was a small change, but helped fit over the toddler belly a little bit better.  I also tacked the collar down because it was flipping up too much for my taste when she tried it on pre-wedding.

  • Sash: I didn’t want to use either version of the sash as published in the pattern.  I was hoping to have my daughter wear this for Christmas so I didn’t want to sew the sash to the dress.  I liked the wide sash in the back, but sometimes the super wide sashes on the front of a dress overwhelms little girls.  I decided to use the pattern pieces for the back, but sew it to a narrower portion for the front of the dress.

Instructions: As expected with Oliver & S, these were good instructions.  I did use couple additional tutorials shown below.

Tutorials Used:

    • How to hand stitch a hem – I used the slipstitch to hem the outer dress.  I don’t hand sew many things, but it felt right for this dress.

Hand sewing silk hem

Pattern Issues: The only step that I had any issues with was attaching the zipper to the dress exterior.  In some of the diagrams it showed the seam finished, in others it wasn’t, and it didn’t mention in the directions the right time to finish the seam.  I was using a serger to finish the seams and chose poorly, because I should have finished that back seam before attaching the zipper.  I ended up serging from the bottom as close as I could to the zipper.  The rest of it gets encased in the lining.  This dress won’t be going through a washing machine, so it will probably be fine.

Although, I do have to add – why is there not a table with the width of the skirts for each size?  I hated having to print out 8 extra pieces of paper for the three skirt pieces when I knew I was just going to cut the skirt as one continuous piece.  This skirt doesn’t need side seams.  It makes it slightly easier to line stuff up, but as long as you mark where the side seams would have been there is not issue lining up the skirt to the bodice.

Fabric Choice:

– Outer: I used silk dupioni from NY Fashion Center Fabrics in 137 – Silver.  I was fortunate that they had a Labor Day sale that lowered the price point when I needed to order it.

– Tulle: I also ordered the gray tulle from NY Fashion Center Fabrics in the same sale.

– Lining The lining was a cheap voile from Fabric Mart that appears to be out of stock now.  I was too cheap, and should have used a better quality voile (even though it would have cost more).  It looks fine in the finished garment, but it was so thin that it was horrendous to sew and I was fighting it the whole time.  I think Tim Gunn has a quote that a successful garment starts at Mood, and he is so right.  I thought I had learned my lesson on cheap vs. good value fabric, but I’m still learning it over and over.

Oliver + S Fairy Tale Dress

Finished Product: I love this dress as a party dress for a little girl.  The color isn’t the best color for my daughter’s complexion, but she was the flower girl for a wedding whose colors were grey and blue.  I only had 1/2 yard of the matching blue fabric, so I used that to make the sash.

Husband’s opinion: He loves this dress.

Final Thoughts: This is my second time making this dress, and I will probably make it again if another fancy occasion comes up.  I may have to use a different collar or something next time so people don’t realize I keep using the same pattern over and over!

Linking up to: Sew + Show Wednesday @ Straight GrainShow off Saturday at Sew Can SheThreading your way @ Threading my Way

Oliver and S Roller Skate Tunic Pattern Review

I’m continuing my Kid’s Clothes Week theme of fall useful clothing with my Roller Skate Tunic Pattern Review.

Roller Skate Tunic Pattern Review

Pattern: Oliver and S Roller Skate Tunic and Dress (digital version)  This is a great pattern for the digital side, because there is not that much to print.  It was a nice change from some of the huge patterns I have printed off lately.

Pattern Description (from designer): This cute and easy dress can also be made as a tunic, with two different styles for each length. All views include built-in cap sleeves, Empire-waist elastic casing, and keyhole-with-button opening at back.

Fabric Required: For 12-18 month size, 3/4 yard of both the lining and outer fabric.  One button for the back closing… a lion button makes any kid’s shirt better!

Oliver & S Roller Skate Tunic

Amount of fabric used: I’m pretty sure I could have cut it out of a half yard cut of fabric.

Sizing: My daughter’s chest size matched the 12-18 month size exactly, so I made the 12-18 width with 2T length.

Alterations: The only change I made was to add some length.

Instructions: This is a pretty simple shirt to construct, and the instructions are good (as always from Oliver and S).  The marking of the line where the elastic casing goes was a bit tedious, but there are better tools that make it easier (I just don’t own them).  The method to use carbon paper and a tracing wheel would be infinitely faster, easier, and more accurate.

Pattern Issues: I measured the elastic to be the exact width of her chest (plus the seam allowance) as directed, but I think it’s a little tight.  Not uncomfortable tight, but when she lifts her arms, the shirt rides up and stays up.  In my next version I will make the elastic a little bit looser so it hopefully won’t have that issue. You can see what I mean in the picture below…

Oliver & S Roller Skate Tunic

Fabric Choice: I used quilting cotton for the outside and voile as the lining.  The weight works well together.

Finished Product: Overall, I think it’s a cute shirt.  I already have another one cut out, it just needs to be sewn up.  I think with the cutout, the neckline is a little low on my daughter.  Maybe for her size, it gets low proportion wise?  I’ve seen a lot of other versions of this dress and never had thought before, but sometimes there is a little more food stuck in the top after a meal than is ideal.  Until she gets into larger sizes I don’t plan on using the cutout again.

Husband’s opinion: He doesn’t like how it rides up, but hopefully loosening the elastic will take care of that.

Notes for future makes: As stated above, I will make the elastic  a little bit looser in my next version and probably not use the cut out option until she is a little bit older.

Oliver & S Roller Skate Tunic

Final Thoughts: The Roller skate tunic is a well designed pattern that creates a good looking dress.  I like how it is lined, and think it is a very flattering and cute silhouette for a little girl.

Also, the pants are the Oliver and S Sandbox Pants that I made for the Winter 2014 KCW (last January).

Izzy Top Review

Here in North Carolina, fall sewing looks a lot like summer sewing for a good reason.  Last week, I think we had about 80 good reasons to wear short sleeves and still sew short sleeves this far into fall.  Therefore, my latest project and review is the free Izzy Top from Climbing the Willow.

This is also the unofficial start of Kid’s Clothes Week for me!  We have some family stuff next weekend, so in my personal version, KCW runs from 18-24 October instead of 20-26 October.

Izzy Top

PatternIzzy Top from Climbing the Willow.  Available for free in sizes 18 months – 12 years.

Pattern Description (from designer): The Izzy Top is a sweet, feminine curved yoke top pattern that closes with a button (or snap) tab in the back.  It is a very simple pattern to make and only requires basic sewing skills.

Fabric Required: 1/2 yard of main print, 1/4 yard lining for 18 months and 2 years.

Amount of fabric used: every last bit of 1/2 yard of the main fabric.  I had to actually reduce the width of the flared portion to fit in a half yard.

Izzy Top

Sizing: The 18 month size is recommended for a 19.5 inch chest.  The designer also mentions that she designed it to fit true ready to wear sizes.  I think that is pretty accurate.  My daughter’s chest is 18.75 inches right now, and I’m glad I have the little bit of ease because it makes it easier to get on and off.  Also, my daughter has a huge head and needed every bit of the neckline to get it on and off.

Alterations: I added 1.5 inches to the length because my daughter is about a 2T in height.  I used a snap for the back enclosure because I didn’t feel like doing button holes.

Izzy Top

Instructions: The instructions were good.  There are pictures for every step.  The only change I made was to baste the bodice to the skirt portion prior to serging them together.  I basted one one top, and did not on the other and the one I basted first turned out nicer.  Most shirts/dresses I have made in this style have the seam mid-chest enclosed, and at first I was annoyed that it was not, but the seam doesn’t seem to bother my daughter and it was faster a little bit easier to serge the seam.  If you don’t have a serger, you would probably want to lengthen the lining piece about half an inch to be able to enclose the seam.  Or you could do a french seam, or a flat felled seam there as well without issue.

Izzy Top

Pattern Issues: None.  This is a free tutorial, and I think for it being free, she did a great job!  The pattern fit as advertised, there are photos for every step, and it is a cute shirt.

Fabric Choice:  One shirt was a Lisette voile from a year or two ago.  The other shirt I made from chambray dots.  I purchased it in person at Mulberry Silks in Carborro, NC, but I’m pretty sure this burgundy chambray dot is the same one.  It’s a heavier weight than the voile, but still works well for this shirt.

Izzy Top

Finished Product: This is an adorable shirt for a toddler.  The shirt is a little wide for my taste.  I prefer the blue one that I didn’t have enough fabric to make the full width, so I will probably reduce the width again when I make this in the future.

Izzy Top

Husband’s opinion: Likes it, but agrees that the full width is a little too full.

Final Thoughts: This is a well put together tutorial in a wide range of sizes that I will most likely make again as she grows out of the current versions.  I even like it as it gets colder because I can either layer it over a long sleeve shirt, or put a cardigan over it.  I think in the spring I would like to try it with a knit for the bottom portion.

Notes for future makes: Reduce the width of the bottom portion.  I think in the spring I would like to try it with a knit for the bottom portion.

Pilot Hat Review

Pilot Hat Review

This is a project summary of the “Pilot Hat” pattern by See Kate Sew.  I bought this pattern during her Black Friday sale last year, made it in February, and am just now blogging it.  It is sized to fit from 18M to 7/8.

See Kate Sew Cozy Pilot Hat

I originally thought that it would fit my daughter next winter and beyond, but then when I checked the sizing, she was a 12 month old wearing the 2T size.  Granted, she has a large head.  Her head circumference was 19.5 when I made it, and I made the 18M-2T size which is recommended for a 19 inch head.  It fits her well, but probably won’t after her next growth spurt – I’ll have to size up.  Then again, it’s been a few months since I made it and it still fits, so maybe I’m good for a little while longer.

See Kate Sew Cozy Pilot Hat

I made this using linen for the outer fabric and a light fleece for the inner fabric.  Both were pre-washed prior to sewing.  I like the fabric combination.

I chose not to add the velcro enclosure.  My daughter prefers to put this hat on when she starts playing with the airplane and then take it off about 2 minutes later, so the velcro is unnecessary.

See Kate Sew Cozy Pilot Hat

Pilot Hat Review: As far as the pattern, I’m mostly happy with it…  I think it’s overall a cute pattern.  I think the angular top is a bit odd and slightly alien-ish.  Traditional pilot hats were not shaped like that so I’m not quite sure why the hat is shaped that way.  I sewed it with a larger seam allowance at the very top in an attempt to minimize that aspect of the hat and you can still see it a little.

Wooden AAC Plane

The instructions were adequate.  I would have preferred a few additions, such as a diagram showing where she measured the head for fit recommendations or a table with the finished size so that I could better decide what size to make.  I also wish she would proofread a little bit better.  On page 11, the instructions said, “… cut out bow pattern pieces located on page xx.”  I know that’s a small detail, but her patterns (while reasonably priced) cost enough that I expect them not to have basic typos like this.  If you have a free tutorial or the pattern cost next to nothing, I am more accepting of typos, but these are small and easy to catch so it makes me wonder about the testing process.

See Kate Sew Cozy Pilot Hat

One other issue I had with this pattern was that it did not call for topstitching, or ironing of any seams.  I added it everywhere – partially because I like the finished look of it and partly because I know that it helps a garment (or hat) wash and wear better.  I know that I can put this hat through a washing machine and it will come out  fine.  The ironing thing is a personal preference, I suppose, but if I had not made other hats before I don’t know if I would have known to do it and would not have as good of a result.  I think that for a pattern that seems to be aimed at beginners, it doesn’t have quite enough detail.

Wooden AAC Plane

Overall, it’s a cute hat, and with some modifications I will probably make this again.

The hat was an accessory to go with the absolutely awesome airplane my husband made the little girl for her birthday.  She enjoys pushing it around, making the rudder flap, spinning the propeller, and scooting around in circles on it.  She knows that the hat goes with the airplane, but it usually doesn’t last long.  Probably because the hat is lined with fleece and it’s really hot in June in North Carolina.  The airplane is made to look like an old World War II Army Air Corps trainer.  I may be slightly partial, but I think he did an incredible job on the plane!

-Heather

Linking to: Anything Goes MondayFabric Tuesday @ Quilt StorySew Cute Tuesday @ Blossom Heart QuiltsLet’s Bee Social Wednesday @ SewFreshQuiltsNeedle and Thread Thursday @ My Quilt InfatuationFinish it up Friday @ Crazy Mom QuiltsWhoop Whoop Fridays @ Confessions of a Quilt AddictTGIFF , Fabric Frenzy Friday @ Ft. Worth FabricSewjo Saturday at My Go-Go LifeShow off Saturday at Sew Can She, and Sewing Saturday at Simple Simon & Co