Easy Patchwork Placemats Tutorial

Bright and cheerful quilted placemats update your dining room or make a great gift for a loved one.

Patchwork Placemats square

This month was a quick and easy project tutorial for Fort Worth Fabric Studio… some Easy Patchwork Placemats!

I feel like a placemat machine lately!  My more modern placemats – Squared Away Placemats – were in Make Modern earlier this month, and now these are a more traditional set of placemats.  These bright and cheerful colors make a perfect birthday present for a special person.

Patchwork Placemats

I quilted a feathery all over design in light pink that is an even design that will wash well.  Unfortunately, my long arm is going to be packed up soon and I am going to miss it!

Linking up to: Fabric Tuesday @ Quilt StorySew Cute Tuesday @ Blossom Heart QuiltsLet’s Bee Social Wednesday @ SewFreshQuiltsNeedle and Thread Thursday @ My Quilt InfatuationFinish it up Friday @ Crazy Mom QuiltsWhoop Whoop Fridays @ Confessions of a Quilt AddictTGIFF, and Show off Saturday at Sew Can She


One of Those Days Mini Quilt

Challenging free pattern tutorial will test your accurate seam allowances to make a mini quilt with 448 pieces.

We all have those days… and those projects!  This project is the front of the mini quilt I showed yesterday in my mini quilt hanging tutorial.  This mini quilt was my design for the Fort Worth Fabric Studio Mini Quilt Mania for the month of April.

One of Those Days

To see the other mini quilts designers this month, visit the following links:

April 1st : Lindsey – FWFS
April 2: Melissa – My Fabric Relish
April 6: Nettie – FWFS pattern tester
April 8: Afton  – Quilting Mod
April 13: Amanda – The Cozy Pumpkin
April 14: Trina – Will Cook For Shoes
April 22: Wendy – Sugarlane Quilts
April 27: Paula – The Sassy Quilter
April 28: Heather – Quilts Actually

It’s a challenging little miniature quilt.  The blocks are 3.5″ finished, so each of those little squares and HSTs finish at 1/2″.

tiny HSTs

I really like the secondary design that is created by this block, and really wanted to try the block out, so it seemed like a good idea to try it out really small.  Ask me again in a couple weeks if it was a good idea or not!

Not to scare anyone off, but there are 448 tiny pieces in this quilt.

tiny pieces

If you are careful and precise, it is a do-able project, I promise!

nested seams

I called it one of those days because as I was assembling it, I was making pretty good progress.  Then, I noticed that one of these things was not like the others.  So, I seam ripped, and pulled the offending section out and resewed it in place correctly.

One of these things is not like the other

What I did not notice, was that a second thing was not like the others.  Not through pressing, adding borders, or until I was about 2/3 of the way done quilting and it was too late to tear it out and redo it because I had quilted too close around it.  Like I said, one of those days!

one of those days mini


At least my test to see how this block looks as a quilt was successful!  Now to move on to the full sized version!

Linking up to: Finish it up Friday @ Crazy Mom QuiltsWhoop Whoop Fridays @ Confessions of a Quilt Addict, and TGIFF


How to hang a mini quilt

Tutorial shows you a quick and effective non-permanent way to display your growing collection of mini quilts.

If you are visiting from Fort Worth Fabric Studio Mini Quilt Mania, Welcome!  I have a quick tip on an easy way to hang mini quilts.

how to hang a mini quilt_square

If I am making a mini to keep or give away, I generally do the corner tab hanging method.

When I first started making mini quilts, I didn’t add any sort of sleeve or tab to hang it with.  As a result, I never hung them up.  This is an easy way to  make it easy to hang your mini quilt up.  You made it, enjoy it and show it off!

Corner Hanging tab

To do this, I cut two squares from scrap fabric.  In this case, I cut (2) 4″ squares.  Fold them in half diagonally, and press with wrong sides together.

I then use a very small line of Elmer’s Washable School Glue within the seam that will be covered by the binding, and glue the triangle in place with the raw edges flush against the raw edges of the quilt.  Press to heat set.

This will keep those triangles in place so that they will be sewn down when you sew the binding down.

So, why on earth you would let a wire cutter get near your hard work?

Hanging tools

To hang, I cut the bottom part of a wire clothes hanger to match the width of the quilt.  I used a wire cutter to cut the hanger.

The wire clothes hanger fits perfectly inside a Command Clear Mini Strip.  Depending on the size of the mini, I will use one or two of the Command Mini Strips, and gently press the hanger into the gap.

Example of how to hang mini quilt

This gives me a removable system that does no damage to walls, and I can rearrange easily if I want to.

You can see the front of the mini quilt here!

Quilted Footstool Tutorial

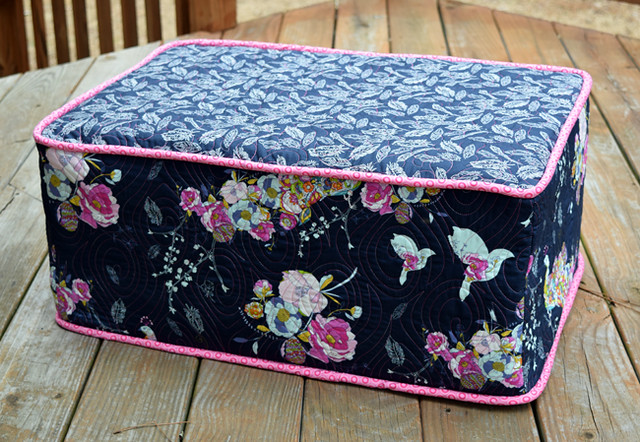
Quilt your favorite fabrics to create a statement piece by following the instructions for this quilted footstool tutorial.

I just finished my favorite non-quilt item I’ve made.

Completed footstool

My daughter is two, and we play a lot in her room – and most of that playing is at floor level.  Sitting in the nice comfortable adult size chair that is in her room is not acceptable, but my body just can’t handle sitting on the floor for hours a day.

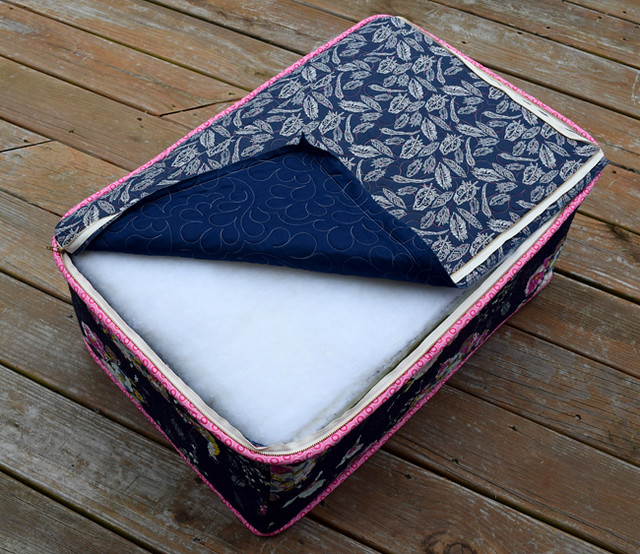
That is where this quilted footstool comes in.  We recently purchased new foam to go in the seat cushions of the couch.  We kept the old foam for a little while to see if it would fit in a different couch that is even worse (but of course it didn’t fit – that would have been too convenient!). One day as I was sitting on the floor, I realized that this old foam could be the solution to my problem.

We (royal we = my husband) cut the foam in half and I stacked it, and I made the quilted cover for it.  I have a tutorial on how I made it over at Fort Worth Fabric Studio if you would like to make your own.

Quilted Footstool Tutorial

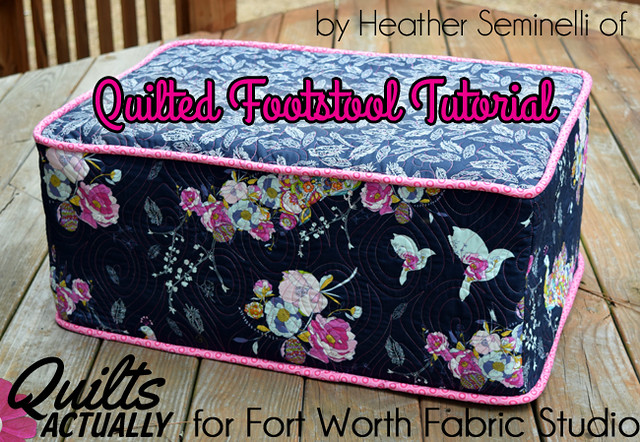
I used some fabric from the Petal & Plume line by Bari J – seriously gorgeous!  That peacock fabric is amazing in person.

Initially, I had planned to do more subdued quilting on the fabric.  I was going to use purple Bottom Line – which is a really thin thread that you would barely have seen.  The texture from the quilting would have been all that was visible.

Then, as I was looking through my thread I found this amazing pink variegated Fantastico thread and I knew it was meant to be for this fabric.  The design on this fabric is strong enough that it stands up to (and I think is complimented) by a shiny visible thread.  I used a peacock feather panto for the peacock fabric.

Closeup of Peacock Quilting

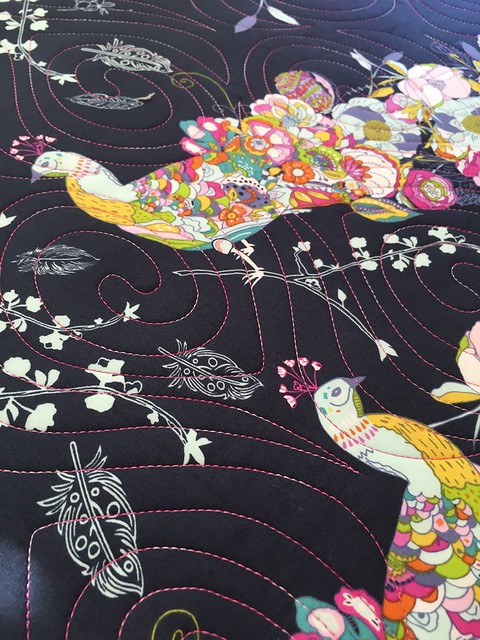
For the feather fabric, the lines are pretty thick and it the design is fairly dense so I knew that whatever quilting I did was probably not going to show very much.  I continued to use the pink thread, but switched to a loose feather panto to mix it up a little bit.

You can’t really see the quilting on the top, but you can see the pattern against the backing.  With two different quilting designs, using the same thread for both fabrics gives a little bit of continuity to the quilting.

Cover on foam with zipper open

I know most people leave their quilting on quilts, but I love bringing it into other parts of my house and life.  This footstool/cushion now sits in my daughter’s room, and I love how much color it brings into her room.

Footstool in use

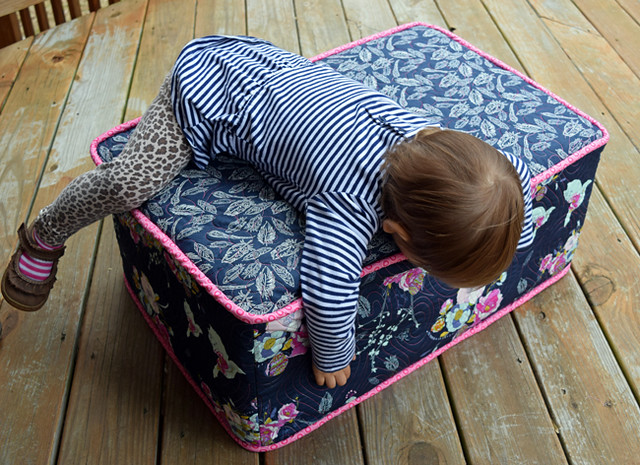
She may end up claiming this from me, based on how many times she has sat and climbed on it already, but hopefully I will also get to enjoy using it.  Worst case, I have one old couch cushion left, so I may have to make a second one for me.

If you want to bring some of your favorite fabrics into your everyday life, contact me and I can quilt fabric for you.

Linking up to some of the following: Fabric Tuesday @ Quilt StorySew Cute Tuesday @ Blossom Heart QuiltsTips and Tutorials Tuesdays @ Late Night QuilterLet’s Bee Social Wednesday @ SewFreshQuiltsNeedle and Thread Thursday @ My Quilt InfatuationFinish it up Friday @ Crazy Mom QuiltsWhoop Whoop Fridays @ Confessions of a Quilt AddictTGIFFShow off Saturday at Sew Can She, and Threading your way @ Threading my Way

Quilted Oven Mitt Tutorial

how to make oven mitts

Learn to make your own fun quilted oven mitts from this tutorial for the Fort Worth Fabric Studio.

Hello again!  This week I have a tutorial to make quilted oven mitts up on the blog at Fort Worth Fabric Studio.  Check it out!

Quilted Oven Mitt Tutorial

Making your own oven mitts is a great way to bring what you love (quilting) into the kitchen in a tasteful and useful way.  I hope you find the oven mitt tutorial useful, and please let me know if you make a pair!

Linking to some of the following: Tips and Tutorials Tuesdays @ Late Night QuilterWiP Wednesday @ Freshly PiecedLet’s Bee Social Wednesday @ SewFreshQuiltsNeedle and Thread Thursday @ My Quilt InfatuationFinish it up Friday @ Crazy Mom QuiltsWhoop Whoop Fridays @ Confessions of a Quilt AddictTGIFFFabric Frenzy Friday @ Ft. Worth FabricShow off Saturday at Sew Can SheStash Bee Link Up

Hanging Towel Tutorial

Hanging Towel Tutorial

Brighten up your kitchen with this fast and easy tutorial to make a hanging towel for your oven door.

I am a blog contributor this winter at Ft. Worth Fabric Studio, and my first project just went live!

Head on over to the FWFS blog to see the hanging towel tutorial to make one for your kitchen.

Let me know if you make one… it’s a quick and easy project.  It’s a great way to use up scraps or to add some holiday color to your kitchen.  Sometimes you just need a project that is a quick win… and this project is a good palate cleanser that can be completed in one sitting.

Hanging Towel Tutorial

Linking to some of the following: Fabric Tuesday @ Quilt StorySew Cute Tuesday @ Blossom Heart QuiltsWiP Wednesday @ Freshly PiecedLet’s Bee Social Wednesday @ SewFreshQuiltsNeedle and Thread Thursday @ My Quilt InfatuationWhoop Whoop Fridays @ Confessions of a Quilt Addict


Jewel Puzzle Paper Pieced Pattern

Jewel Paper Pieced Tutorial

Free paper pieced pattern for 12″ finished block that includes detailed photographic instructions on how to paper piece.

Today, my new Jewel Puzzle paper pieced block pattern was featured on Sew Mama Sew!  Head over to Sew Mama Sew for the Jewel Puzzle Tutorial.

Jewel Puzzle Block

This paper pieced pattern is probably a solid intermediate level… not too hard because there aren’t a lot of intersections to match up, but a lot of pieces for a true beginner.

I made this block to use a pillow in my daughter’s new room.  I wanted something bright and cheerful, and I think this block does just that.

I also made a version of this block for my Red & White Sampler.  It amazes me how different these blocks look with some different fabric and different fabric placements.

Red Jewel Puzzle Block


If you make this block, please let me know because I would love to see your work!  I’ve started an Instagram tag for #jewelpuzzle block, or you can email me a picture.

– Heather

Also linking up to:

WiP Wednesday @ Freshly PiecedLet’s Bee Social Wednesday @ SewFreshQuiltsWhoop Whoop Fridays @ Confessions of a Quilt AddictFabric Frenzy Friday @ Ft. Worth FabricShow off Saturday at Sew Can SheSewing Saturday at Simple Simon & Co,  Anything Goes MondayFabric Tuesday @ Quilt StorySew Cute Tuesday @ Blossom Heart Quilts