Oliver and S Roller Skate Tunic Pattern Review

I’m continuing my Kid’s Clothes Week theme of fall useful clothing with my Roller Skate Tunic Pattern Review.

Roller Skate Tunic Pattern Review

Pattern: Oliver and S Roller Skate Tunic and Dress (digital version)  This is a great pattern for the digital side, because there is not that much to print.  It was a nice change from some of the huge patterns I have printed off lately.

Pattern Description (from designer): This cute and easy dress can also be made as a tunic, with two different styles for each length. All views include built-in cap sleeves, Empire-waist elastic casing, and keyhole-with-button opening at back.

Fabric Required: For 12-18 month size, 3/4 yard of both the lining and outer fabric.  One button for the back closing… a lion button makes any kid’s shirt better!

Oliver & S Roller Skate Tunic

Amount of fabric used: I’m pretty sure I could have cut it out of a half yard cut of fabric.

Sizing: My daughter’s chest size matched the 12-18 month size exactly, so I made the 12-18 width with 2T length.

Alterations: The only change I made was to add some length.

Instructions: This is a pretty simple shirt to construct, and the instructions are good (as always from Oliver and S).  The marking of the line where the elastic casing goes was a bit tedious, but there are better tools that make it easier (I just don’t own them).  The method to use carbon paper and a tracing wheel would be infinitely faster, easier, and more accurate.

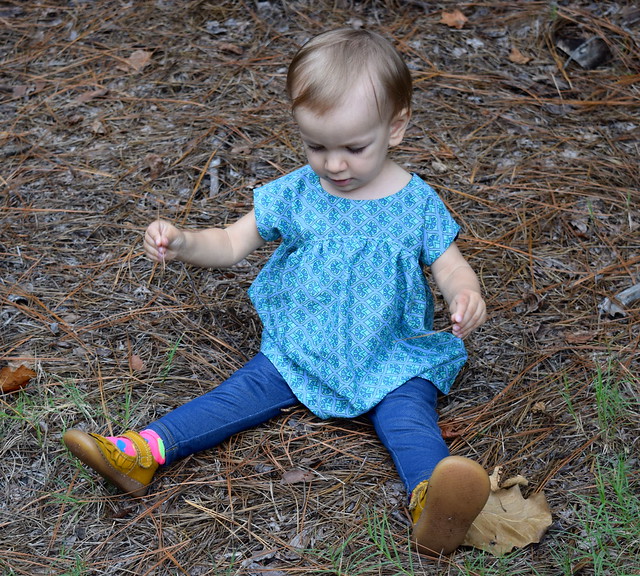
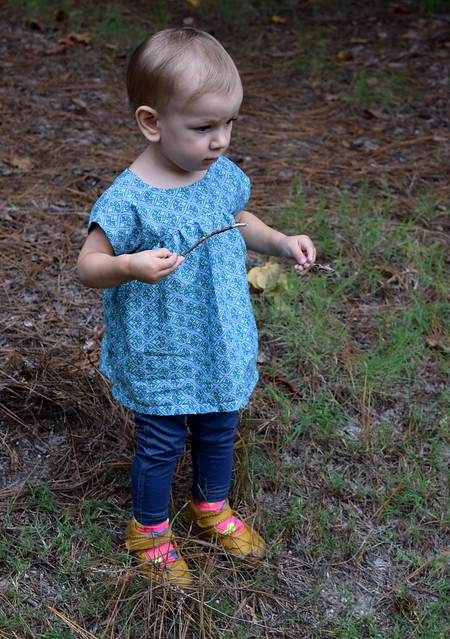
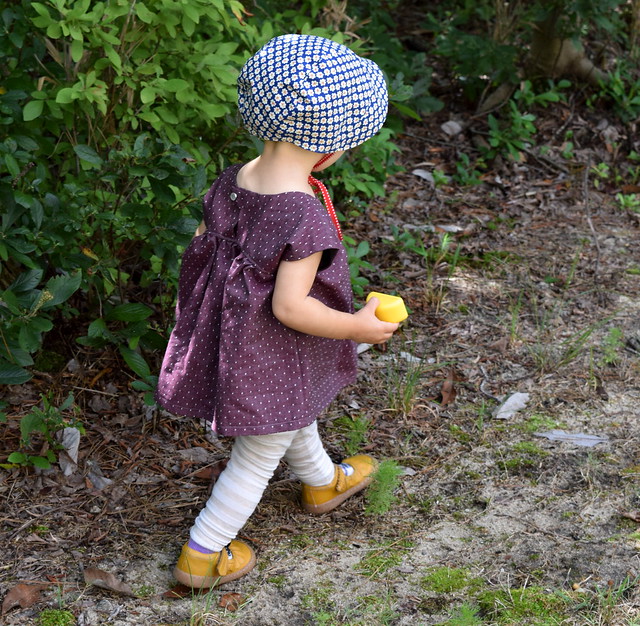
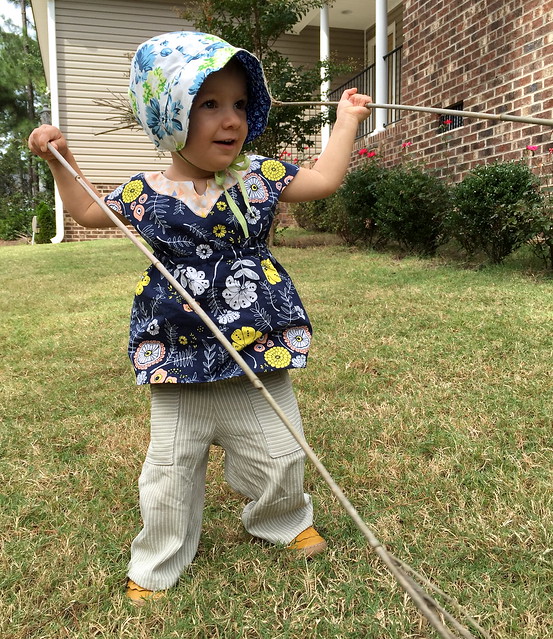
Pattern Issues: I measured the elastic to be the exact width of her chest (plus the seam allowance) as directed, but I think it’s a little tight.  Not uncomfortable tight, but when she lifts her arms, the shirt rides up and stays up.  In my next version I will make the elastic a little bit looser so it hopefully won’t have that issue. You can see what I mean in the picture below…

Oliver & S Roller Skate Tunic

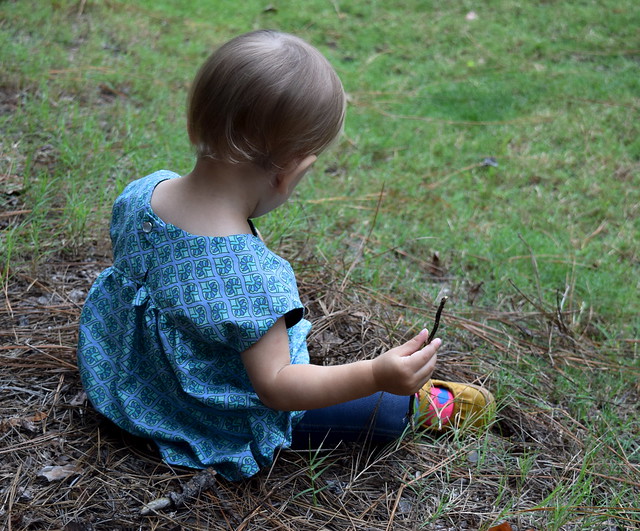
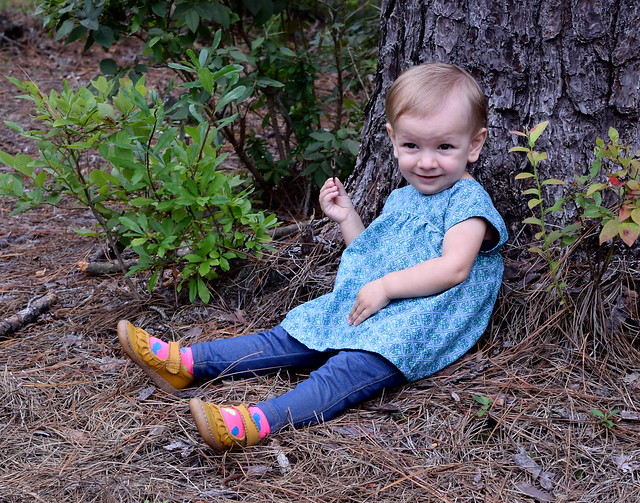
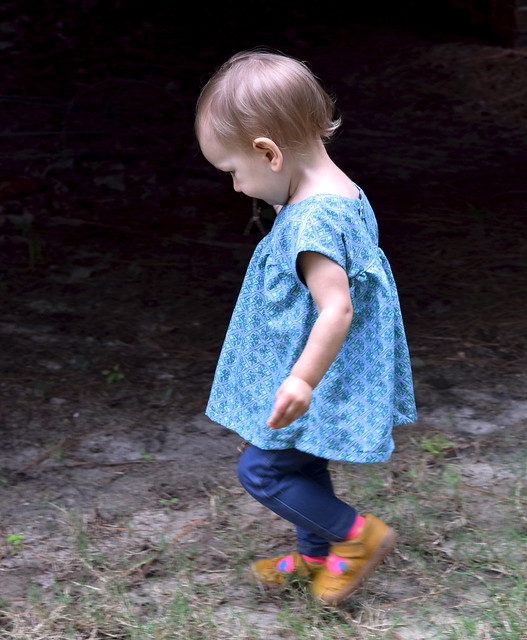
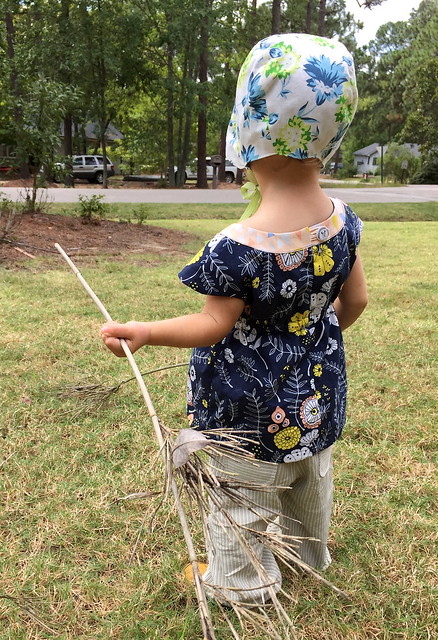
Fabric Choice: I used quilting cotton for the outside and voile as the lining.  The weight works well together.

Finished Product: Overall, I think it’s a cute shirt.  I already have another one cut out, it just needs to be sewn up.  I think with the cutout, the neckline is a little low on my daughter.  Maybe for her size, it gets low proportion wise?  I’ve seen a lot of other versions of this dress and never had thought before, but sometimes there is a little more food stuck in the top after a meal than is ideal.  Until she gets into larger sizes I don’t plan on using the cutout again.

Husband’s opinion: He doesn’t like how it rides up, but hopefully loosening the elastic will take care of that.

Notes for future makes: As stated above, I will make the elastic  a little bit looser in my next version and probably not use the cut out option until she is a little bit older.

Oliver & S Roller Skate Tunic

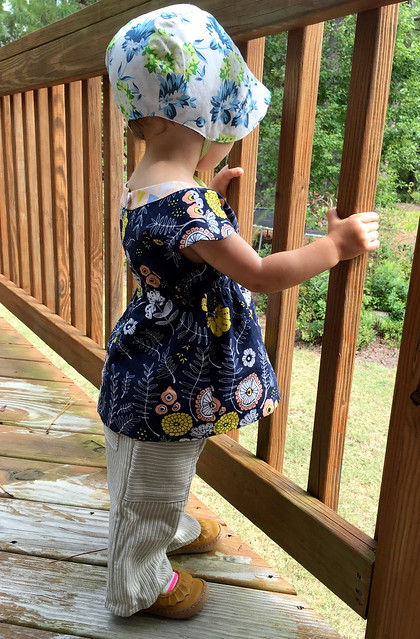
Final Thoughts: The Roller skate tunic is a well designed pattern that creates a good looking dress.  I like how it is lined, and think it is a very flattering and cute silhouette for a little girl.

Also, the pants are the Oliver and S Sandbox Pants that I made for the Winter 2014 KCW (last January).

Izzy Top Review

Here in North Carolina, fall sewing looks a lot like summer sewing for a good reason.  Last week, I think we had about 80 good reasons to wear short sleeves and still sew short sleeves this far into fall.  Therefore, my latest project and review is the free Izzy Top from Climbing the Willow.

This is also the unofficial start of Kid’s Clothes Week for me!  We have some family stuff next weekend, so in my personal version, KCW runs from 18-24 October instead of 20-26 October.

Izzy Top

PatternIzzy Top from Climbing the Willow.  Available for free in sizes 18 months – 12 years.

Pattern Description (from designer): The Izzy Top is a sweet, feminine curved yoke top pattern that closes with a button (or snap) tab in the back.  It is a very simple pattern to make and only requires basic sewing skills.

Fabric Required: 1/2 yard of main print, 1/4 yard lining for 18 months and 2 years.

Amount of fabric used: every last bit of 1/2 yard of the main fabric.  I had to actually reduce the width of the flared portion to fit in a half yard.

Izzy Top

Sizing: The 18 month size is recommended for a 19.5 inch chest.  The designer also mentions that she designed it to fit true ready to wear sizes.  I think that is pretty accurate.  My daughter’s chest is 18.75 inches right now, and I’m glad I have the little bit of ease because it makes it easier to get on and off.  Also, my daughter has a huge head and needed every bit of the neckline to get it on and off.

Alterations: I added 1.5 inches to the length because my daughter is about a 2T in height.  I used a snap for the back enclosure because I didn’t feel like doing button holes.

Izzy Top

Instructions: The instructions were good.  There are pictures for every step.  The only change I made was to baste the bodice to the skirt portion prior to serging them together.  I basted one one top, and did not on the other and the one I basted first turned out nicer.  Most shirts/dresses I have made in this style have the seam mid-chest enclosed, and at first I was annoyed that it was not, but the seam doesn’t seem to bother my daughter and it was faster a little bit easier to serge the seam.  If you don’t have a serger, you would probably want to lengthen the lining piece about half an inch to be able to enclose the seam.  Or you could do a french seam, or a flat felled seam there as well without issue.

Izzy Top

Pattern Issues: None.  This is a free tutorial, and I think for it being free, she did a great job!  The pattern fit as advertised, there are photos for every step, and it is a cute shirt.

Fabric Choice:  One shirt was a Lisette voile from a year or two ago.  The other shirt I made from chambray dots.  I purchased it in person at Mulberry Silks in Carborro, NC, but I’m pretty sure this burgundy chambray dot is the same one.  It’s a heavier weight than the voile, but still works well for this shirt.

Izzy Top

Finished Product: This is an adorable shirt for a toddler.  The shirt is a little wide for my taste.  I prefer the blue one that I didn’t have enough fabric to make the full width, so I will probably reduce the width again when I make this in the future.

Izzy Top

Husband’s opinion: Likes it, but agrees that the full width is a little too full.

Final Thoughts: This is a well put together tutorial in a wide range of sizes that I will most likely make again as she grows out of the current versions.  I even like it as it gets colder because I can either layer it over a long sleeve shirt, or put a cardigan over it.  I think in the spring I would like to try it with a knit for the bottom portion.

Notes for future makes: Reduce the width of the bottom portion.  I think in the spring I would like to try it with a knit for the bottom portion.

Round Trip Quilts, round 1

I am part of the Round Trip Quilts group that formed from the New Blogger Group that Plum and June does every year.  We are 8 ladies from the US and Canada that will be making round robin quilts over the next year.  We just finished up the first round of the round robin.

I had the fortune to start on Kim’s quilt.  Kim blogs at Ties That Bind Quilting.  Kim explains the start of her quilt in this blog post, Introducing Round Trip Quilts.  Her inspiration is a color story, and she sent quite a few bright, saturated, and (in my opinion) pretty awesome blocks blocks to start her more modern round robin.  You can see what I received below:

Round Trip Quilts, Round 1
It was such a bright, cheery palette that I just stared at it for awhile.  I had a hard time trying to decide what to add to it that would make sense and be appropriate for her quilt.  Adding on to someone else’s quilt is a big responsibility!  I’d never felt quite this challenged when making my own work, but I was nervous to do something Kim wouldn’t like.

I kept going back and forth about what to add, and then I would second guess all my ideas.  So, I decided to start by pulling fabric and move on from there.

Round Trip Quilts, round 1

When I asked Kim’s opinion on Instagram (she is tiesthatbindquilting), she said she liked the blue streamers that are second from the bottom and the top purple and pink AMH the best.

I moved on to more research, stalking her pinterest account and researching tons of blocks.

Then, one afternoon I was going through my quilting books trying to decide which ones to keep and which ones to find new homes for, and saw the cover of “Fresh Quilting” by Malka Dubrawsky*. That sewing machine cover on the top right just seemed like the perfect fit for what I was looking for!

Fresh Quilting by Malka Dubrawsky
I started chopping up my chosen fabrics into squares, and adding the sashing.  Once I started, it was like I couldn’t stop!  It was such a relief to figure out what I wanted to do.

Round Trip Quilts, Round 1

I debated assembling the blocks.  I would have sewn together the sections on the left side of my block, to my block, but the sizing didn’t quite work out and I didn’t want to cut any blocks yet because someone later might make something that fits better.

Round Trip Quilts, Round 1

Mostly, I was just excited that my block looks like it fits in when Elizabeth from Green Cheese Quilting pulls it out of the envelope!

Round Trip Quilts, Round 1

If you want to see more, Round Trip Quilts has a Flickr group and you can follow us on Instagram using #RoundTripQuilts!

The full list of members is below:
Heather at QA Creations
Leanne at Devoted Quilter
Kim at Ties That Bind Quilting
Liz at Green Cheese Quilting
Mary at See Mary Quilt
Christina at WIPs and Tuts
Jennifer at Never Just Jennifer
Chelsea Huckins at Patch the Giraffe


Linking up to: Fabric Frenzy Friday @ Ft. Worth FabricWhoop Whoop Fridays @ Confessions of a Quilt AddictTGIFFAnything Goes MondayFabric Tuesday @ Quilt StoryWiP Wednesday @ Freshly PiecedLet’s Bee Social Wednesday @ SewFreshQuilts

* I’ve signed up to be an Amazon Affiliate.  I won’t get rich anytime soon because it gives me less than $0.50 if you buy a book that I link to (within the 24 hour window that you click on it), but I’m hoping that it may help at least offset my web hosting fees.  It doesn’t change your price to purchase, so if you do decide to buy any books I link to, thanks for the support!