Spinnaker Quilt for my dad

Now that Christmas is over, I can share the Spinnaker Quilt that I made for my dad.

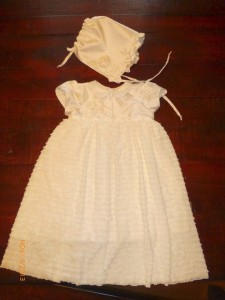
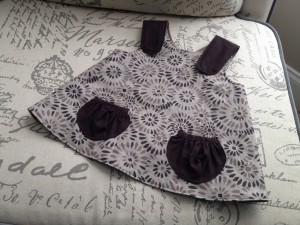
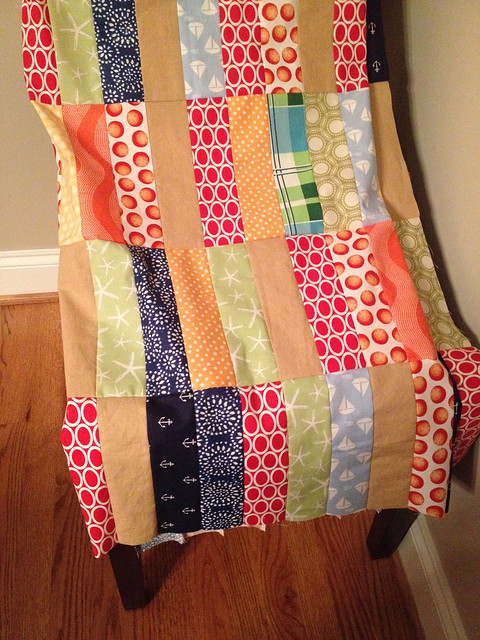
This summer I went to visit my parents and Grandmother in Wisconsin.  While I was there, my dad described a skirt he had seen and asked if I could recreate a quilt like it.  He wanted a quilt made up of rectangles about 2 inches by 8 inches in yellow, red, and green with some white in there to calm it down a bit.  His major descriptor was that he wanted it to be bright and cheerful.  Later, the request was modified somewhat as he said it reminded him of the colorful spinnaker sails at a sailboat regatta.

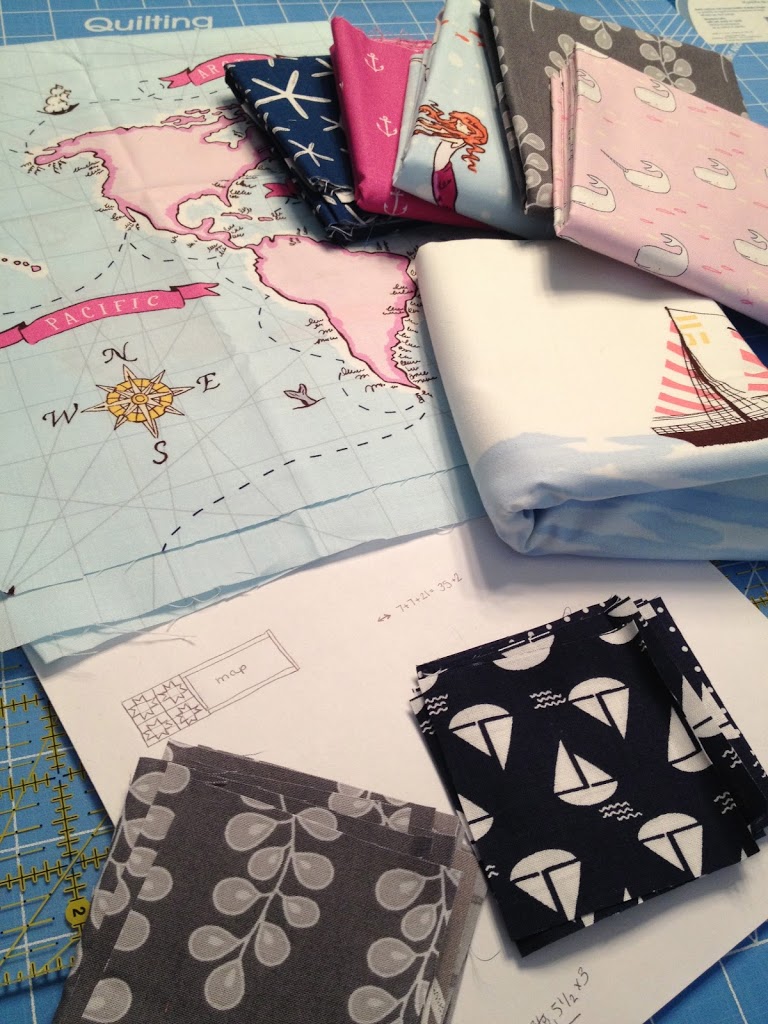
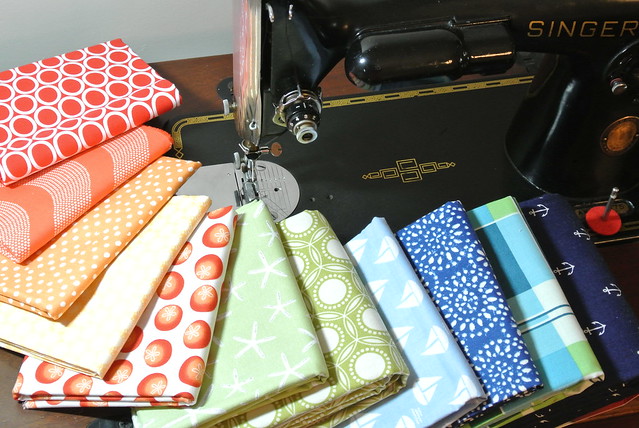
I had already pulled some nautical fabrics before the spinnaker theme was requested, so I knew I was going in the right direction.  My dad grew up around boats, and had a boat most of his life.  Some of my fondest memories growing up are from sailing down the Columbia River at dusk.

The making of the Spinnaker Quilt

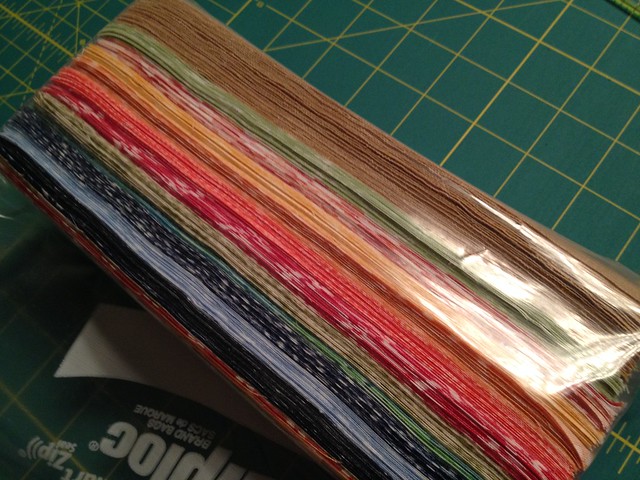
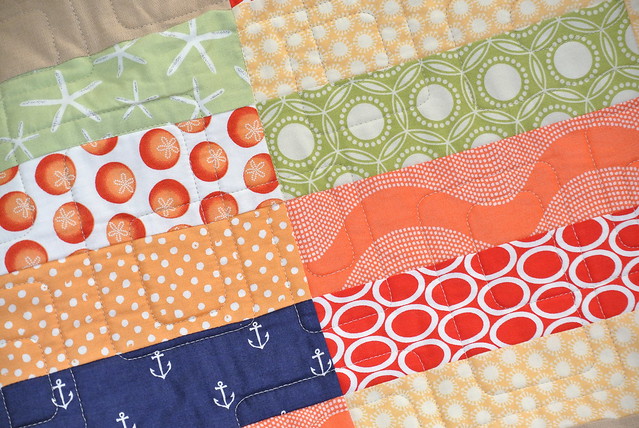
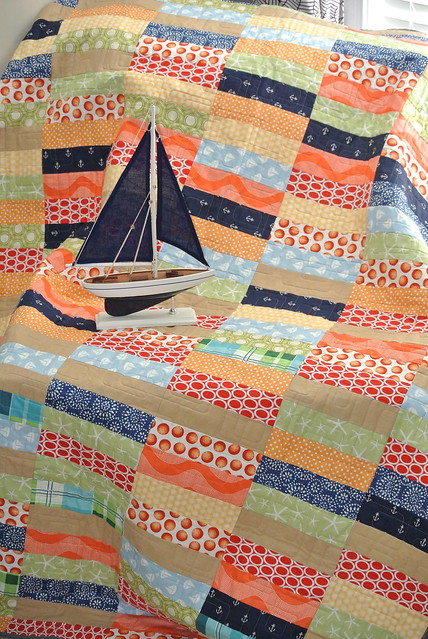
Each of the 238 rectangles in this quilt measure 2.5 inches by 8 inches prior to sewing.

The making of the Spinnaker Quilt

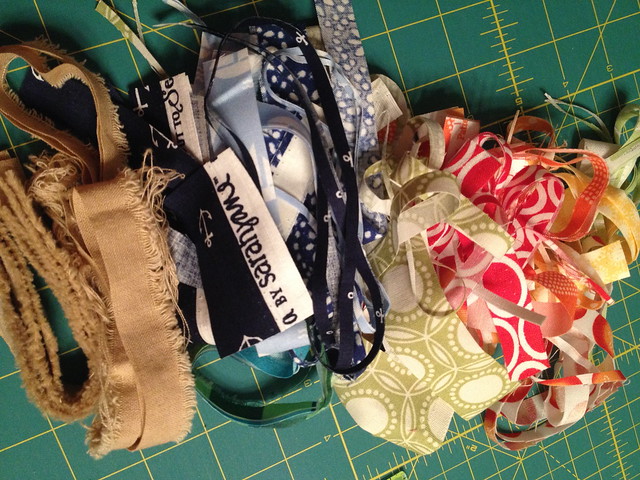
My trimmings turned out quite pretty, at least more so than usual.

The making of the Spinnaker Quilt

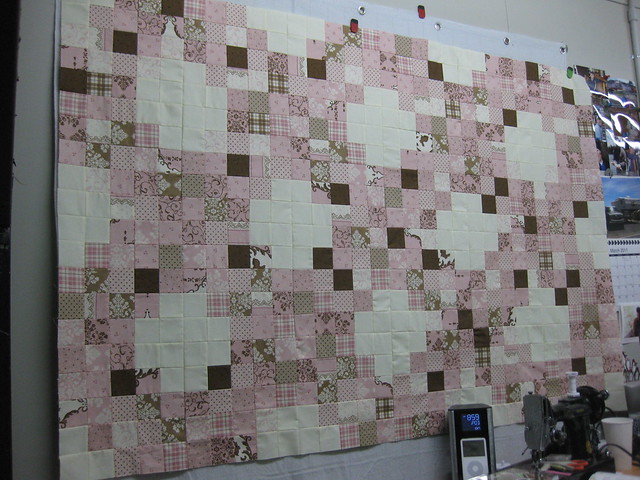
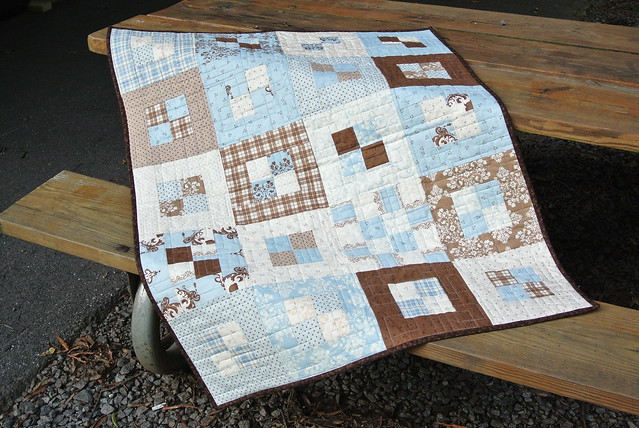
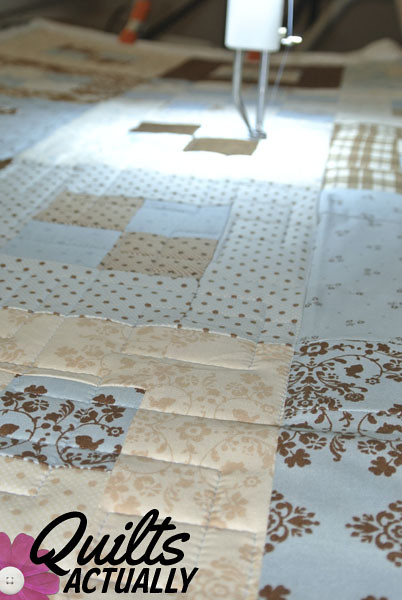
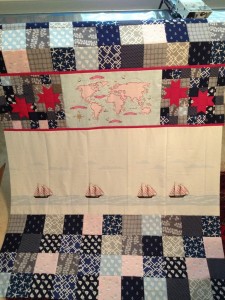
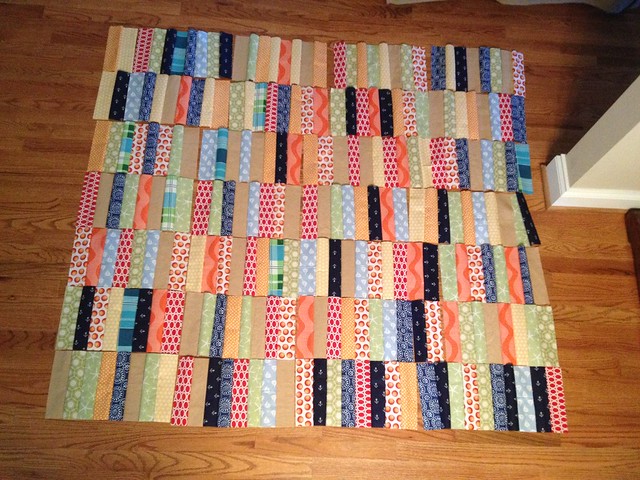
The layout is 34 rectangles vertically and 7 rectangles wide.  The top photo is prior to being sewn together – it was a risk to use the design floor with baby and dog around.

The making of the Spinnaker Quilt

The making of the Spinnaker Quilt

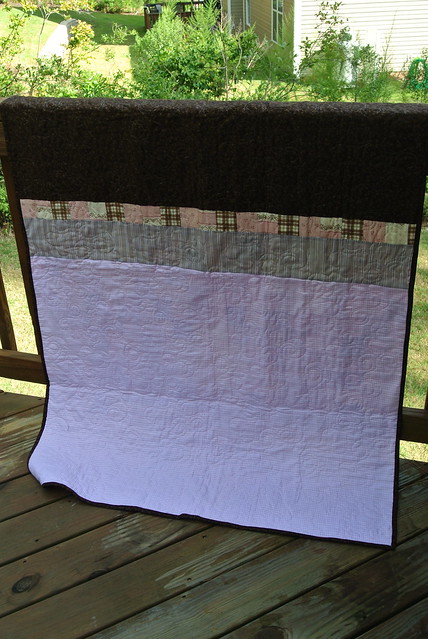
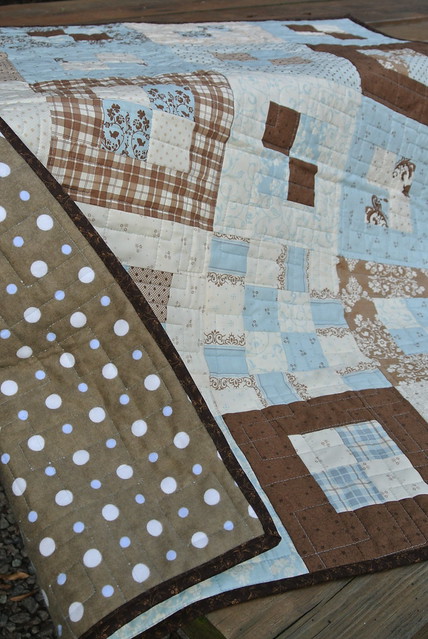
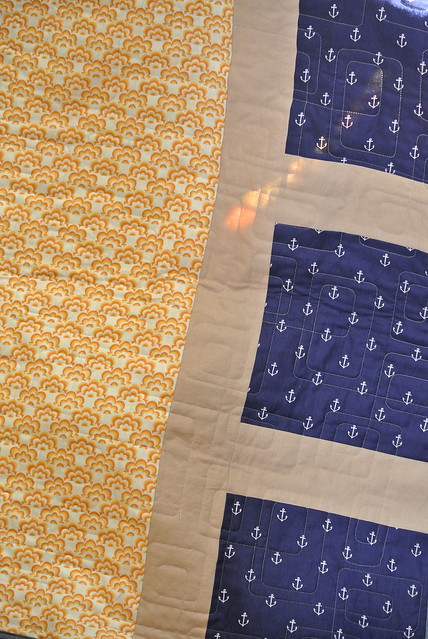
The back is pieced – I didn’t have enough of the one main fabric, so I pieced in the linen and anchor fabric as a design choice.  Plus, I think pieced backs are kind of fun.

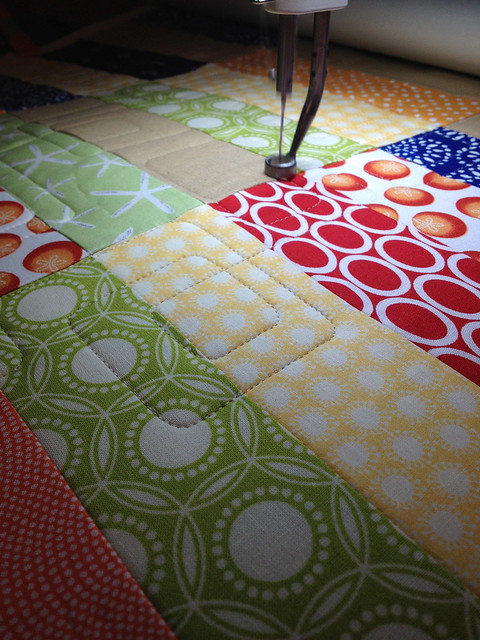
I chose to quilt it with a new panto – rounded rectangles.  I wanted something masculine, yet the rounded edges helped to soften the design.  I think a sharp quilting design would have been too much for this quilt.

The making of the Spinnaker Quilt

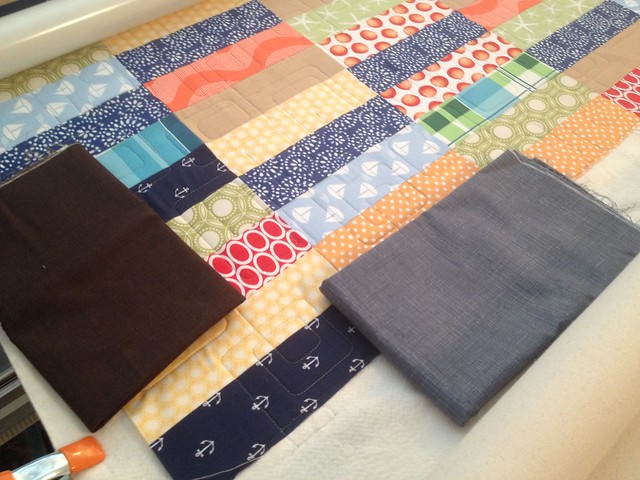
I debated about the binding, but after getting some confirmation from instagram friends, I went with the gray binding.  It fit the nautical theme much better.

The making of the Spinnaker Quilt

The making of the Spinnaker Quilt

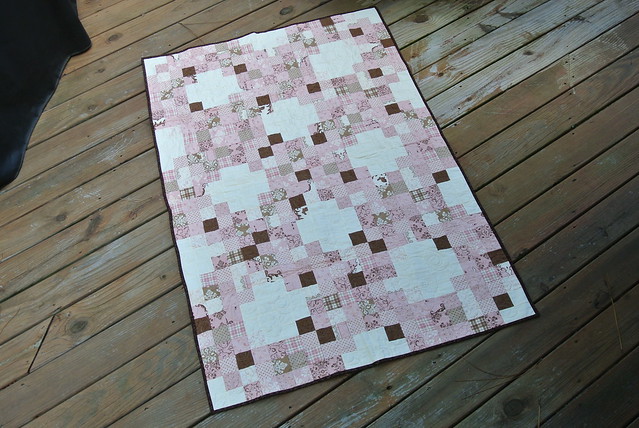
And now for the stream of finished pictures… The quilt had been finished for several days before I finally had a sunny day to take them!

Spinnaker Quilt

Spinnaker Quilt

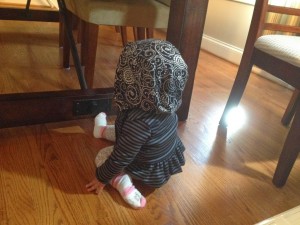
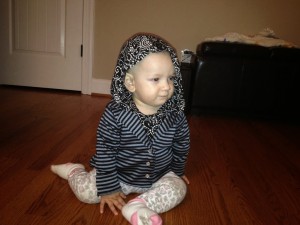
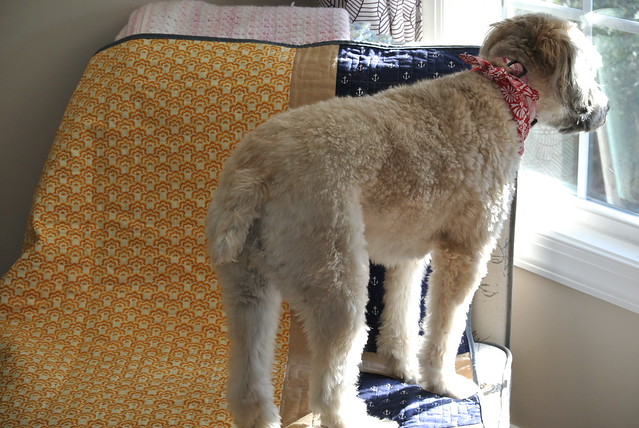
I had trouble taking pictures of the back thanks to my helpers – my two girls.  First, the dog wanted to see what was going on outside.

Spinnaker Quilt

After I closed the window, the daughter walked over trying to figure out why she couldn’t see outside.

Spinnaker Quilt

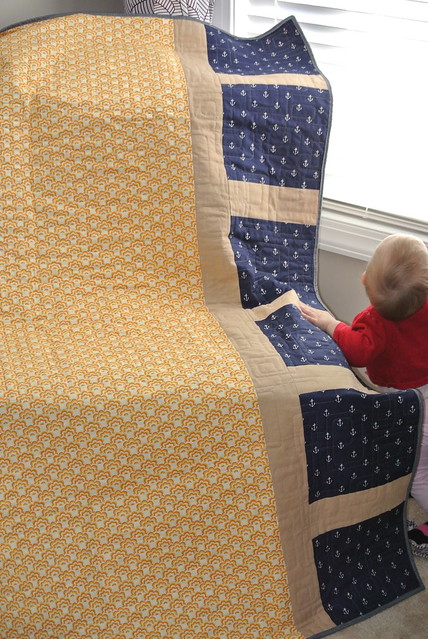
It’s a very large throw, which made it a little difficult to get a photo of the entire thing inside my dry house.  I don’t risk quilts outside when it is wet.

Spinnaker Quilt

Spinnaker Quilt

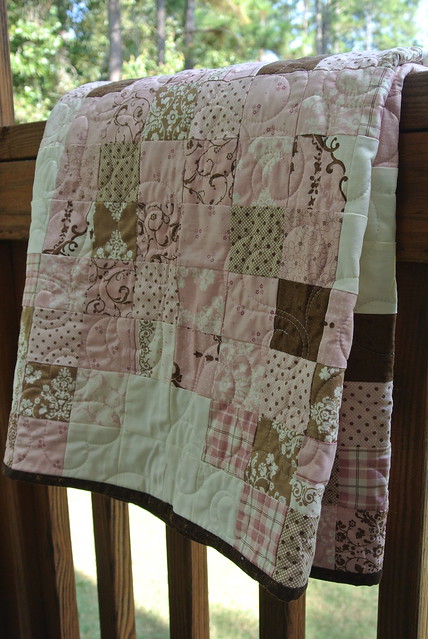
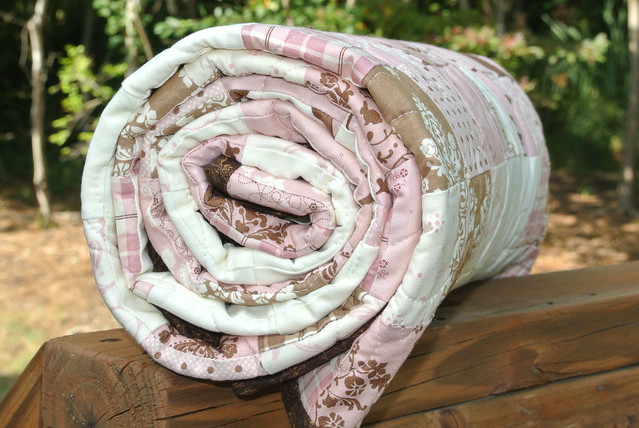
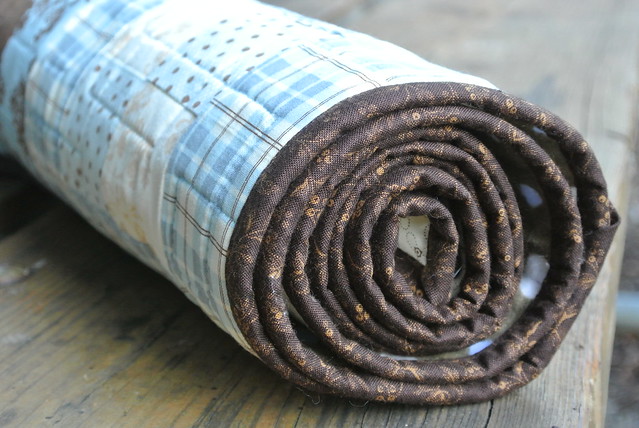
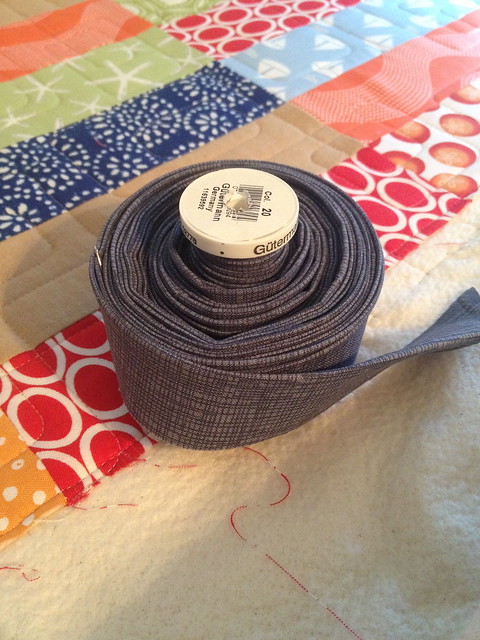
Lastly, the roll shows the binding color the best.

Spinnaker Quilt

My dad loved it! Below is my dad’s view of the quilt being shown off Christmas morning.  So much so that he said it was too nice to use and that he wanted to just hang it up.  Luckily, my mom (who crochets, and therefore understands that things are made to be used) told him it was too nice not to use and that he has to use it.  A successful Christmas quilt!
Spinaker QUilt

Linking up to: Quilt StoryYou Flew Tuesdays at Feather’s FlightsFinish it Up Friday at Crazy Mom QuiltsFriday Favs Party at Nap Time Crafters, Anything Goes Mondays at Stitch by Stitch, and while not quite a work in progress (because I couldn’t share it during the progress) Work in Progress Wednesday at Freshly Pieced.

I love my new serger!

No seriously, I can’t believe I didn’t get one sooner.  I love my serger.  I have the super-basic Brother 1034D.  It was supposed to be my birthday present back in May, but I wasted months trying to figure out why there is such a price jump in sergers and if the more expensive ones are worth it.  I chose to get a basic serger and then I will get a cover stitcher at a later date.  The combined cost will be less than many of the fancy sergers I was considering.  Despite all my debating, I finally got my serger and I love it!

Why do I love it?  It is amazingly fast, and the finish looks great.  It is also easy to use.

I was a little intimidated at first, mostly because people talk about how hard sergers are to thread and to get the tension correct.  I watched the video tutorial, and then set out to serge.  I was a little upset at first because out of the box, the thread kept breaking and it was not working like the video.  Then I discovered one of the spools had the edge with the cut in it up, so the thread kept getting caught and breaking.  One of the bonuses of this almost tragic frustration is that I got really good at threading it almost immediately.  In fact, I prefer rethreading it when I change thread color to doing the tie and pull thread through method that even the video recommended.

How did I get to love my serger so fast?  I used it on real projects to learn.  I know people advise you to practice on scraps first, but I get bored.  So, after about 12 inches of sewing on scraps I jumped to real projects.

I had two knit projects cut out ready to go: the Bimaa Sweater (LouBee Clothing) and the Lily Blazer (Peek-a-boo Pattern Shop).  It turns out I did not choose the easiest projects – not that the patterns are difficult in any way – I chose difficult fabrics.

For the Bimaa, I chose the lightest knit ever from JoAnn Fabrics.  I made a 2T, because my daughter’s measurements put her in the 12 month size but I’ve read that it fits tight and I wanted it to fit over onesies.  I should have done the 12 month length with the 2T width because the body and sleeves are about 2 inches too long.  Oh well, room to grow right?

I followed the advice from the video tutorial to change the feed differential to 0.7 for light knits and had no issues putting the Bimaa together.  The serger goes so fast I had to get over my quilter’s need to pin every two inches (and more often on curves).  I felt very proud of my first knit garment when I finished it.  There are a few seams that are not as attractive as they could be on the starts and stops, but it’s a learning process.

The only odd thing about this pattern is that the hood is huge!  My daughter has a large head – like 96th percentile huge head – and she swims in it.  It is also so big that it pulls the shirt too far back because of too much fabric weight, so it pulls at the neck.  If I were to ever make this hoodie in the smaller sizes I would probably try to draft down the hood a little.  Most likely, I just won’t make the hood option again until she is older.  I will probably do the shawl option next.

For the Lily Blazer I chose a beautiful stripe that I am pretty sure I also got at JoAnn Fabrics.  Knit stripes are probably not a good choice for a second garment ever made on the serger, but I went for it!

Most of the stripes ended up matching, so I’m pretty happy with it.  I made the 12 month size.  I love the ruffle on her butt when she is crawling around.

The only other change I made was to use snaps instead of buttons because they are easier to dress her with.

The way this is constructed it becomes fully lined when you are done which is very nice.

My only complaint is that the sleeves are too long with the cuff.  I should have followed the baby example the pattern came with where the designer didn’t add the cuff and just hemmed the sleeves.  Then, the length would have been perfect.  As is, I fold the cuff up completely and the serged edge shows.  The black thread against the dark fabric isn’t really noticeable so in reality, I’m probably the only person that will notice.

I can’t wait to keep using my new toy!

Linked to: Make it, Wear it from The Train to Crazy, Fabric Tuesday at Quilt StoryYou Flew Tuesdays at Feather’s Flights and Friday Favs Party at Nap Time Crafters.

Oliver and S Fairy Tale Dress Christening Gown

A tale of two christening gowns: The heirloom and the Oliver & S Fairy Tale Dress

Situation: The first was my baptism dress from when I was baptised and my mother passed it on to me to use with my daughter.  I was baptized at 6 months so I thought it would fit my 9 month old daughter.  Unfortunately, it did not fit.  That left my mother and I to start making a dress Thursday morning for church on Sunday morning at 9:00 am with the added detail that 6 additional family members were arriving Saturday afternoon, so it had to be finished before then.

Solution: We chose to flip the Oliver & S Fairy Tale Dress.  I wanted a peter pan collar and sleeves with an empire waist to echo my original dress that my mother had made.  The fairy tale dress gave me that bodice top and the adjustments gave the long traditional bottom.

To accomplish this I had to make a couple minor adjustments to the pattern.  I cut off the fitted dress at an empire waist height, and adjusted the skirt length to go down to the floor.  I also took a lot of the gathering out of the skirt because of the silk dupioni fabric I chose to use, and I also felt like it would be overwhelming for such a little girl.

My daughter measured 19.5 inches at the chest which put her as a perfect size 6-12 months, but due to the compressed time frame I didn’t have time for a muslin and couldn’t risk it not fitting.  Therefore, I made the 6-12 month size with the 12-18 month width as you can see in the bodice pattern photo.  After it was finished, she had enough room that I’m sure the 6-12 month width would have fit perfectly fine but I just couldn’t risk it turning out too small.

I also added ruffle fabric for the skirt.  I made the ruffle fabric about 4-5 inches longer than the silk just to cut down on bulk and make it easier for my daughter to move and easier for me to hold her.

To add the ruffle fabric I used the silk as the lining, but not as the lining like the pattern calls for.  Due to the thinness of the ruffle fabric, I could not use it as an outer layer to attach the zipper to.  I treated the silk and the ruffle as one (outer) layer of fabric with no lining.  This (combined with the empire waist) led to a couple minor differences from the pattern: 
– The skirt seams had to be finished because they were not sandwiched within the lining.  The ruffle fabric does not fray so it did not need to be finished – I just cut it at the length I wanted.  

– I did not use a side seam for the ruffle layer.  I used the entire width of fabric by the length I wanted for the skirt and only had the back seam.
– Shorter zipper: with the empire waist there is no need for such a long zipper.  I ended the zipper about three inches below the empire waist and it was long enough to get my daughter in and out easily. The instructions for an invisible zipper were good, but I hadn’t done one in forever so the Coletterie tutorial helped fill in the blanks for me.  

– Lining: My mom hand stitched the lining down on the inside of the dress.  We also left the seam of the skirt and bodice upwards instead of ironing it down like the pattern calls for.  That seam was then covered by the bodice lining.  
– Hook at top of zipper: I left it off and it stayed closed just fine throughout the day.  

This was the late night photo when we finished the dress Friday night – ahead of schedule!!

I added some silk flowers to both the bodice and the bonnet.  I used this tutorial from Just Another Hang Up for the flowers.

 The bonnet is a combination of several tutorials that I found online because I didn’t find a single one that was what I wanted.  I got the shape from this one and the ruffle from this one.

I love how the combination turned out!  The tulip sleeves, peter pan collar, and ruffle fabric made such a sweet dress.  This may have taken more time to make than the time she wore it for, but I really love it and maybe someday this can be worn again.  The wrinkles show she wore it most of the day.

Lastly, a vintage view of a beautiful girl in a dress made by her mom and grandma on a quilt made by me.

Linking up to Show and TellMade By Hand, Fabric Tuesday and You Flew Tuesdays.

Blogger’s Quilt Festival: Daisy Chain Finished!

I am pleased to welcome you to my baby quilt entry for the Blogger’s Quilt Festival! This quilt is another oldie but goody… I started it in Afghanistan in March 2011 or so, and was pieced using my Featherweight (you can see it in the bottom right corner in the photo below). This design is “Daisy Chain” from “Jelly Roll Quilts” by Pam & Nicky Lintott. This is the throw size, sans border.  I think the fabric was Lily and Will – the pink version.

Daisy Chain

I longarm quilted it this summer.  You too can have me finish up long overdue WiPs as part of Quilts Actually.

Daisy Chain

The binding and backing is by now looking familiar if you see my work.  When I started quilting I bought this brown fabric as backing formy first quilt.  I bought way too much and it has been used in two quilt backs, and three bindings so far.  I say so far because there is more fabric left.  Luckily it works with a wide variety of my quilts!  The back is mostly flannel – the pink houndstooth you see below.

Daisy Chain

This was once again finished during camper quilting.  My featherweight and I can do great things together while my husband watches the baby.  It is quilted with a light pink thread in a heart panto design.

Daisy Chain

The colors are most accurate in this rolled up shot – it is such a sweet baby quilt.

Daisy Chain

Linked to: Blogger’s Quilt Festival Fall 2013 and Finish it up Friday!


Kids Clothes Week, Fall 2013

I was very excited to participate in Kids’s Clothes Week for the first time!  This is pretty much what I got done for the week, but I was showing real time progress over on Instagram throughout the week.

First, the plan.  There have been many versions of the plan.

Version 1 – make 3-4 bonnets to last through winter into spring, 2 O+S seashore dresses, and a fall themed pinafore.   Now, why did it seem like a good idea to make two O+S summer dresses in October?  I wanted one as her Army vs. Navy outfit, and figured while I was at it I should also make the next size up for next summer.  I wanted the upper portion embroidered with the Army logo, but after many hours of searching I realized West Point has its copyrights locked up so tight you can’t even find a legitimate way to do what I wanted to do.  Also, realistically we are going to be sitting on our couch watching the game so it doesn’t matter what she wears.  Seashore dresses out.

Version 2 – I bought a serger (yay!), so what better time than the present to learn how to use it?  I saw Bimaas and leggings in my future.  Turns out the serger doesn’t come with thread and the instructions I need to watch on a windows computer.  My windows laptop died over a year ago.  Moving on…

Version 3 – Get ready for a Southern Winter Kids Clothes Week.  This still includes a bonnet and pinafore.  Now, I added flannel lined Quick Change Trousers, baby mittens, lumberjack hat, scarf, and O+S hood.  Neither winter hat was completed.

Pinafore: The pinafore needs two buttonholes.  In my defense, my regular machine decided it doesn’t want to sew without leaving huge thread nests from the bobbin so this was/is on hold while I bought a vintage buttonholer off eBay for my Featherweight, which is what I’m sewing on this week.

The pinafore is using the free pattern from Smashed Peas and Carrots.  I added the pockets on one side, and fall appliqué on the other side.  It is made of linen, and once I get buttons put on will be super cute. These in-progess pictures show the idea.

Side 1:

Side 2: 

Fall applique
Fall baby dress

Baby mittens- version one and two complete.  The concept is good, but my daughter has really long fingers so they just barely fit.  This was my priority because it was 40 degrees several mornings this week and she doesn’t like to keep her hands under the blanket.  I used the tutorial from Speckled Owl Studio.  The only challenge was that tutorial was really meant for newborn mittens to keep babies from scratching themselves as opposed to winter gloves, so I had to do some adjusting.  I used corduroy and fleece to warm them up.  I am still working on sizing because my second version was too large and she just pulled them off her hands in two seconds.

homemade fleece mittens

Bonnet- this bonnet makes my heart heavy.  I absolutely love how it turned out!  The problem is that it is huge!  Her old ones were getting small so I decided to go up two sizes, and it will not fit this winter.  Maybe next week I can face making another smaller one.  This matches the pinafore perfectly, so it would be a shame to not have her wear them together.

Handmade baby bonnet

Winter Quick Change Trousers: I used the pattern from Handmade Beginnings by Anna Maria Horner.  The last pair I made was huge, so I reduced the front piece by an inch on each side.  This was probably a little too aggressive, about 1/2 inch would have probably been perfect.  I also added the tuxedo strip for some fun.  The butt is also the gray elephant fabric, and I love the elephant butt on these!  The inside shown is flannel.  The large size is nice in winter because they do fit over her knit pants.  I used the width reduced 9 month size with 12 month length.

Handmade fleece lined baby pants
Fleece Booties: Also a must in the cold.  I used the tutorial from Dorothy Was Here.  I used the size exactly as is, and they fit my 8.5 month old perfectly.  I will probably have to size them up for another pair before the winter is over.  I would also like to try using the non-stick fabric on the bottom like she suggested, but I couldn’t find any at my fabric store during Kids Clothes Week.  
Handmade winter baby shoes

The combined result of this efforts is my little warm girl below 🙂  Although, we did add two more blankets because it was freezing this morning.  Not too bad for a week’s effort!  Kids Clothes Week has been a blast and I can’t wait for the spring version!

Edited to add:
Linking up to Show and Tell, Made By Hand, and Make It, Wear It.

Pandora’s Box is finally finished!

Sometimes my WiPs get out of hand… as in taking years to finish a simple baby quilt.

I began this quilt top in Afghanistan in December of 2010.  It’s been awhile!  The design is “Pandora’s Box” from “Jelly Roll Quilts” by Pam & Nicky Lintott.  My version is half size and I left off the border.

Finished Pandora's Box


I quilted this in mid-July 2013.

I put the binding on this weekend.  As in late August 2013.  Thank goodness for camper quilting.  My featherweight and I are going to put an end to my stack of unfinished quilts.  Or at least that’s the plan.

Finished Pandora's Box

 
The quilting is an allover square design to keep the quilt boyish.  

Blue and Brown on longarm 2

 
The backing is a brown flannel with blue and white polkadots.  The resulting quilt has a nice weight to it, but still moves easily and isn’t too stiff.  

Finished Pandora's Box


Linking up to Craft Buds Craft Book Month 2013 and Finish it up Friday.


Craft Book Month

Em’s Out to Sea Quilt

From the moment I found out I was pregnant, I knew I wanted to create a quilt for my baby.  I suppose it’s the sickness all quilters have – any excuse to make a quilt is justifiable.  Once I knew I was having a girl, the desire only increased.  My only problem was that I was actually creatively stifled by the multitude of options and all the different designs I wanted to create.  

Once I found the “Out to Sea” fabric by Sarah Jane, I knew that was going to be the basis for the quilt and future nursery.  The pirate girls at the center of each block are from that series.  Some of the inspiration fabrics I pulled are shown below: 


Still, I debated on what design to use.  I finally decided on a blue and grey log cabin based quilt inspired by this quilt and this quilt and this quilt.  The colors I used for the grey were too dark for the low contrast that is very popular right now, but follows the feel of what low contrast is trying to achieve.  I chose the blue and grey because I want this quilt to be something she can enjoy for a long time, even when she is past the phase every girl goes through of loving pink.  This is feminine and pink without screaming 6-year old girl (or at least the pink-obsessed 6 year old girl that I was).  

I started this quilt over Christmas when we took a weekend holiday to the mountains of North Carolina.  We had rented a house on an old mill pond that overlooked a waterfall and I started cutting and sewing on my travel machine – my old faithful featherweight.  Unfortunately, in my pregnancy muddled state I mis-cut and mis-sewed and ended up with 1 log cabin and 11 courthouse step blocks.  At least all 12 blocks had the colors based on the log cabin design so only a quilter who looks closely can probably notice the mistake.  The design was purposely done to have each round get larger as I worked toward the outside of the block as you can see below.  The shade of grey and blue also got darker as I worked outward.  


I managed to finish the quilt top days before my due date.  Due to my odd assortment of blocks, I couldn’t arrange it in the way I had originally planned, so I changed it to a more random arrangement seen below.  It then sat for months as I realized how little sewing time I had once a baby was in my life.  Her short naps are used for things like eating lunch and hygiene, rarely to craft for me.  


After I emerged from the first few months of motherhood, I realized that I needed to do something for me sometimes to maintain my sanity and connections to the outside adult world.  Quilting has been that thing for me before, and is that that thing again.  I started on the quilt back.  I seriously considered just buying some fabric to fill the back, but decided to shop in my stash.  I started with the thought to use slightly wonky stars on one side of the map print, with the boat print below.  That sketch can actually be seen in the first photo of the inspirational fabrics.


Once I had the star parts, I realized that I would have to trim them down more than expected to 2.5 inches.  Then, I had my moment of inspiration – I would fill in the remainder of the back with patchwork.  I cut out 2.5 inch squares from the leftover fabric from the front.  I cut out 5 inch squares from other fabric in my stash that matched or was already in the quilt for the rest.  The pink border was done to separate the 2.5 inch and 5 inch sections because the seams would not intersect properly due to the map in the middle that was not a variable of 2.5 inches.


Next came the decision on the quilting to finish this off.  I’ve already chosen the bright pink solid as the binding.  For quilting I didn’t want to do anything to emphasize the log cabins because then it would look funny on the back.  I think an all-over design is called for due to the busy nature of both the front and back.  I was considering clouds, sailboats, anchors, whales, etc to maintain the basic nautical theme.  I finally decided on a panto with anchors and sailboats, and on the longarm it went to be finished.  The finished product will be coming soon!

Starry Log Cabin

I am beginning my next attempt at scrappy.  I chose to go with a log cabin quilt using tans, browns and reds from Maison de Garance of French General.  The design is “Log Cabin Hidden Stars” from “Jelly Roll Quilts.”
Chain Piecing in progress
I admit I still can’t give up complete control.  I admit that I had the entire quilt laid out on my design wall to ensure that clashing and duplication was kept to a minimum.  This is the first time I’ve ever had a design wall.  I bought a vinyl one and attached it to the wall with magnets.  (I live in a metal container, thus why magnets work on the walls) I got it because I don’t have a horizontal surface to lay things on, and now I think I need one of these at home.  It is so amazing to hang stuff up on it and step back to see how it all looks together. 

I absolutely love how this quilt turned out.  I almost don’t want to start another quilt, because it will mean that I will have to take this one off the design wall.  Having this on my wall makes my tiny trailer a home. 
Completed Quilt

This pattern was once again well written, and easy to follow.  The plain log cabin inside of each block goes very quickly.  The star section bogged me down, but part of that was due to my insistence on planning out all the fabrics.  If I had continued to chain piece and done less planning, it would have gone much faster.  This quilt ends up being 60”x60”.  Mine is not quite that large because I don’t have the outside border on it yet.  I think it will be a great size to curl up with on the couch. 

Beginnings…

I first started quilting this summer while I was finishing up my grad school classes.  I was fortunate enough to have some time off that I could use to attend beginning quilt classes at my (not so) local quilt store.  I calculate that I saved about 2 years of frustration and hard lessons by starting out with good habits learned, and soon made rapid progress.  In that first summer I made a large sampler quilt from the beginner class, two baby quilts, two quilts for “Quilts for Kids” and another large quilt for my husband.  I was in love with quilting.  I had finally found “my” craft. 
Fast forward to October 2010.  I was about to deploy to Afghanistan.  I was not about to bring my sewing machine, so I got the bright idea that it would be a great time to make a quilt completely by hand.  Looking back, this was never going to work, but at the time it seemed doable.  I cut out all the pieces and brought needles, thread and instructions.  This attempt to hand piece lasted approximately two long and frustrating hours. 

I began to research sewing machines that were small, portable, and most importantly – would be able to stand up to Middle East dust and dirt.  I found the Singer Featherweight 221 to be the answer to my problems.  I ordered one, and had it shipped to Southern Afghanistan.  I’m pretty sure I have one of the few, if not only, Featherweights in this entire country.  It is the perfect solution.  It is small, has a case, and is entirely mechanical.  I can oil and grease it myself.  When I get back home, I will be able to give it a thorough cleaning on my own and have a great little machine to travel with.  Mine is a 1948, and it runs amazingly well.  I recommend this little machine to anyone looking for a travel machine. 
Now, I am attempting to quilt in an area that is about 18”x30”.  It requires some creative maneuvering.  It has also led me to discover the world of pre-cut fabrics.  I don’t have enough space to really deal with yardage.  My introduction to pre-cut fabrics is in the form of the book “Jelly Roll Quilts” by Pam & Nicky Lintott. 

I’m working my way through this book in 20 minute increments.  I work 7 days a week, so I sneak sewing in before work, during lunch, late at night … whenever I get a chance.  This is the story of my attempt to keep my sanity and keep a piece of myself no matter what else is going on in the world.