Little Zippy Top

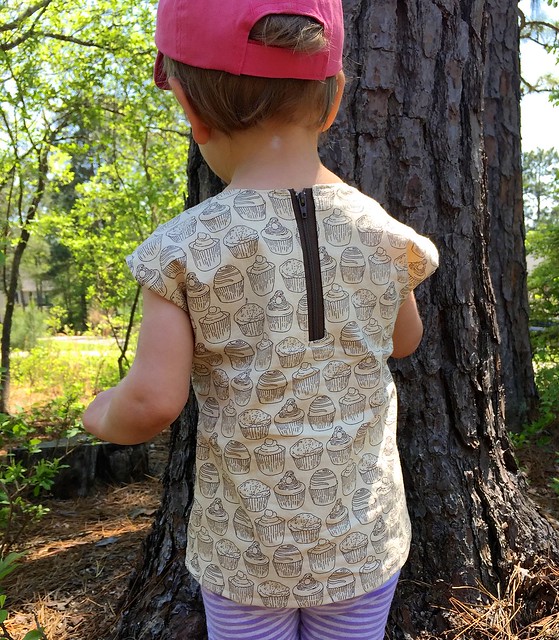
I originally had not planned to participate in Kid’s Clothes Week this week because I have quite a few other obligations that need to be finished.  Then, I was working on a particularly frustrating quilt top, so I needed to just take a break from quilting/piecing for a morning.  I decided that following an easy pattern was just what I needed before tackling that other project.  Therefore, I present to you the Little Zippy Top.

Little Zippy Top

Pattern: Little Zippy Top from See Kate Sew

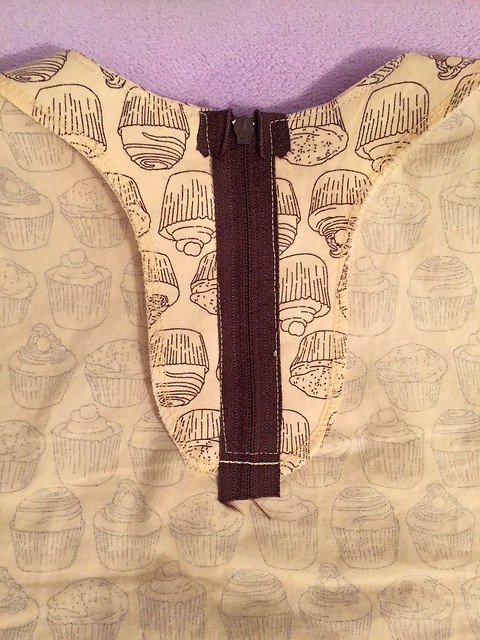
Pattern Description (from designer): This top is a versatile woven top with an exposed zipper on the back! Make it with all your favorite fabrics! This top is perfect for beginners and quick and fun to sew! Requires very little fabric and a little zipper!

Pattern Price: $9 full price, but watch for sales.

Fabric Required: 1/2 yard for size 4T and smaller

Amount of fabric used: 1/2 yard!

Sizing: Comes in size 18M to 10.

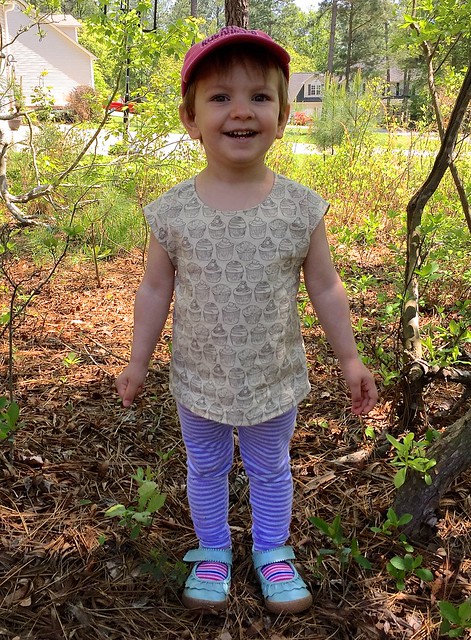
Alterations:  This shirt is a little short, in my opinion.  I used the 4T length hoping to get a little more wear out of the shirt, and it needed that length just to be wearable now on my daughter.

Little Zippy Top

Instructions: Some of the steps were in a little bit of a weird order.  For example, you don’t stay stitch the neckline until step 6 by which point you’ve already handled it quite a bit so if it was going to stretch out, I think it would have by then.  I also prefer to do prep-type work at the beginning, but that’s my personal preference versus a pattern issue.  For example, step 7 is to fuse the interfacing to the facing pieces.  That’s something I prefer to do first before I get into sewing the piece of clothing.

Pattern Issues: Instructions are adequate, but not my preferred style of construction.  For example, you don’t under stitch the facing to the seam allowance.  Instead, you just topstitch the whole neckline.  Which is fine, but that step has you also topstitch around the zipper opening prior to the zipper being installed, which leads you to have to install the zipper while insanely carefully trying to topstitch over the line of stitching already there.  I probably made more work for myself by under stitching the neckline, then installing the zipper and just continuing on to topstitch around the neckline in one go.

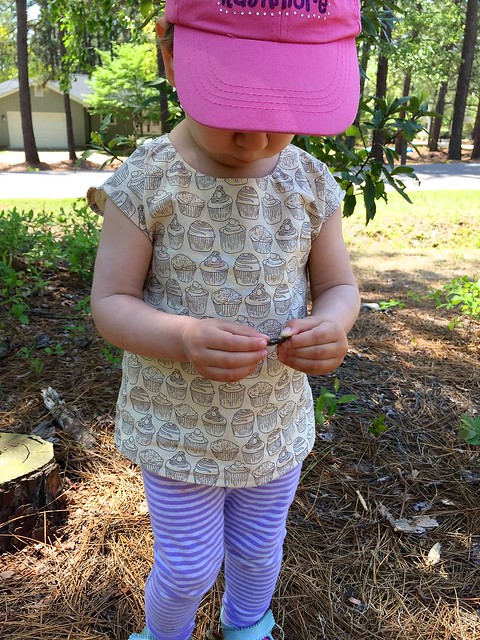
Fabric Choice: Cute cupcake fabric that was on sale from Fort Worth Fabric Studio.  The actual name of the fabric is Love At First Bite by Color Bakery for Windham Fabrics.  Quilting cotton works fine for the shirt.

Finished Product: It’s a cute shirt.  I wish the neck was a little bit higher in front.  Sometimes the shirt has a tendency to sit forward a little more than it should, so that may be why the neckline looks lower than it should.

Little Zippy Top

Husband’s opinion: I like the exposed zipper, and the fabric.

Notes for future makes: I think I will go up a size in width, and at least one more size in length (to 5T for a little girl that wears 2T in ready to wear).  My daughter is pretty skinny, but likes to “help” put her clothes on by sticking her arms out straight in whatever direction that makes it impossible to get a woven shirt on, so I’m hoping a little extra width will help make dressing her a little bit easier.

Little Zippy Top

Final Thoughts: I had high hopes for this shirt being one that I go to again and again, but I’m not sure that I will.  It’s like when someone tells you a restaurant has the best hamburger they’ve ever had in their entire life… your hopes get high and no hamburger is going to live up to what you have built up in your head.  I had higher hopes for this pattern, so I think that’s why I’m a little disappointed.

I didn’t keep track of time, but it wasn’t quite as fast of a make as I was hoping.  Then again, if I made multiples, it would go faster.  Making sure the zipper is evenly installed takes longer than buttonholes and sleeves do for me.  I also don’t really like how the zipper is installed.  The zipper seemed to be annoying my daughter last night when we were sitting on the couch together.  I still like how little fabric it uses, so I may try it again just for that reason.

I guess for now, I’ll see how often I dress her in it before deciding if it’s a total win or bust.

Franklin Dress

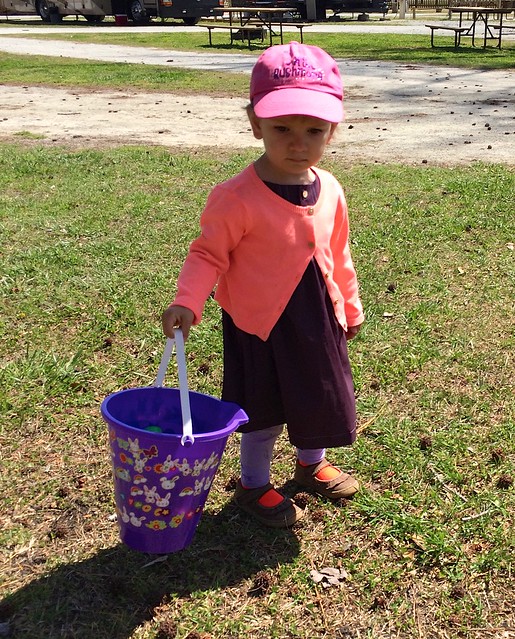
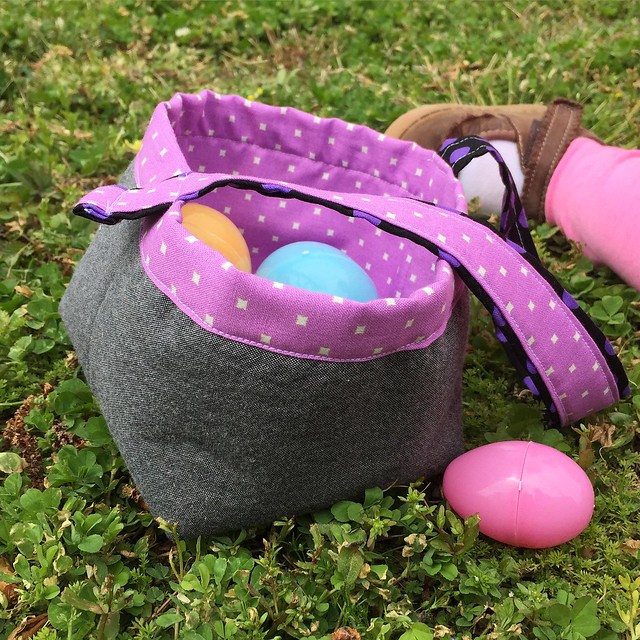
I made the Franklin dress pattern for my daughter for Easter.  Unfortunately, it ended up being a little chilly, so almost all of the pictures of her that day are covered up by a sweater.  Then, I made her an Easter basket from the Fabric Basket Tutorial from Ellison Lane, which she also ended up not using because a bucket was provided at the Easter Egg Hunt.  Oh well!  She had a blast running around and picking up eggs, and that is what mattered.
Pattern: The Franklin Dress is the first dress pattern offered by the Brooklyn Pattern Company.

Franklin Dress

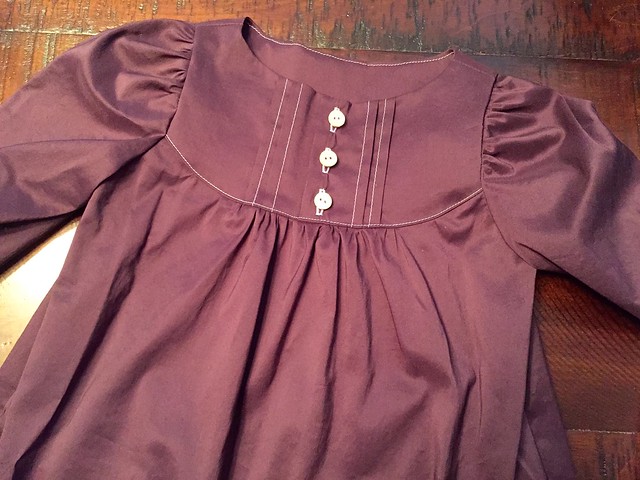
Pattern Description (from designer): A surprisingly simple dress with playful details and endless options. Whether romping in the dirt with frogs in her pockets or strolling across the Brooklyn Bridge, both mom and daughter will appreciate the versatility. A pleated yoke frames the face while gathered sleeves add a special touch. Go casual with a sweet polka dot cotton or dress it up with linen or silk.

Pattern Price: $12

Fabric Required: For 12 month size, it requires 1- 1.5 yards depending on width.

Amount of fabric used: I used 1 yard of 54″ wide fabric and did not have garment sewing usable scraps after.

Sizing: Includes sizes 6 months – 8 years.  I made size 2T.  Actual measurements are not included, which I am so used to using to decide what size to make that I was lost without it.

Franklin Dress

Alterations: I made the pattern as written.

Instructions: Instructions are good and there is also a sew-a-long for beginners or anyone who needs extra help.  Diagrams are included in the pattern.  My only issue is below.

Pattern Issues: My only complain is that the diagram showing where to place the interfacing behind the buttonholes makes it look like it should be placed again the cut edge of the fabric, instead of inside the seam or even just centered on the line you are going to put the buttonholes on.  I knew it didn’t seem right as I was doing it, but I try to follow the instructions as written for the first time I make a pattern so I went with it in case there was some reason it was done that way.  There wasn’t.

Fabric Choice: I made it in a lovely purple stretch poplin purchased from Mood, now out of stock.  I originally purchased it for me (back when I had a short-lived misconception that I could make a woven shirt for myself out of 1 yard of fabric).  I used 1 yard of fabric for her dress.

Franklin Dress

Finished Product: It is a very sweet dress.

Husband’s opinion: Why did I make it a dress when we never dress our daughter in dresses?

Notes for future makes: The bodice width is a bit wide.  Not crazy wide, more room to grow wide, but if in doubt about size I would probably go with the lower size.  Also, I would shorten it to make as a shirt so she would wear it more often.

Final Thoughts: It’s a pretty easy sew that makes a cute dress.

Ellison Lane Fabric Basket as Easter basket

I had to include the Easter Basket somewhere!  It was used during the practice egg hunts, so it wasn’t a total waste.  I’m probably going to remove the handles and use it as a thread catcher.  I like how it turned it!

Linking up to Frances Suzanne’s Link Party for the Franklin Dress Flip this Pattern, even though I didn’t flip it at all.


Quilts Actually on the move….

Quilts Actually Moving Announcement 2015


As you may know, my husband is in the Army.  Therefore, every few years they notify us that it is time to move.  This summer we will be moving from North Carolina to New York.

What that means to me and my family:

We will be putting all our belongings on a truck in early June, to include my longarm.  That means I need to finish all customer quilts before I take down my longarm prior to the arrival of the packers and movers.  I do not want to move any quilts that are not my own because I don’t want your quilt subject to any of the risk inherent when other people move your belongings.

moving truck

What does that mean to you?
I am setting a cutoff date of May 1st for you to mail your quilts if you want it completed prior to my move.  That will give me time to quilt it for you and give it the attention it deserves before I pack everything up.  You will receive your completed quilt as I finish it, but guarenteed before the end of May.
If you will not have your quilt ready to mail by May 1st, I will be setting up my longarm back up and still doing quilting for others in New York.  We are tentatively hoping to be unpacked and settled in sometime in July.
The only thing that will change will be my physical location.  Instead of being a little over an hour from Raleigh, I will be a little over an hour from New York City.

house border

When I am ready to accept quilts again, I will let you know and we will celebrate with a Quilts Actually Grand Re-Opening!

Thank you for your understanding and patience, and I hope to quilt for you in the future!
– Heather

Heart Quilting

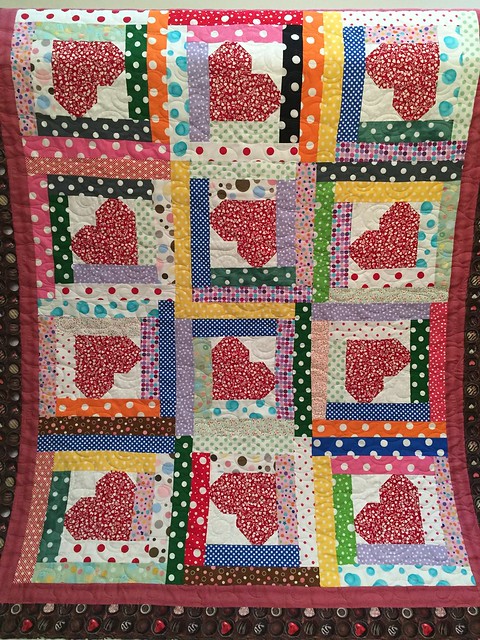
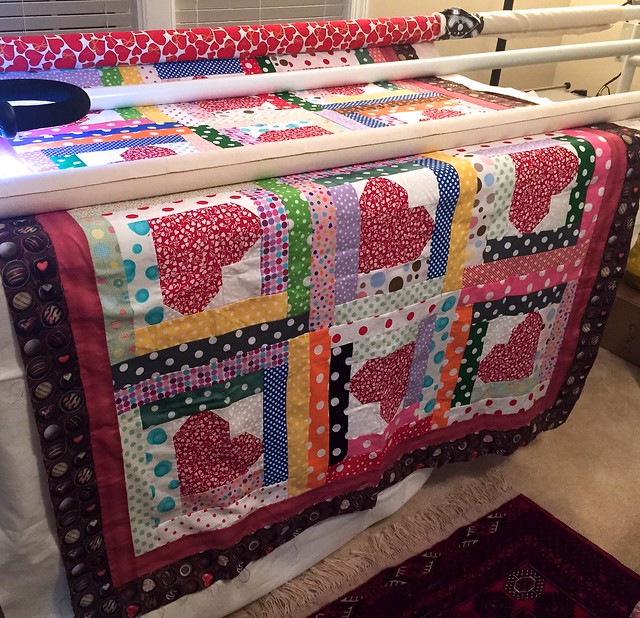
Here is a beautiful quilt that I finished while ago, but forgot to share.  If you follow me on instagram (@QACreations) or Facebook, you may have already seen some pictures of this quilt.

Heart Quilt

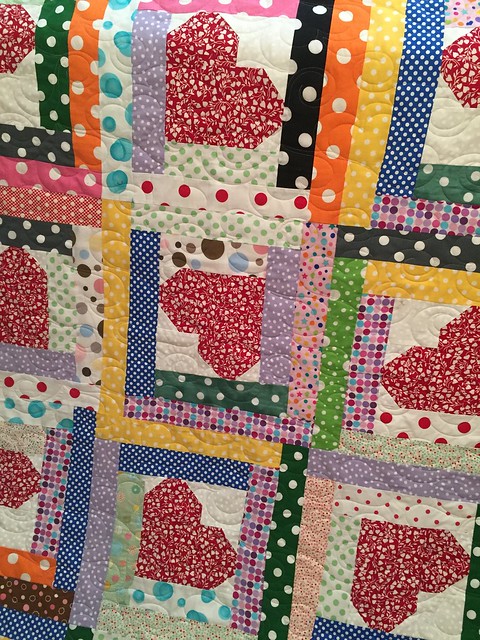
This cheerful quilt had hearts at the center of log cabins.  The borders were fabric made to look like chocolate.  This was literally a sweet quilt!

Heart Quilt

I kept the sweet + heart theme going and used light pink thread to quilt a heart panto all the quilt.

Heart Quilt

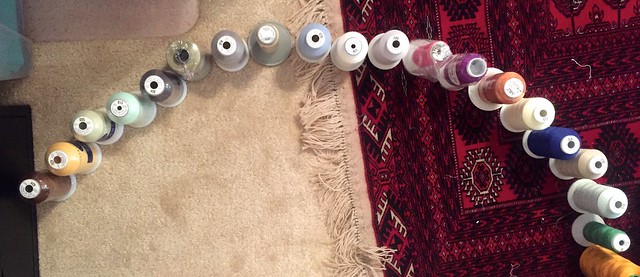
My daughter even decided to “help” out with the quilting… by re-arranging thread!

Heart Quilt

I hope its future owner loves it!

– Heather

Linking to: Linky Tuesday @ Freemotion by the RiverLet’s Bee Social Wednesday @ SewFreshQuiltsWhoop Whoop Fridays @ Confessions of a Quilt Addict

Bee Blocks, 1st Quarter 2015

I am a member of the Stash Bee.  This is my second year with that group, and I like it because it gets me to try new color combinations and new blocks and new techniques without the commitment of having to do an entire quilt!  I’m trying to avoid starting new WiPs, so anytime I get to try something new without have to make a whole quilts worth, it’s a win in my book.

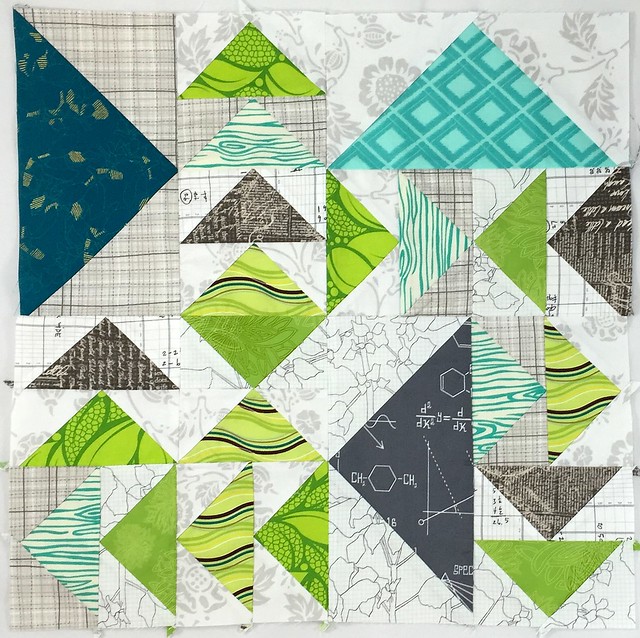
We’ll go in reverse order…  March was the month for flying geese!  Carolyn from Sweet Boater Chick asked for these large blocks with many flying geese, so I won’t be making any flying geese soon, but I do love her color scheme and can’t wait to see it finished.

March Hive 3 Stash Bee Block

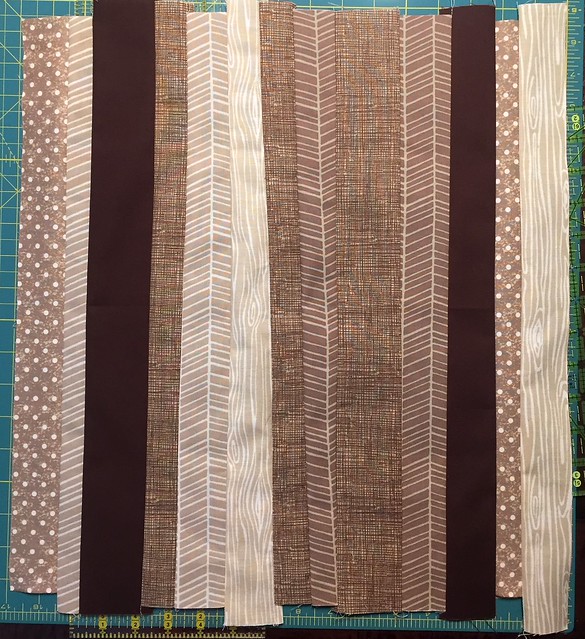
February was for Bonnie .  She asked for a relaxed strip block – made up of strips of brown.  I’m not so good at not sewing in straight lines, so even without pins and telling myself to sew crooked, mine is not very wonky.

Hive 3 February Block

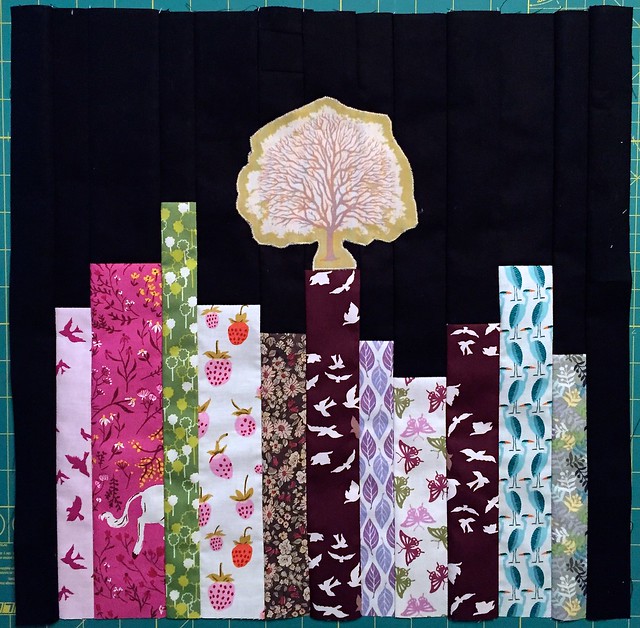
January’s block was for Ruth from Charly & Ben’s Crafty Corner.  It was kind of cool to send a block away to Ireland since my family background is 1/2 Irish.  She asked for book blocks, and is going to make a quilt that looks like a bookshelf from the blocks.

Stash Bee Hive 3 January 2015

April is my month, so I can’t wait to see what I get!  I’m trying to finished up my “Real World Red & White” sampler, and getting these blocks will really help me along my way.

– Heather

Linking to: Scraptastic Tuesday @ She Can QuiltWiP Wednesday @ Freshly PiecedLet’s Bee Social Wednesday @ SewFreshQuiltsWhoop Whoop Fridays @ Confessions of a Quilt Addict and Fabric Frenzy Friday @ Ft. Worth Fabric

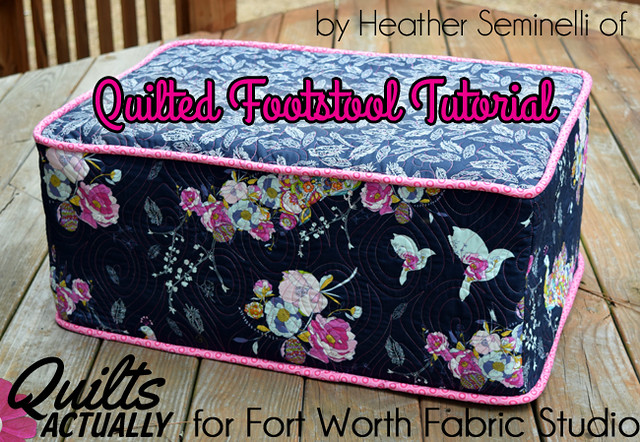
Quilted Footstool Tutorial

Quilt your favorite fabrics to create a statement piece by following the instructions for this quilted footstool tutorial.

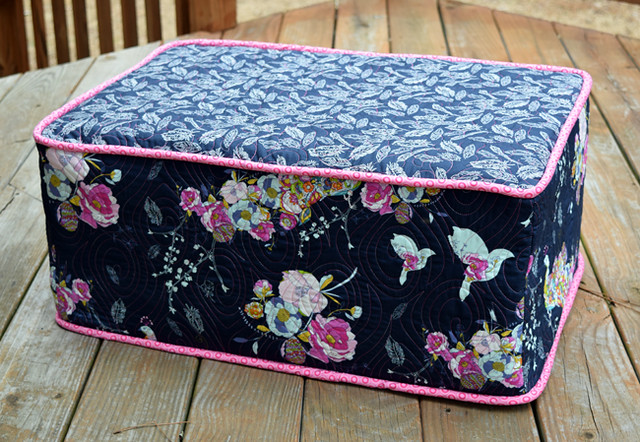
I just finished my favorite non-quilt item I’ve made.

Completed footstool

My daughter is two, and we play a lot in her room – and most of that playing is at floor level.  Sitting in the nice comfortable adult size chair that is in her room is not acceptable, but my body just can’t handle sitting on the floor for hours a day.

That is where this quilted footstool comes in.  We recently purchased new foam to go in the seat cushions of the couch.  We kept the old foam for a little while to see if it would fit in a different couch that is even worse (but of course it didn’t fit – that would have been too convenient!). One day as I was sitting on the floor, I realized that this old foam could be the solution to my problem.

We (royal we = my husband) cut the foam in half and I stacked it, and I made the quilted cover for it.  I have a tutorial on how I made it over at Fort Worth Fabric Studio if you would like to make your own.

Quilted Footstool Tutorial

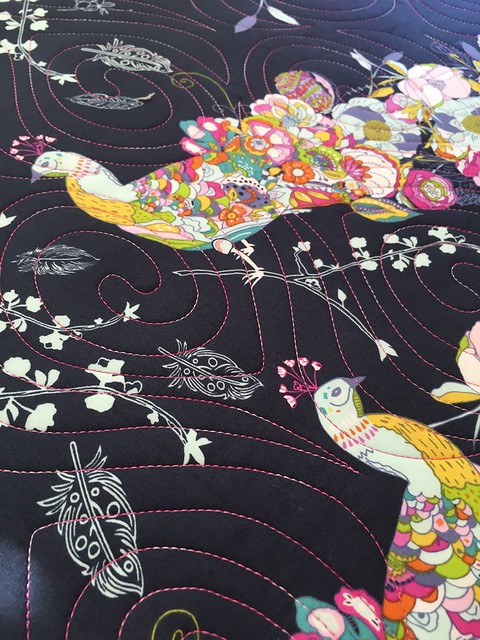
I used some fabric from the Petal & Plume line by Bari J – seriously gorgeous!  That peacock fabric is amazing in person.

Initially, I had planned to do more subdued quilting on the fabric.  I was going to use purple Bottom Line – which is a really thin thread that you would barely have seen.  The texture from the quilting would have been all that was visible.

Then, as I was looking through my thread I found this amazing pink variegated Fantastico thread and I knew it was meant to be for this fabric.  The design on this fabric is strong enough that it stands up to (and I think is complimented) by a shiny visible thread.  I used a peacock feather panto for the peacock fabric.

Closeup of Peacock Quilting

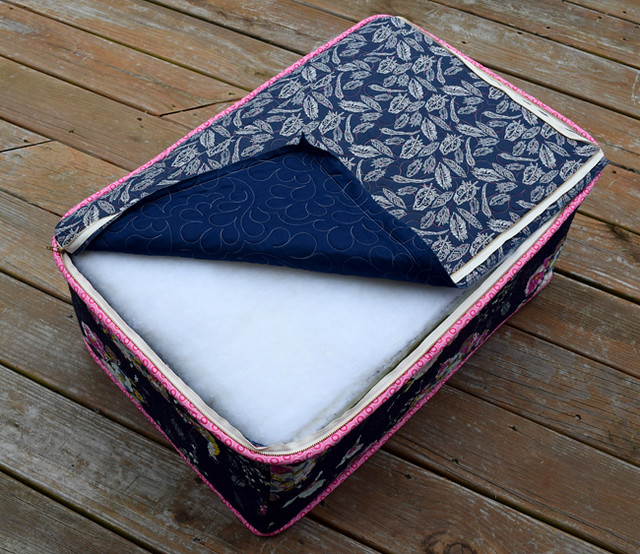
For the feather fabric, the lines are pretty thick and it the design is fairly dense so I knew that whatever quilting I did was probably not going to show very much.  I continued to use the pink thread, but switched to a loose feather panto to mix it up a little bit.

You can’t really see the quilting on the top, but you can see the pattern against the backing.  With two different quilting designs, using the same thread for both fabrics gives a little bit of continuity to the quilting.

Cover on foam with zipper open

I know most people leave their quilting on quilts, but I love bringing it into other parts of my house and life.  This footstool/cushion now sits in my daughter’s room, and I love how much color it brings into her room.

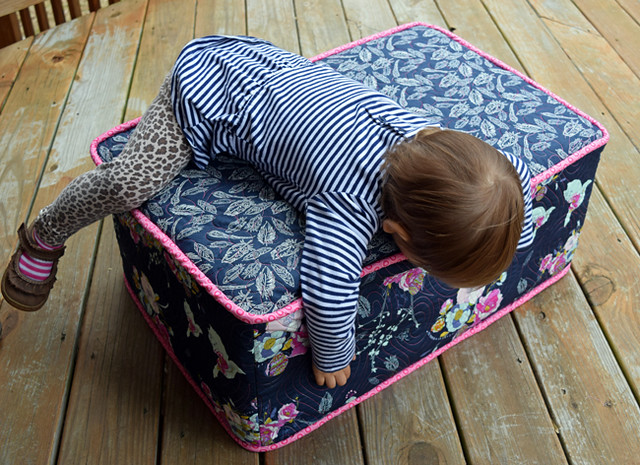
Footstool in use

She may end up claiming this from me, based on how many times she has sat and climbed on it already, but hopefully I will also get to enjoy using it.  Worst case, I have one old couch cushion left, so I may have to make a second one for me.

If you want to bring some of your favorite fabrics into your everyday life, contact me and I can quilt fabric for you.

Linking up to some of the following: Fabric Tuesday @ Quilt StorySew Cute Tuesday @ Blossom Heart QuiltsTips and Tutorials Tuesdays @ Late Night QuilterLet’s Bee Social Wednesday @ SewFreshQuiltsNeedle and Thread Thursday @ My Quilt InfatuationFinish it up Friday @ Crazy Mom QuiltsWhoop Whoop Fridays @ Confessions of a Quilt AddictTGIFFShow off Saturday at Sew Can She, and Threading your way @ Threading my Way

Oliver & S Fairy Tale Dress Review

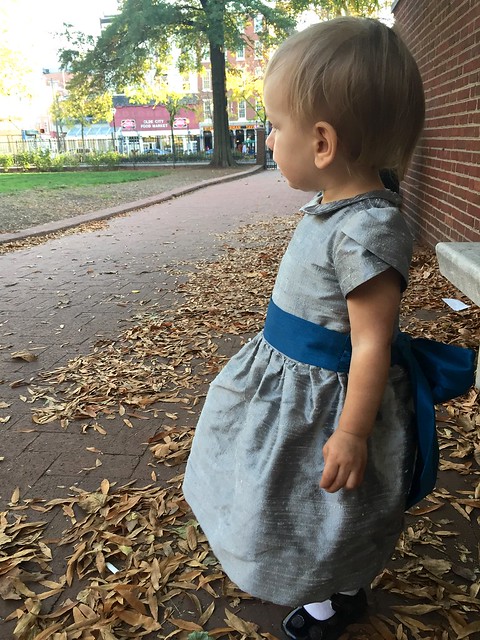
My first Fairy Tale Dress was almost a year ago, and I adjusted it to make my daughter’s baptismal gown.  At that time, I was still pretty new to garment sewing.  I think it was my third dress ever.  I chose to go from the Made by Rae Itty Bitty Dress, to the Made by Rae Geranium Dress, to the Oliver & S Fairy Tale Dress.  It was a pretty big learning curve.  Now that I have actually sewn the pattern as written, I feel better about writing a Fairy Tale Dress pattern review.

Oliver + S Fairy Tale Dress

I have to say I was much more confident this time than I was last time.  Although, last time I had the advantage of ignorance – I didn’t know enough to know that I had chosen a challenging pattern with silk and “scary” invisible zippers.  If I had realized what I was doing was supposed to be harder, I don’t know if I would have finished it so quickly.

Pattern: Oliver & S Fairy Tale Dress

Fabric Required: From pattern (44-45″ wide): 1 3/4 yards of main fabric, and 1 yard of lining fabric.

Amount of fabric used: A little under 1 yard of main fabric (52″ wide), and a little under 1 yard of lining fabric.  If anyone has a use for just over a yard of silver silk dupioni, please let me know!

Oliver + S Fairy Tale Dress

Sizing: I used the 12-18 month size for width, 18-24 month size for bodice length, and I added 2 inches to the 18-24 month skirt length to make it mid-calf instead of knee length.

Alterations: I had to lengthen the front of the bodice by 1/2″.  I just added the 1/2″ to the middle and tapered it to the normal length at the sides.  It was a small change, but helped fit over the toddler belly a little bit better.  I also tacked the collar down because it was flipping up too much for my taste when she tried it on pre-wedding.

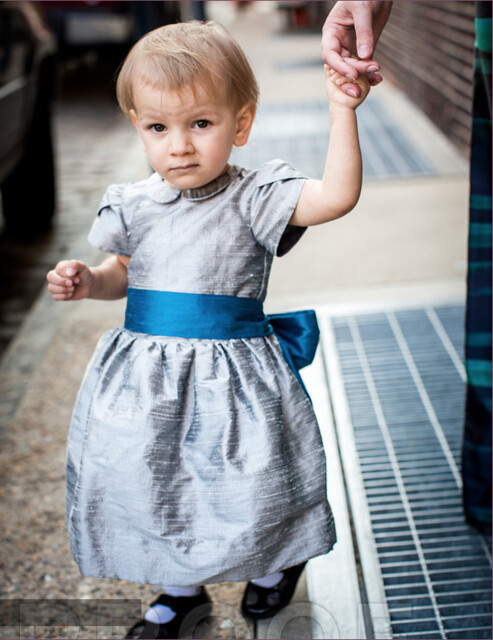
  • Sash: I didn’t want to use either version of the sash as published in the pattern.  I was hoping to have my daughter wear this for Christmas so I didn’t want to sew the sash to the dress.  I liked the wide sash in the back, but sometimes the super wide sashes on the front of a dress overwhelms little girls.  I decided to use the pattern pieces for the back, but sew it to a narrower portion for the front of the dress.

Instructions: As expected with Oliver & S, these were good instructions.  I did use couple additional tutorials shown below.

Tutorials Used:

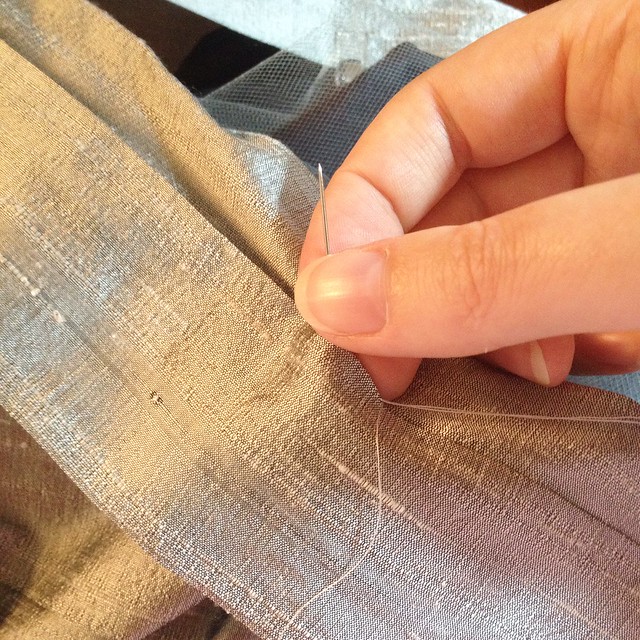
    • How to hand stitch a hem – I used the slipstitch to hem the outer dress.  I don’t hand sew many things, but it felt right for this dress.

Hand sewing silk hem

Pattern Issues: The only step that I had any issues with was attaching the zipper to the dress exterior.  In some of the diagrams it showed the seam finished, in others it wasn’t, and it didn’t mention in the directions the right time to finish the seam.  I was using a serger to finish the seams and chose poorly, because I should have finished that back seam before attaching the zipper.  I ended up serging from the bottom as close as I could to the zipper.  The rest of it gets encased in the lining.  This dress won’t be going through a washing machine, so it will probably be fine.

Although, I do have to add – why is there not a table with the width of the skirts for each size?  I hated having to print out 8 extra pieces of paper for the three skirt pieces when I knew I was just going to cut the skirt as one continuous piece.  This skirt doesn’t need side seams.  It makes it slightly easier to line stuff up, but as long as you mark where the side seams would have been there is not issue lining up the skirt to the bodice.

Fabric Choice:

– Outer: I used silk dupioni from NY Fashion Center Fabrics in 137 – Silver.  I was fortunate that they had a Labor Day sale that lowered the price point when I needed to order it.

– Tulle: I also ordered the gray tulle from NY Fashion Center Fabrics in the same sale.

– Lining The lining was a cheap voile from Fabric Mart that appears to be out of stock now.  I was too cheap, and should have used a better quality voile (even though it would have cost more).  It looks fine in the finished garment, but it was so thin that it was horrendous to sew and I was fighting it the whole time.  I think Tim Gunn has a quote that a successful garment starts at Mood, and he is so right.  I thought I had learned my lesson on cheap vs. good value fabric, but I’m still learning it over and over.

Oliver + S Fairy Tale Dress

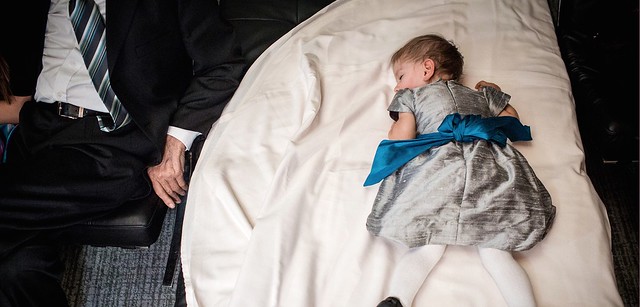
Finished Product: I love this dress as a party dress for a little girl.  The color isn’t the best color for my daughter’s complexion, but she was the flower girl for a wedding whose colors were grey and blue.  I only had 1/2 yard of the matching blue fabric, so I used that to make the sash.

Husband’s opinion: He loves this dress.

Final Thoughts: This is my second time making this dress, and I will probably make it again if another fancy occasion comes up.  I may have to use a different collar or something next time so people don’t realize I keep using the same pattern over and over!

Linking up to: Sew + Show Wednesday @ Straight GrainShow off Saturday at Sew Can SheThreading your way @ Threading my Way

Round Trip Quilts, Stop 4

Mary's Round Trip Quilt

I just finished up my addition for Mary from See Mary Quilt.  We are now over halfway through on the Round Trip Quilts, stop 4.

Well that went amazing and was super easy. A little late, but it will be in the mail ASAP. #roundtripquilts

This was Mary’s original center.

Chelsea from Patch the Giraffe was next, and added these awesome arrows to the quilt.

Christina from WiPs and Tuts went absolutely crazy and made what probably felt like a million tiny log cabins.

Kim from Ties that Bind Quilting added some needed breathing room while keeping the rainbow theme.

Then it was my turn… I started making half square triangles.

And kept making more half square triangles.

And more.

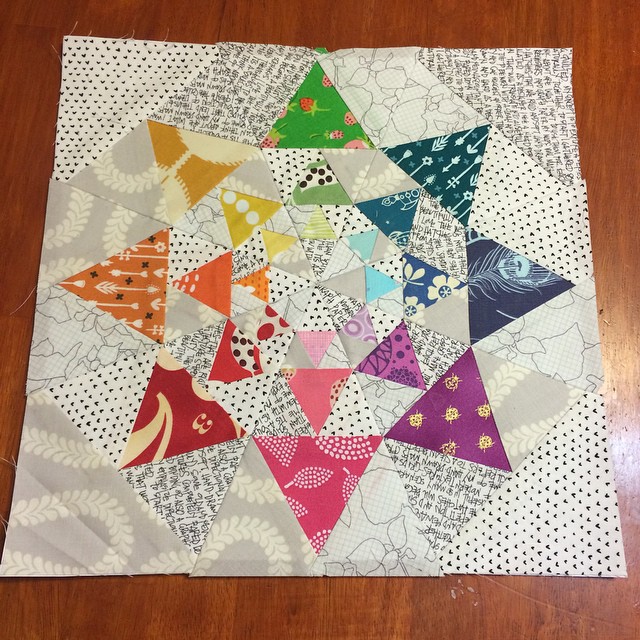
Until I was done.  Then I sewed, and sewed, and sewed, and ended up with this awesome herringbone border.

This project has made me want to make a medallion quilt, and to not want to mail this on.  It can stay with me, right?


Linking up to some of the following:

Fabric Tuesday @ Quilt StorySew Cute Tuesday @ Blossom Heart QuiltsWiP Wednesday @ Freshly PiecedLet’s Bee Social Wednesday @ SewFreshQuiltsNeedle and Thread Thursday @ My Quilt InfatuationWhoop Whoop Fridays @ Confessions of a Quilt AddictFabric Frenzy Friday @ Ft. Worth Fabric

Quilted Oven Mitt Tutorial

how to make oven mitts

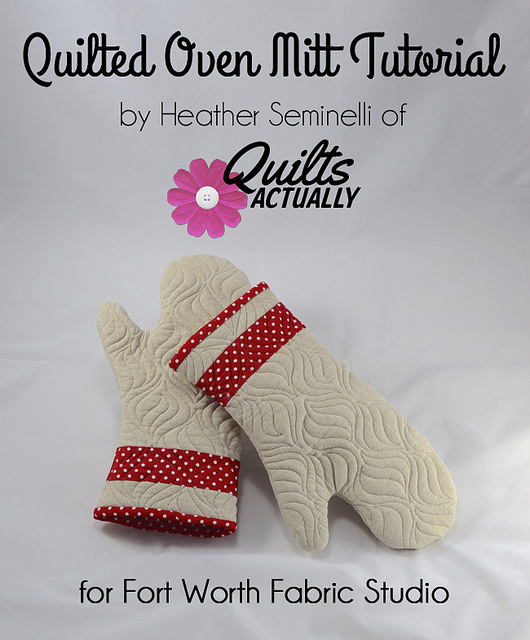
Learn to make your own fun quilted oven mitts from this tutorial for the Fort Worth Fabric Studio.

Hello again!  This week I have a tutorial to make quilted oven mitts up on the blog at Fort Worth Fabric Studio.  Check it out!

Quilted Oven Mitt Tutorial

Making your own oven mitts is a great way to bring what you love (quilting) into the kitchen in a tasteful and useful way.  I hope you find the oven mitt tutorial useful, and please let me know if you make a pair!

Linking to some of the following: Tips and Tutorials Tuesdays @ Late Night QuilterWiP Wednesday @ Freshly PiecedLet’s Bee Social Wednesday @ SewFreshQuiltsNeedle and Thread Thursday @ My Quilt InfatuationFinish it up Friday @ Crazy Mom QuiltsWhoop Whoop Fridays @ Confessions of a Quilt AddictTGIFFFabric Frenzy Friday @ Ft. Worth FabricShow off Saturday at Sew Can SheStash Bee Link Up

4×7 Sewing Challenge

This February Sarah from Berry Barn Designs is hosting a fun challenge called the 4×7 Sewing Challenge to sew for yourself for 30 minutes each day during February.  I haven’t quite made 30 minutes each day – some were more and some were less – but I like trying to sew a little each day.

I’m trying to make my sewing more purposeful.  As in, choose projects that I really want to finish.  Finish the projects I start.  Do something with the scraps or throw them away.  Finally finish the quilt for my bed.  That type of purposeful.

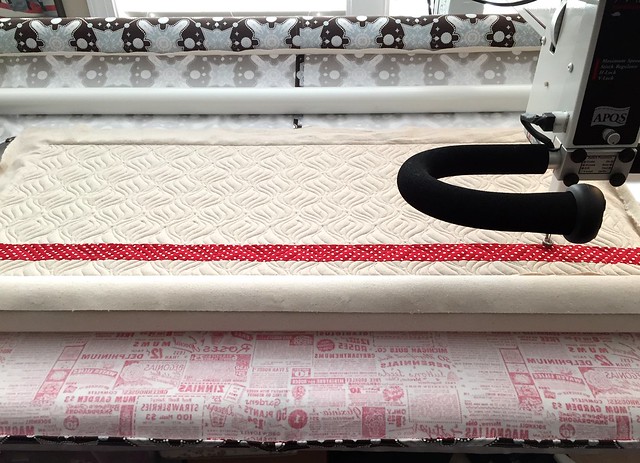
I made two sets of leaders for my new velcro longer setup (which so far I am in love with, other than having to make leaders).  I watched Sharon Chamber’s youtube video on how she loads her quilts, and while some of it doesn’t apply because she uses a different type of machine than I do, I love her leader method.  It helps me attach the quilts to achieve a flatter surface which results in a more even stitch especially at the top and bottom of the piece.  It’s also easier to load because I can center the quilt easier – and if it’s off by a little, re-center much easier.  You can see the newest 50″ leader in action below.

new leaders for the longarm

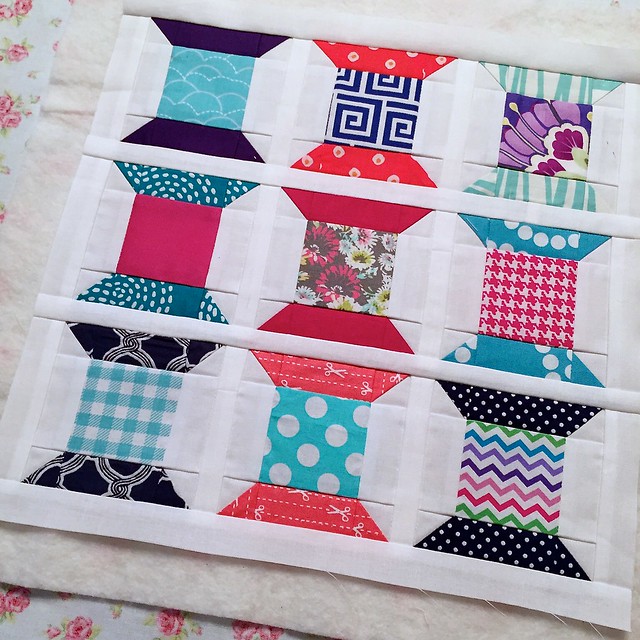
I also pieced a little mini that I had started during the January meeting of the Quilting Circle I am part of.  I am really trying to not create new UFO’s so I pieced the top, made a backing (even attaching a label!), found a scrap of batting that fits, and it is in line for the longarm.

Spool mini quilt

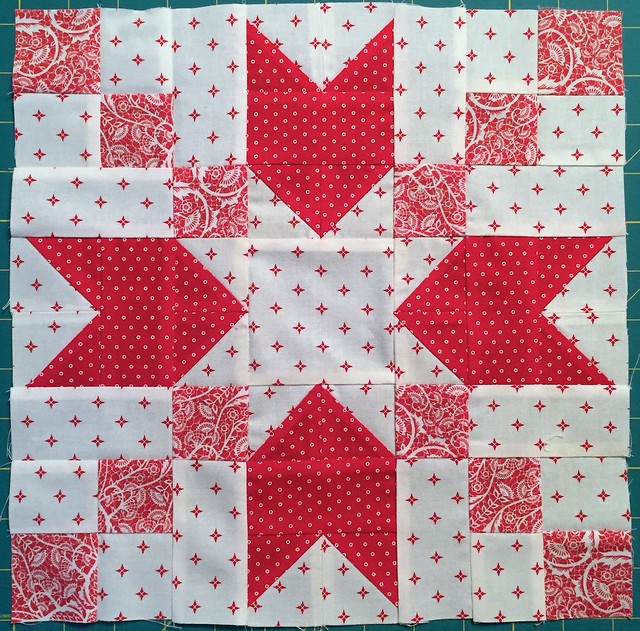
I also made another block for the “Real World Red & White” quilt.  I was obsessed with that quilt last winter, and then as it warmed up my interest waned.  I had though about signing up for the 4×5 block exchange on flickr this winter to get more blocks for the quilt.  I did the 2014 Winter and 2014 Spring (received and sent) iterations and received some great blocks, but I have so many blocks that I want to make myself.  I had to really ask myself if I was going to sign up because I wanted to do a bee, or if I wanted a forcing function to get 6 more blocks done.  I really wanted a forcing function, so I’ve decided to just challenge myself to make 6 more blocks.  I would like to get it done by mid-March.  That’s one block a week, and seems do-able.  This week I started with the Stepping Stones block from Piece n Quilt’s 30 days of blocks.

Stepping Stones block from Piece n Quilt's 30 days of blocks

Week 1 was super productive!  Here’s hoping I can keep up the momentum with week 2!

Linking up to Sarah @ Berry Barn Designs, and some of the following: Sew Cute Tuesday @ Blossom Heart QuiltsWiP Wednesday @ Freshly PiecedLet’s Bee Social Wednesday @ SewFreshQuilts, Needle and Thread Thursday @ My Quilt InfatuationWhoop Whoop Fridays @ Confessions of a Quilt AddictFabric Frenzy Friday @ Ft. Worth Fabric