30/30 Challenge

Sarah at Berry Barn Designs is hosting a fun 30/30 challenge in March.  Her challenge is to sew for 30 minutes a day for 30 days.  I think it’s a fun idea, and will play along as much as I can.

What would I like to get done this month?

1. Two blocks for my “Real World Red & White” Sampler.  My blocks so far are below.  The top blocks are the Practice, January and February 2013 Lucky Stars BOMs.  The bottom blocks are what I’ve received so far from the Winter 2014 Hive 4, 4×5 Modern Quilt Bee.

Real Life Red and White Quilt

2. A shirt for me.  I’ve been wanting to make my own clothes for awhile, so why not start?

3. Get ready for spring!  I need at least one pair of shorts for my daughter, preferable more.

4. Acknowledge that spring is not here yet, therefore make a couple pairs of pants for my daughter.

5. Complete the March Stash Bee block – that’s not a real goal, more of a must finish, but I think it still counts (and makes this list a little less clothing heavy).

This is doable, right?  Anyone else want to join the challenge?

Berry Barn Designs

Winter 2014 4×5 Modern Quilt Bee & Fresh Sewing Day

I decided to sign up for the Winter 2014 4×5 Modern Quilt Bee this round.  I chose the January 2013 paper pieced block from the 2013 Lucky Stars BOM.  This is also what I spent most of February doing, thus most of my entry to Fresh Sewing Day!

Winter 2014 4x5 Modern Quilt Bee Hive 4

My color scheme is red and tan, with some brown.  It’s adjusted some as I make more blocks for this sampler quilt.  I decided it’s best described as a real life red and white quilt.  I love red and white quilts, but it’s just not realistic for everyday use with a daughter and a dog.  So, by adding tan and brown, I think it’s more realistic for everyday use in my life.

Winter 2014 4x5 Modern Quilt Bee Hive 4

Philippa asked for aqua/teal, pink/purple, grey and a touch of mustard with a white/grey/black low volume background.

Winter 2014 4x5 Modern Quilt Bee Hive 4

Kendra asked for any shade of blue with a white background.

Winter 2014 4x5 Modern Quilt Bee Hive 4

Maureen asked for blues and greens, “ocean” colors, with a white background.

Winter 2014 4x5 Modern Quilt Bee Hive 4

Jodi asked for rainbow blocks with any kind of a neutral text print background.

Winter 2014 4x5 Modern Quilt Bee Hive 4

Jennifer asked for pink, yellow, grey with a white, light grey, or low volume background.

Winter 2014 4x5 Modern Quilt Bee Hive 4

Also, in case you were wondering what the papers from 5 paper pieced blocks looks like, see below!

Paper backings from 5 paper pieced blocks

I also made another block for my “Real World Red & White” quilt sampler.  This one is the February 2013 block from the Lucky Stars BOM club.  I’m caught up – just a year later than planned 🙂  I’m enjoying where this quilt is headed though.  I still hope to finish 2-3 blocks a month to keep on track to finish this by the fall.

February 2013 Lucky Stars BOM

Since my contribution to this bee is finished, I’m linking up to Finish it up Friday @ Crazy Mom Quilts and TGIFF.   It also counts as my WiP Wednesday @ Freshly Pieced for the week, Anything Goes Monday, Paper Piecing Party @ Quiet Play, and Let’s Bee Social Wednesday @ SewFreshQuilts.

Stash Bee – Dutch Rose Block

For February, Cheryl of Texas Quilting Gal, Hive 12 of Stash Bee asked for the Dutch Rose block.  This block is also currently well known as the Swoon Block from Camille’s fame.  She had us use this tutorial from The Double Nickel Quilt Challenge blog.

The Swoon block is a huge 24″ block.  This Dutch Rose tutorial is constructed differently, and makes a 16″ finished block.  Quite frankly, this block still looks large and I can’t imagine it another 8 inches larger!  Then again, this block is a fiddly block with lots of steps, so maybe a 24″ version is the way to go…

Also, I know this is not the 100% original layout of the Swoon/Dutch Rose.  I did it on accident at first, but the more I look at it, the more I like it.  I think maybe even more so than the traditional version of this block.  I really want to try one that doesn’t have the white part in the gray and purple lattice square corner.  I think that could look really cool.

Stash Bee Hive 12 Dutch Rose

Cheryl asked for a radiant orchid inspired, purple and gray block.  I realized that despite liking purple, I only have about 8 purple fabrics and half of those have some other color mixed in.  Hopefully with Radiant Orchid as the Pantone Color of the Year, the quilting fabric companies will make some good purple fabric this year.

Anyway, on to talk about the block.  The tutorial was designed to use charm squares, but if you are cutting yardage leads to quite a bit of waste.  Or as the write refers to it, “bonus blocks.”  I don’t personally like as many “bonus blocks” as this leads to, so I re-did the math on some portions and maybe I can save someone else some fabric.

No waste flying geese….

The first change I made was to use the no-waste method of making the flying geese units.  This method makes 4 units, and this block requires 4 units.  Perfect, right?  To do this method, I used this tutorial, or you can just google “no waste flying geese” and find others.

To make a flying geese unit that is 2.5″ x 4.5″ (as required by the tutorial), you need 1 square of background fabric that is 5.75″ square and 4 squares of the star fabric that are 3 3/8″ square.  This creates 4 units that need to be trimmed down to 2 1/2 by 4 1/2 inches.  As you trim them, you can make them more perfectly shaped so that the block goes together better.

No waste half square triangle units….

The second change was to the HST blocks.  In this method, you end up with 8 “bonus blocks”.  Or, you can use a no-waste method.  I used the 2-at-a-time method from this tutorial.  I don’t know why I did that, I should have done the 4-at-a-time method.  Both ways are demonstrated at that link.  To do the 2-at-a-time method, you need 4 squares that are 3 3/8 inches of each color.  Follow the tutorial, and you will make 8 HSTs without any wasted fabric.  Once again, these need to be trimmed down.

Using this method, the only waste is below, and it is unavoidable due to how the pentagon shaped sections are formed.  The truly no waste method would be to construct those sections using HSTs, but then the pattern gets broken up, so I consider this a small price to pay for the neater appearance of the final block.

Extra fabric from Dutch Rose

I’m a little late making the block this month, but I hope this isn’t too late to help someone else out.  I hope you like your block Cheryl!

Linking up to: Anything Goes MondayWhoop Whoop Fridays @ Confessions of a Quilt Addict, and Fabric Frenzy Friday @ Ft. Worth Fabric.

Guest Post at The Business of Machine Quilting!

In addition to my personal quilts and baby clothes making endeavors, I am also a professional long arm quilter.  I keep my business website at Quilts Actually, and that is where I show off my competed quilting, but this news was too exciting to limit to just that website.  

If you love quilting, I’m sure you have heard of Angela Walters.  She has a relatively new blog about “The Business of Machine Quilting” to help other machine quilters.  It is a great resource, and I am honored  and excited to have a guest post there today on finding inspiration as a quilter.  Clicking on the button will take you to the post!


Fresh Sewing Day – January Summary

January flew by!  I can’t believe it’s already time to do a summary for Fresh Sewing Day and the Small Blog Meet.  For those coming from the Small Blog Meet, I am a quilter that loves to piece and quilt, and sew clothes for my 1 year old daughter.  Welcome, and please check out the other projects on my blog.

I joined two bees so far this year.  I’m really enjoying it so far.  It’s a lot of fun to do colors and blocks that I wouldn’t have thought of myself.

For the Stash Bee, I made this red and yellow block for Heather from Quilts in the Queue.

That Stash Bee Hive #12 January Bee

I made my test block for the 4×5 Modern Bee.

4x5 modern bee hive #4 test block

I also participated in Kids Clothes Week.  Part 1 of my week can be found here.  The pants were really the highlight of the week.  I finished up the week by turning the Oliver and S Hopscotch Knit top into a onesie.  The completed outfit is shown below.

She kept pulling on the neck, I think because it is much stretchier than the onesies she normally wears.

O+S Hopscotch knit onesie and Sandbox Pants
It’s such a soft knit, I kind of wish it was for me.  However, I only had 1/2 a yard, so I managed to get a 12-18 month onesie and thought I was doing good.
O+S Hopscotch knit onesie and Sandbox Pants
The linen pants are a little big despite being 12-18 months, but I’m ok with that because I love them and hopefully they will still fit this fall.
O+S Hopscotch knit onesie and Sandbox Pants
And now, she shows off the whole outfit 🙂
O+S Hopscotch knit onesie and Sandbox Pants
Thanks for checking out my blog, and I hope you stick around and see what else I have here!  

Kids Clothes Week: Winter 2014, part 1

I am super excited for this Kids Clothes Week: Winter 2014. I have vowed to spend 1 hour per day sewing for my daughter. That means realistic sewing for me – and includes pattern prep, cutting out fabric, sewing, ironing, and everything else involved.  I don’t have time to spend hours everyday sewing and pump out dozens of garments.

Part of this experiment for me is to realistically see just how much time these activities take.  I can’t actually tell you how long it takes me to make a shirt or a pair of pants.  Even if I can estimate the sewing, I don’t count the prep work of the pattern and fabric cutting.  This week, I will.

Day 1 – 1:00:42

KCW Day 1 - Pattern Tracing

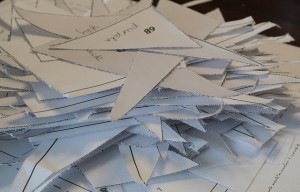
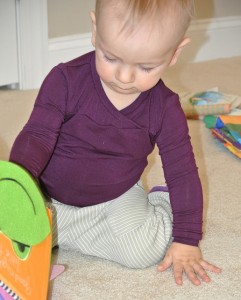
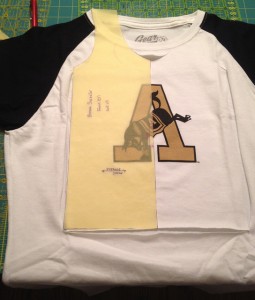
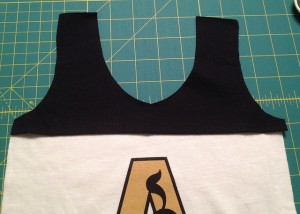
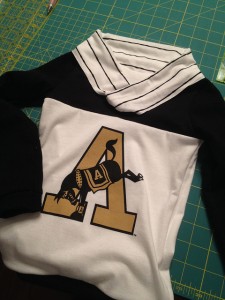
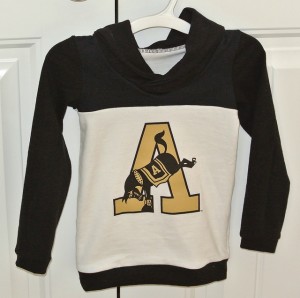
I was 42 seconds over my 1 hour time limit, but I did manage to trace and cut out two patterns.  I will be making the Oliver + S Sandbox pants in size 12-18 months and the Hopscotch knit shirt in size 12-18 months.

Partway through tracing the tissue paper pattern on tracing paper, I was definitely cursing my cheapness thriftiness for buying the paper pattern on sale instead of buying the digital pattern at full price.  Those tissue paper folds are surprisingly difficult to get flat enough to trace over.

Day 2 – a little over two hours

KCW Day 2 - Cutting and start sewing

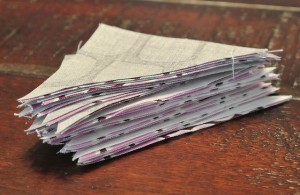
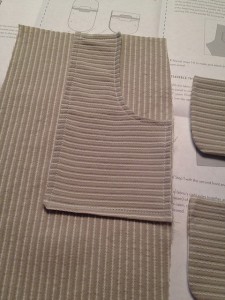
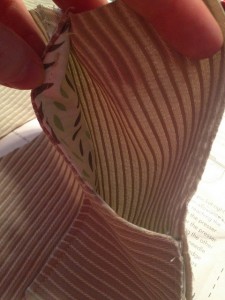
I cut out the fabric for the pants, then started on the pockets.  Those pockets took probably 45 minutes – I would leave them off in the future, but they really are adorable and make the pants.  That took me to about 1.5 hours, but my daughter was napping, so I kept going.  At the end of the time, I had the pants mostly done, leaving the waistband to go.

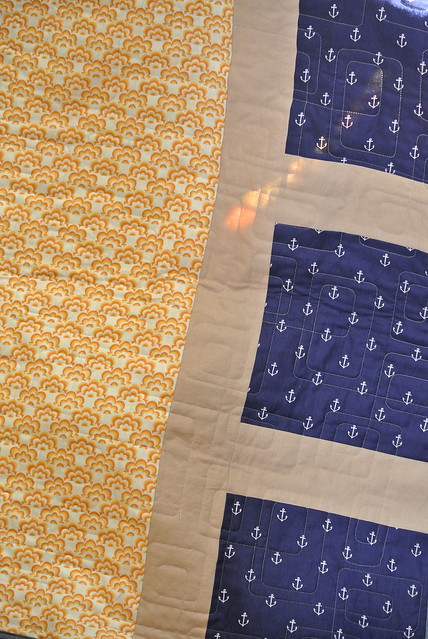
How cute is it that the pockets even have a coordinating lining?  I love Oliver + S.

Inside Sandbox Pants Pocket

Day 3 – a little over an hour

KCW Winter 2014 Serious Sewing
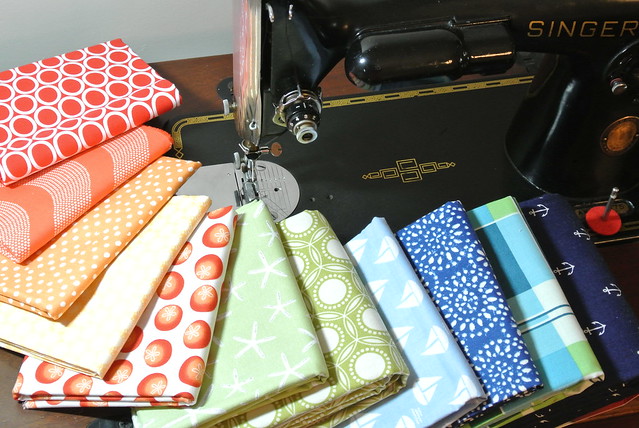
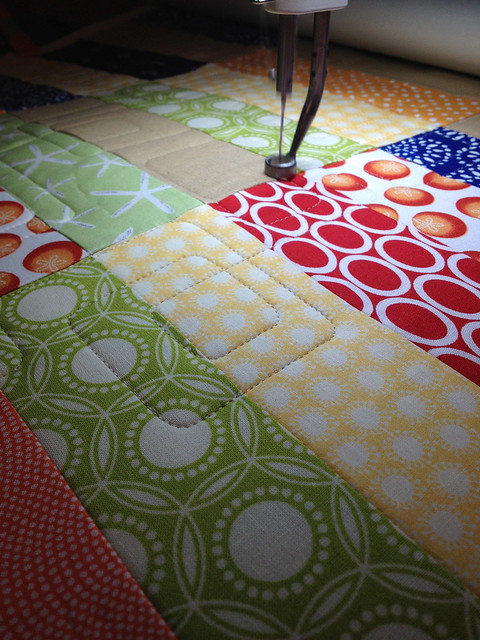
The sewing is serious when the serger and regular sewing machine are sitting next to each other.  

My timing is getting worse instead of better.  I wasted some time first trying to figure out how to use the buttonholer for my vintage Singer.  Then, I discovered I did not have the cam for the 3/8 inch hole I needed to make.  Then I make the drawstring, which should be a quick thing, but with the stretch striped linen I’m using – took FOREVER.

By this point, I was frustrated and decided to just do the waist as an elastic waistband instead of the way the pattern called for.  Once again, I was slightly thwarted by my supplies because I only have 1/2 inch elastic, not the 3/8 inch required.  It fit in the waistband, but it just took a lot more time because it fit so tightly.  At least there was a bright spot today – I finished the pants!

KCW Day 3 - Complete pants
KCW Day 3 - Complete Pants

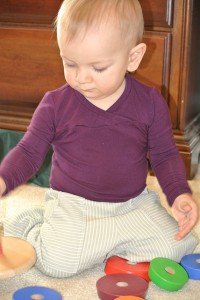
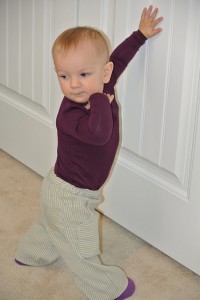
The fabric is a linen blend from Mood NYC.  I picked it up when I was there after Christmas.  It’s nicer fabric than any pants I own, but it is adorable, and I am considering remaking these pants in every size because they look that good.  The weight is perfect for spring, and I am very pleased with the fit – it was just too dark to get a photo of them being worn.

Oliver + S patterns are so wonderful.  They cost a little bit more, but from what I have seen, they are worth it.  The finishes are always professional, there are no errors in the pattern instructions, and the forums are active if you have any questions or issues.

Although, I just realized I still have not made one of their patterns as written.  This pair of pants is on my projects page.  Let’s see what gets done the rest of the week!

Go Army! Beat Navy! Baby shirt :)

The greatest rivalry in college football – Army vs. Navy was the second weekend in December.  That was awhile ago, and I had this post half written forever so I finally decided to finish it and hit publish anyway.  Since we didn’t have any plans to do anything to celebrate, originally I was not going to make anything for the little girl.  Then my husband asked if we had anything for her to wear.  I then sorted through some drawers to get rid of too small clothes and I found a shirt that would make the most adorable Army baby shirt.  Fast forward a couple hours, and I cut up two (scratch that – three) adult women’s t-shirts to make 1 baby shirt.  Not sure how that happens…

I’m doing another version of the Bimaa from LouBee Clothing, this time with the shawl collar.  My last version is here.

The front of the shirt didn’t go up high enough for the pattern, so I used the arm of the shirt to cut out the extra fabric I needed.

Bimaa Sweater in progress

Bimaa Sweater in progress

The sleeves and cuffs came from the back of another black t-shirt I had set aside to make a t-shirt quilt out of.  The shawl collar was supposed to be the only new fabric in this shirt (Thank you, Girl Charlee Black Friday Sale).  Look ahead to see what really happened.

This is what is left of my former t-shirt!  Just imagine another black shirt without a back – the black doesn’t photograph well.  Turns out this is how it takes two three women’s shirts to make one baby shirt.

Bimaa Sweater in progress

Once I cut out all the pieces, I rethreaded the serger with black thread.  Does anyone else have trouble deciding what thread color to go with on a multi-color project?  I considered using black and white as needed, but that seemed like a lot of thread changing.  In the end, when I had to piece together the front pattern piece there was black fabric in almost every single seam so I went with black.

When it came time to put the shawl collar on, I didn’t like the striped fabric.  It would have worked, but it wasn’t quite as athletic as I was going for with the color blocking and logo on this shirt.

Bimaa Sweater in progress

That led to the 3rd t-shirt being cut up.  I need a black collar.  Luckily, I am never going to wear my old unit’s t-shirt again so it doesn’t matter that I cut the bottom six or so inched off to make this collar.  I love it with the black collar!

Bimaa Sweater

Here is a closeup of the shawl collar.  I tried to lighten up the photo to see it better, but it is still kind of hard to see.  Black is hard to photograph!

Bimaa Sweater

The back – slightly wrinkled from the fit test.

Bimaa Sweater

Game Day outfit is below!  She was almost adorable enough to make up for the terrible football game.

Bimaa Sweater

Then, because it seemed logical, I didn’t want the fabric I used for the collar to go to waste, and I had an extra black color block piece for the front… I cut out another bimaa.  The next one is below.

Bimaa Sweater

Linking up to Whoop Whoop Fridays at Confessions of a Fabric AddictAnything Goes Monday at Stitch by Stitch, and You Flew Sewing Linkup at Feather’s Flights.

Spinnaker Quilt for my dad

Now that Christmas is over, I can share the Spinnaker Quilt that I made for my dad.

This summer I went to visit my parents and Grandmother in Wisconsin.  While I was there, my dad described a skirt he had seen and asked if I could recreate a quilt like it.  He wanted a quilt made up of rectangles about 2 inches by 8 inches in yellow, red, and green with some white in there to calm it down a bit.  His major descriptor was that he wanted it to be bright and cheerful.  Later, the request was modified somewhat as he said it reminded him of the colorful spinnaker sails at a sailboat regatta.

I had already pulled some nautical fabrics before the spinnaker theme was requested, so I knew I was going in the right direction.  My dad grew up around boats, and had a boat most of his life.  Some of my fondest memories growing up are from sailing down the Columbia River at dusk.

The making of the Spinnaker Quilt

Each of the 238 rectangles in this quilt measure 2.5 inches by 8 inches prior to sewing.

The making of the Spinnaker Quilt

My trimmings turned out quite pretty, at least more so than usual.

The making of the Spinnaker Quilt

The layout is 34 rectangles vertically and 7 rectangles wide.  The top photo is prior to being sewn together – it was a risk to use the design floor with baby and dog around.

The making of the Spinnaker Quilt

The making of the Spinnaker Quilt

The back is pieced – I didn’t have enough of the one main fabric, so I pieced in the linen and anchor fabric as a design choice.  Plus, I think pieced backs are kind of fun.

I chose to quilt it with a new panto – rounded rectangles.  I wanted something masculine, yet the rounded edges helped to soften the design.  I think a sharp quilting design would have been too much for this quilt.

The making of the Spinnaker Quilt

I debated about the binding, but after getting some confirmation from instagram friends, I went with the gray binding.  It fit the nautical theme much better.

The making of the Spinnaker Quilt

The making of the Spinnaker Quilt

And now for the stream of finished pictures… The quilt had been finished for several days before I finally had a sunny day to take them!

Spinnaker Quilt

Spinnaker Quilt

I had trouble taking pictures of the back thanks to my helpers – my two girls.  First, the dog wanted to see what was going on outside.

Spinnaker Quilt

After I closed the window, the daughter walked over trying to figure out why she couldn’t see outside.

Spinnaker Quilt

It’s a very large throw, which made it a little difficult to get a photo of the entire thing inside my dry house.  I don’t risk quilts outside when it is wet.

Spinnaker Quilt

Spinnaker Quilt

Lastly, the roll shows the binding color the best.

Spinnaker Quilt

My dad loved it! Below is my dad’s view of the quilt being shown off Christmas morning.  So much so that he said it was too nice to use and that he wanted to just hang it up.  Luckily, my mom (who crochets, and therefore understands that things are made to be used) told him it was too nice not to use and that he has to use it.  A successful Christmas quilt!
Spinaker QUilt

Linking up to: Quilt Story, You Flew Tuesdays at Feather’s Flights, Finish it Up Friday at Crazy Mom Quilts, Friday Favs Party at Nap Time Crafters, Anything Goes Mondays at Stitch by Stitch, and while not quite a work in progress (because I couldn’t share it during the progress) Work in Progress Wednesday at Freshly Pieced.